Keeping your woodworking tools in optimal shape helps improve the workflow in any shop. There’s nothing like gliding a chunk of hardwood lumber across a smooth cast iron surface, past a razor-sharp blade. A carefully tuned bandsaw will do a lot of work for you in the shop, and the good news… it just takes a few minutes to do.

Start with the Blade
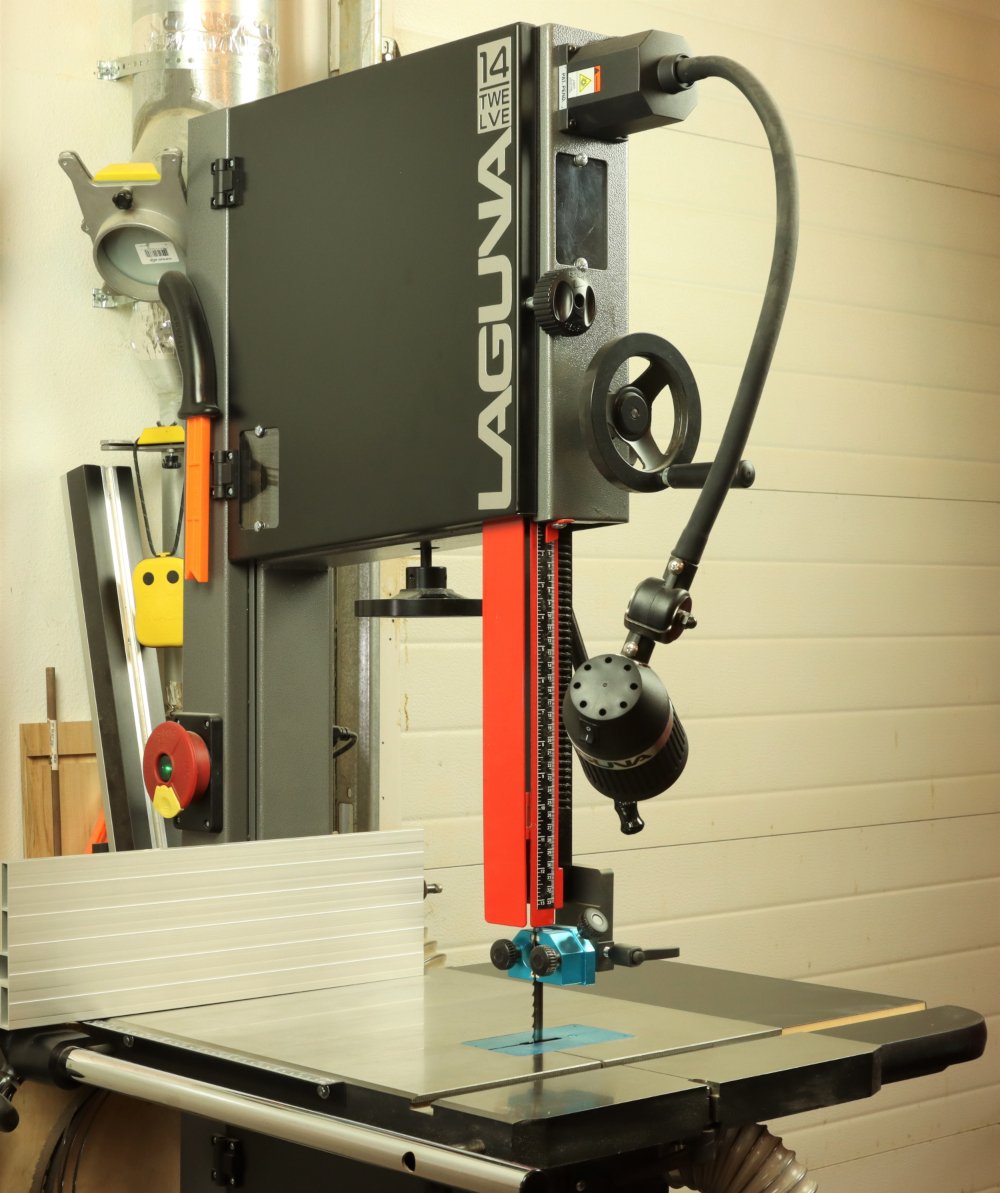
I like to start with a fresh blade. I’ve read several bandsaw blogs where users were troubleshooting their bandsaws performance issues, and they replaced every component under the sun. Except the blade! When in truth, we should all probably start by replacing an aging bandsaw blade. Everyone has their favorite blade, with a particular tooth count and blade geometry. My favorite day-to-day blade is a ½” ProForce blade with 3-4 TPI. It’s an aggressive blade that cuts a straight line well, and will handle some light resawing too. If I have a serious day of resawing ahead of me, I’ll switch to a ¾” wide Resaw King (pictured), which is a carbide-tipped beast that can be resharpened several times. The ProForce handles most joinery cuts I like to do, such as notches or long tapered cuts. An aggressive ½” wide blade will even cut gentle curves, and is more apt to track well than a narrow blade. There is a limit though, and if you’re cutting tighter radius curves, you’ll certainly want to switch to a narrower blade like a ¼” ProForce blade with 6 TPI.

Tension and Tracking
Once you’ve installed a fresh blade on your bandsaw, take a moment to tension and track it. Use the integral tension gauge on the 1412 bandsaw to set the blade tension according to your blade width. Naturally, a ½” wide blade will require more tension than a ¼” blade. A convenient quick-release lever helps tension the blade in one fluid motion. This quick-release sure beats the old system of tediously turning a knob to set blade tension. Only once the blade is properly tensioned can you move on to tracking the blade. And here’s the most amazing thing about my 1412 bandsaw – I never actually have to adjust the blade tracking, regardless of the type of blade I install. I found that so amazing, and really hints at the quality inherent in these Laguna saws. If you do need to make a slight adjustment to center the blade on the upper wheel, it’s an easy tool-free adjustment on the back of the saw.

Set the Guides
Now that the blade is tensioned and tracking properly, it’s time to adjust the guides. The 1412 uses space age ceramic guides with an impressive 5 points of contact above the table, and 5 points of contact below the table. I’ve always found the guides easy to adjust, but if the little knobs are hard on your fingers, try my Plasti-Dip solution here.
Or check out a short video of blade selection and setting guides here.

Now for the Fun Stuff
Sure, sure the blade tension and tracking might be the most important first steps. However, I like to go a little further with the bandsaw tune up and make the saw truly enjoyable to use. Next on my list is to adjust the set screws that level the blue anodized throat plate. It goes without saying that you’ll unplug or disable the power source before maintaining any power tool. Luckily, the 1412 bandsaw comes equipped with a safety key, that once removed, prevents accidental startup. Adjust the screws until the aluminum plate sits perfectly flush with the cast iron table top. Now you won’t experience any hang-ups when passing lumber over your saw!

Square the Table
A small engineers square is handy to quickly square the table to the blade. Make any adjustments as necessary for a perfectly square cut. Did you know??? The Laguna 1412 has a sliding stop that allows for table angles both to the left and to the right? Yet the stop swings easily back in place for a quick return to 90 degrees.

Smooth Glide
A regular anti-friction treatment will make the saw easier and more enjoyable to use. If you select the right product, it also helps to prevent rust. The product I’ve been using lately is CRC 3-36 multi-surface lubricant and corrosion inhibitor. It seems to do a good job of reducing sliding friction and preventing any rust from forming on cast iron surfaces.

Clean the Dust
Remember to vacuum out behind the doors if any sawdust has a tendency to accumulate. I often forget this step because the dust collection on my 1412 is absolutely stellar. This picture was taken after extended use, with no cleaning of the lower cabinet whatsoever. Admittedly, I made some tweaks to the dust collection, but I’m happy to share my secrets if you’re interested. Watch the short video here to learn more!

With everything freshly tuned, you can get the most out of your 1412 bandsaw, including the 12” resaw capacity.
Have fun, stay safe and remember to tune those bandsaws for peak performance!
Willie Sandry is a Freelance Writer for all the major woodworking magazines, blogger, crafter and YouTuber. Catch up with all the latest projects on his channel ‘The Thoughtful Woodworker.’


