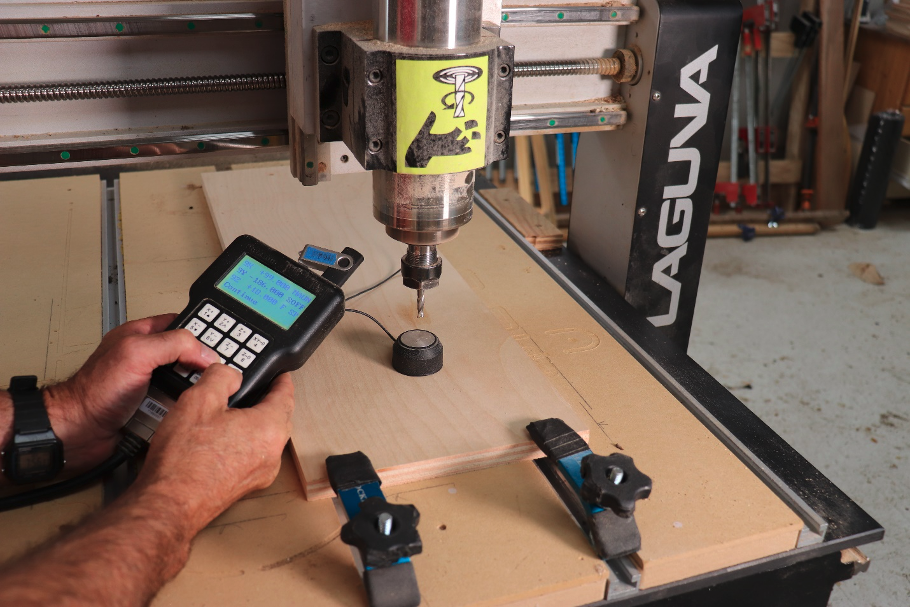
Touch plates, also known as pucks, are commonly used to set the Z-zero on CNC routers. The concept is simple. When the machine is told to do so, the spindle automatically moves toward the touch plate until the bit makes contact. Contact completes an electrical circuit, the spindle retracts, and the system knows exactly where the cutter is relative to the surface.
This is based on the idea that the system knows exactly how thick the touch plate is. That’s what we want to check. If you want uber accuracy out of your CNC router, you need to double-check this setting.
Over time, the surface of your touch plate gets marred by contact with router bits. V-bits, in particular, can leave dimples on a surface that affect the accuracy of your touch plate. Regardless, even new CNC router machines should follow this calibration procedure.
If you’ve been using your touch plate for a while and the surface is marred, you can clean it up with gentle sanding. Lay a piece of fine sandpaper on a flat surface such as your spoilboard or table saw. Hold the top of the touch plate flat on the abrasive and move the touch plate back and forth creating a smooth flat surface. Be careful about not rocking the touch plate. The touch surface must remain flat. If your touch plate is brand new, you don’t have to do this step.
Depending on your touch plate, a little amount of sanding is enough to remove the high spots and restore your touch plate.
Next, you will want to measure the thickness of the touch plate using digital calipers. In most cases, you must measure in millimeters. 
It can be challenging to accurately measure the puck, as they have a hollow bottom, but here's a tip that can simplify this.
Grab and measure a piece of metal. 1/4" bar stock from a set of setup gauges works great. Record the measurement.
Then, bridge the hollow bottom with the bar stock and measure the overall thickness. Lastly, subtract the thickness of the bar stock, this will give you the exact thickness of your touch plate.
To continue with the calibration, you will then touch the Menu button on your fob.
You will then go from the Menu and navigate to Machine Setup and click OK.
Once on Machine Setup menu, navigate to C.A.D. Thickness and click Ok. This is the thickness of your touch plate.
Now that you are on C.A.D. Thickness, click the Run/Pause/Delete button, this will enable you edit this number. 
Use the numbers and decimal point on the keypad to enter the new thickness of your touch plate that you measured earlier.
Your touch plate is now calibrated. Take your time, do this process carefully, and you can rely on your CNC for the accuracy it’s capable of.
CNC
CNC Technology
CNC Tech Talk
How-to
Tips & Tricks
Calibrate Your CNC Touch Plate For Best Results
By
George Vondriska on August, 17 2022

Recommended Articles
- January 20, 2026
- March 7, 2025


