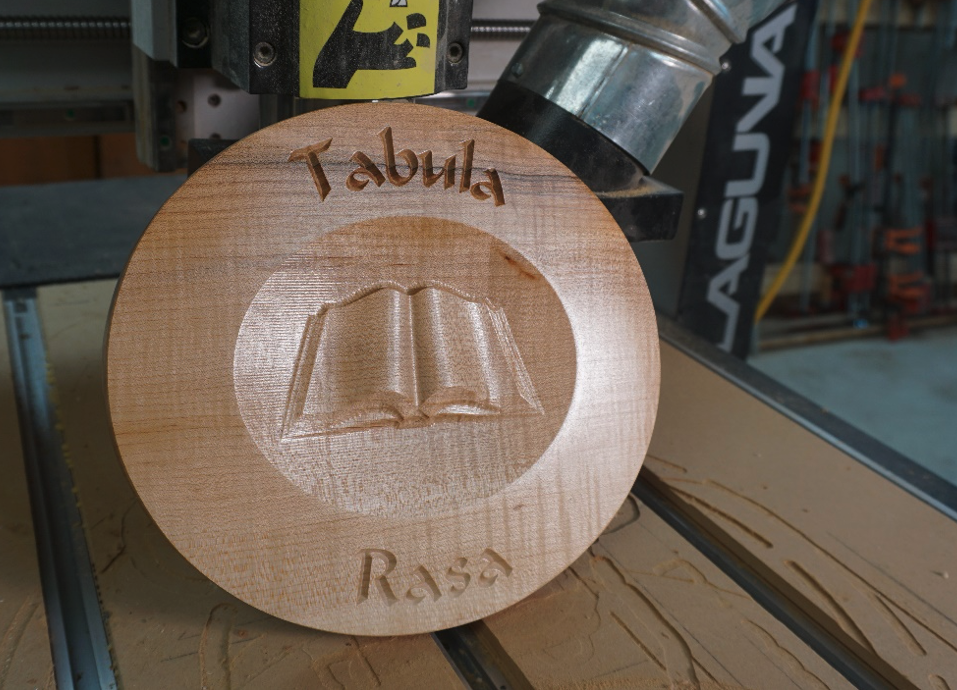
Tabula Rasa: an absence of preconceived ideas or predetermined goals; a clean slate.
What better way to start a new year than with a clean slate? And to commemorate it here’s a CNC project that incorporates 3D clipart and wrapping text on a curve. This project was designed in VCarve Pro.

Start a new job and define the project dimensions and X, Y and Z origins. The workpiece is 3/4" x 10” x 12”. The XY origin is the center of the workpiece. Using the center instead of a corner makes things easier when we do the design work.
Add clipart and lay out ovals

Navigate to the Clipart tab.

Locate the book clipart. If you don’t have the open book clipart you can get it here. Of course you can use any clipart you like, or none at all. But the blank pages of the book do a great job of representing a clean slate.

Drag and drop the clipart onto your workpiece.

Navigate to Set Selected Object Size.

Make the width of the open book 6-3/4”. Be sure to leave Link XY checked so the height remains proportional to the width. Center the clipart on your workpiece.

Select the book clipart and navigate to the Modeling tab.

Click on Create vector boundary around selected components.

You’ll see a line appear around the clipart.

Select the line you just created and navigate to the Offset icon.

Check Outwards/Right and set the Distance for 1”. Click Offset.

This creates a new oval 1” larger than the oval surrounding the clipart. Select and delete the oval surrounding the clipart.
Add and align text

In order to place text on the top and bottom of the oval, or a circle if you were wrapping text to that, the shape needs to be in two halves. So, we need to create a top half and bottom half of the oval. Start by making a horizontal line that slightly longer than the largest part of the oval.

With the line selected navigate to and click on Center Vertical.

Since the clipart was centered on your workpiece the resulting oval is, too. Centering the line vertically puts it in the precise center of the oval.

Navigate to Interactive Trim.

Use Interactive Trim to remove the upper half of the oval. Select the bottom half of the oval. Copy and paste a new half oval on the selected oval.

Navigate to and click on Mirror Selected Objects.

Click on Top.

This creates a new oval half above the centerline.

Click on Draw Text, choose a font and set the Text Height at 1”. Type out Tabula. The Calligraphic font is being used for this example.

Repeat the process and type out Rasa.

Select Tabula and the upper half of the oval.

Navigate to and click on Text on a Curve.

Click on different options to see what happens. For this piece make sure you use Maintain text size, On Curve, Middle and Align to Curve for your settings.

Repeat the process to position Rasa on the bottom oval half.
Final shape and toolpaths

Select the oval the text is positioned on and use the Offset Vectors tool to create a new oval 1” outside the text oval. This is for the outer shape of the workpiece.

Select the clipart and use the Rough Machining Toolpath to rough out the artwork. Use a 1/4" upcut spiral bit.

Finish the clipart by using the Finishing Machining Toolpath and a 1/4" ballnose bit.

Select the text. Use the V-Carve/Engraving Toolpath and a 90-degree V-bit to cut the letters.

Select the outer oval and use the 2D Profile Toolpath and 1/4” upcut spiral to cut the shape. Be sure to use Ramps and Tabs.
CNC work and finishing

Secure the workpiece, install the V-bit and zero the X, Y and Z axes.

Run the lettering toolpath.

Install the 1/4" bit and run the profile and roughing toolpaths.

Install the 1/4" ballnose and run the finishing toolpath.

Sand and seal the project and get ready to face the new year with a clean slate.


