If you need a little help keeping your desk organized this project is right up your alley. It’ll store your phone, pens, flash drives, SD cards…. That little stuff that tends to get lost on your desk. You can use the design files we’ve provided, or go through the step-by-step design process to create your own design. The design work in this article is being done in VCarve Pro.
Project prep

Choose your board. To use the .crv or DXF files included with this article you need a 5” x 10” work area. The board doesn’t have to be live edge, but a live edge board with figured grain adds a lot of visual interest to the project. These boards are spalted box elder that was cut and dried in the shop using a bandsaw. The deepest pocket cut is 1/2" deep so your stock should be 3/4" or more thick.

Measure the machinable area of your workpiece. On live edge pieces this may not be the overall width of the piece, but instead the width of the flat area on the top face.

Measure your phone. Digital calipers make it easy to accurately measure the thickness. Be sure you double-check your phone dimensions before using the provided files to make sure your phone will fit in the phone slot.
Design and toolpath

Create a new job with your workpiece dimensions. If the outside dimensions of the live edge piece are significantly different than the machineable area, be sure to use the machineable area dimensions for X and Y.

Use the Draw Rectangle tool with Radiused External checked to create the phone slot. Make it slightly wider than the thickness of your phone and long enough for the phone to be able to lay down on its edge. It’s best to do a test cut of the phone slot in scrap before doing the final project to make sure you have a good fit.

Position the phone slot about 1/2" from the back edge and left end of the work area.

Use the Measure tool to determine the distance from the end of the phone slot to the right end of the work area.

Use the Draw Rectangle tool to make the small tray. Make it 3/4" narrower than the dimension you found in the previous step. Make its length, Y, 1” less than the width of the machineable area.

Position the small tray 1/2" from the end of the work area.

Select the small tray, hold the Shift key, and then select the phone slot. That sequence is important.

Use the Align top tool to bring the top edges of the small tray and phone slot into alignment.

Use the Draw Rectangle tool to create a tray that will fit into the remaining space. Its length, X, should equal the length of the phone slot. Its width, Y, should allow a 3/8” space between the phone slot and the large tray and leave the large tray even with the front edge of the small tray.

Your tray should look something like this. Of course, this isn’t set in stone. The only critical dimension is the phone slot. The other trays can be any size or shape you like.

Select the two trays and use the Pocket Toolpath to clear them. A Cut Depth of 3/8” works well, but you can make the trays as deep or shallow as you want. Use a 1/2" ball nose bit for the final pass and a 1/2” end mill for the clearance cut. Click Calculate.

Select the phone slot and use the Pocket Toolpath with a Cut Depth of 1/2". You don’t need to use a Clearance Tool for this cut. Click Calculate.

Check your work with Preview Toolpaths and make any necessary changes.
Machine your organizer

Secure your workpiece to the CNC and install the clearance cut router bit. Zero the X, Y and Z axes.

Run the clearance toolpath.

Install the round nose bit and rezero the Z axis.

Run the finishing toolpath for the pockets.

If you did a test cut of the phone slot in scrap your fit should be fine, but…. Before removing your material from the CNC, make sure your phone will stand up in the slot. If necessary you could, at this time, make the slot a little deeper by simply increasing Cut Depth on the phone slot toolpath. Once you’ve removed the workpiece from the CNC you no longer have that option.
Sanding and finishing

Hand sand the trays to remove machine marks.

Apply a coat of finish.

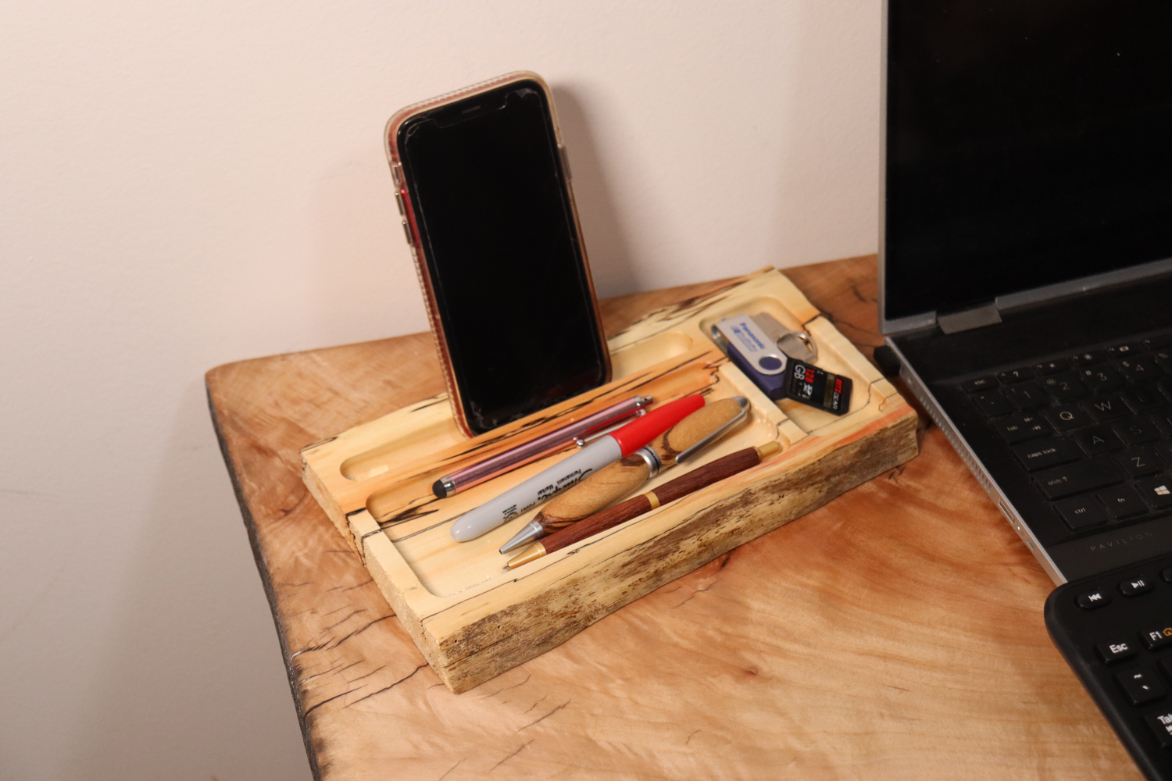
Organize your desk. You can access the charging port on your phone when it’s horizontal in the phone slot.


