Custom coasters are a great way to use up small pieces of great looking wood like the birdseye maple these coasters are made out of. And this project teaches you to create circles, use the Offset tool, optimize cut quality, keep text within a confined area and place text in the bottom of a pocket.
Getting started
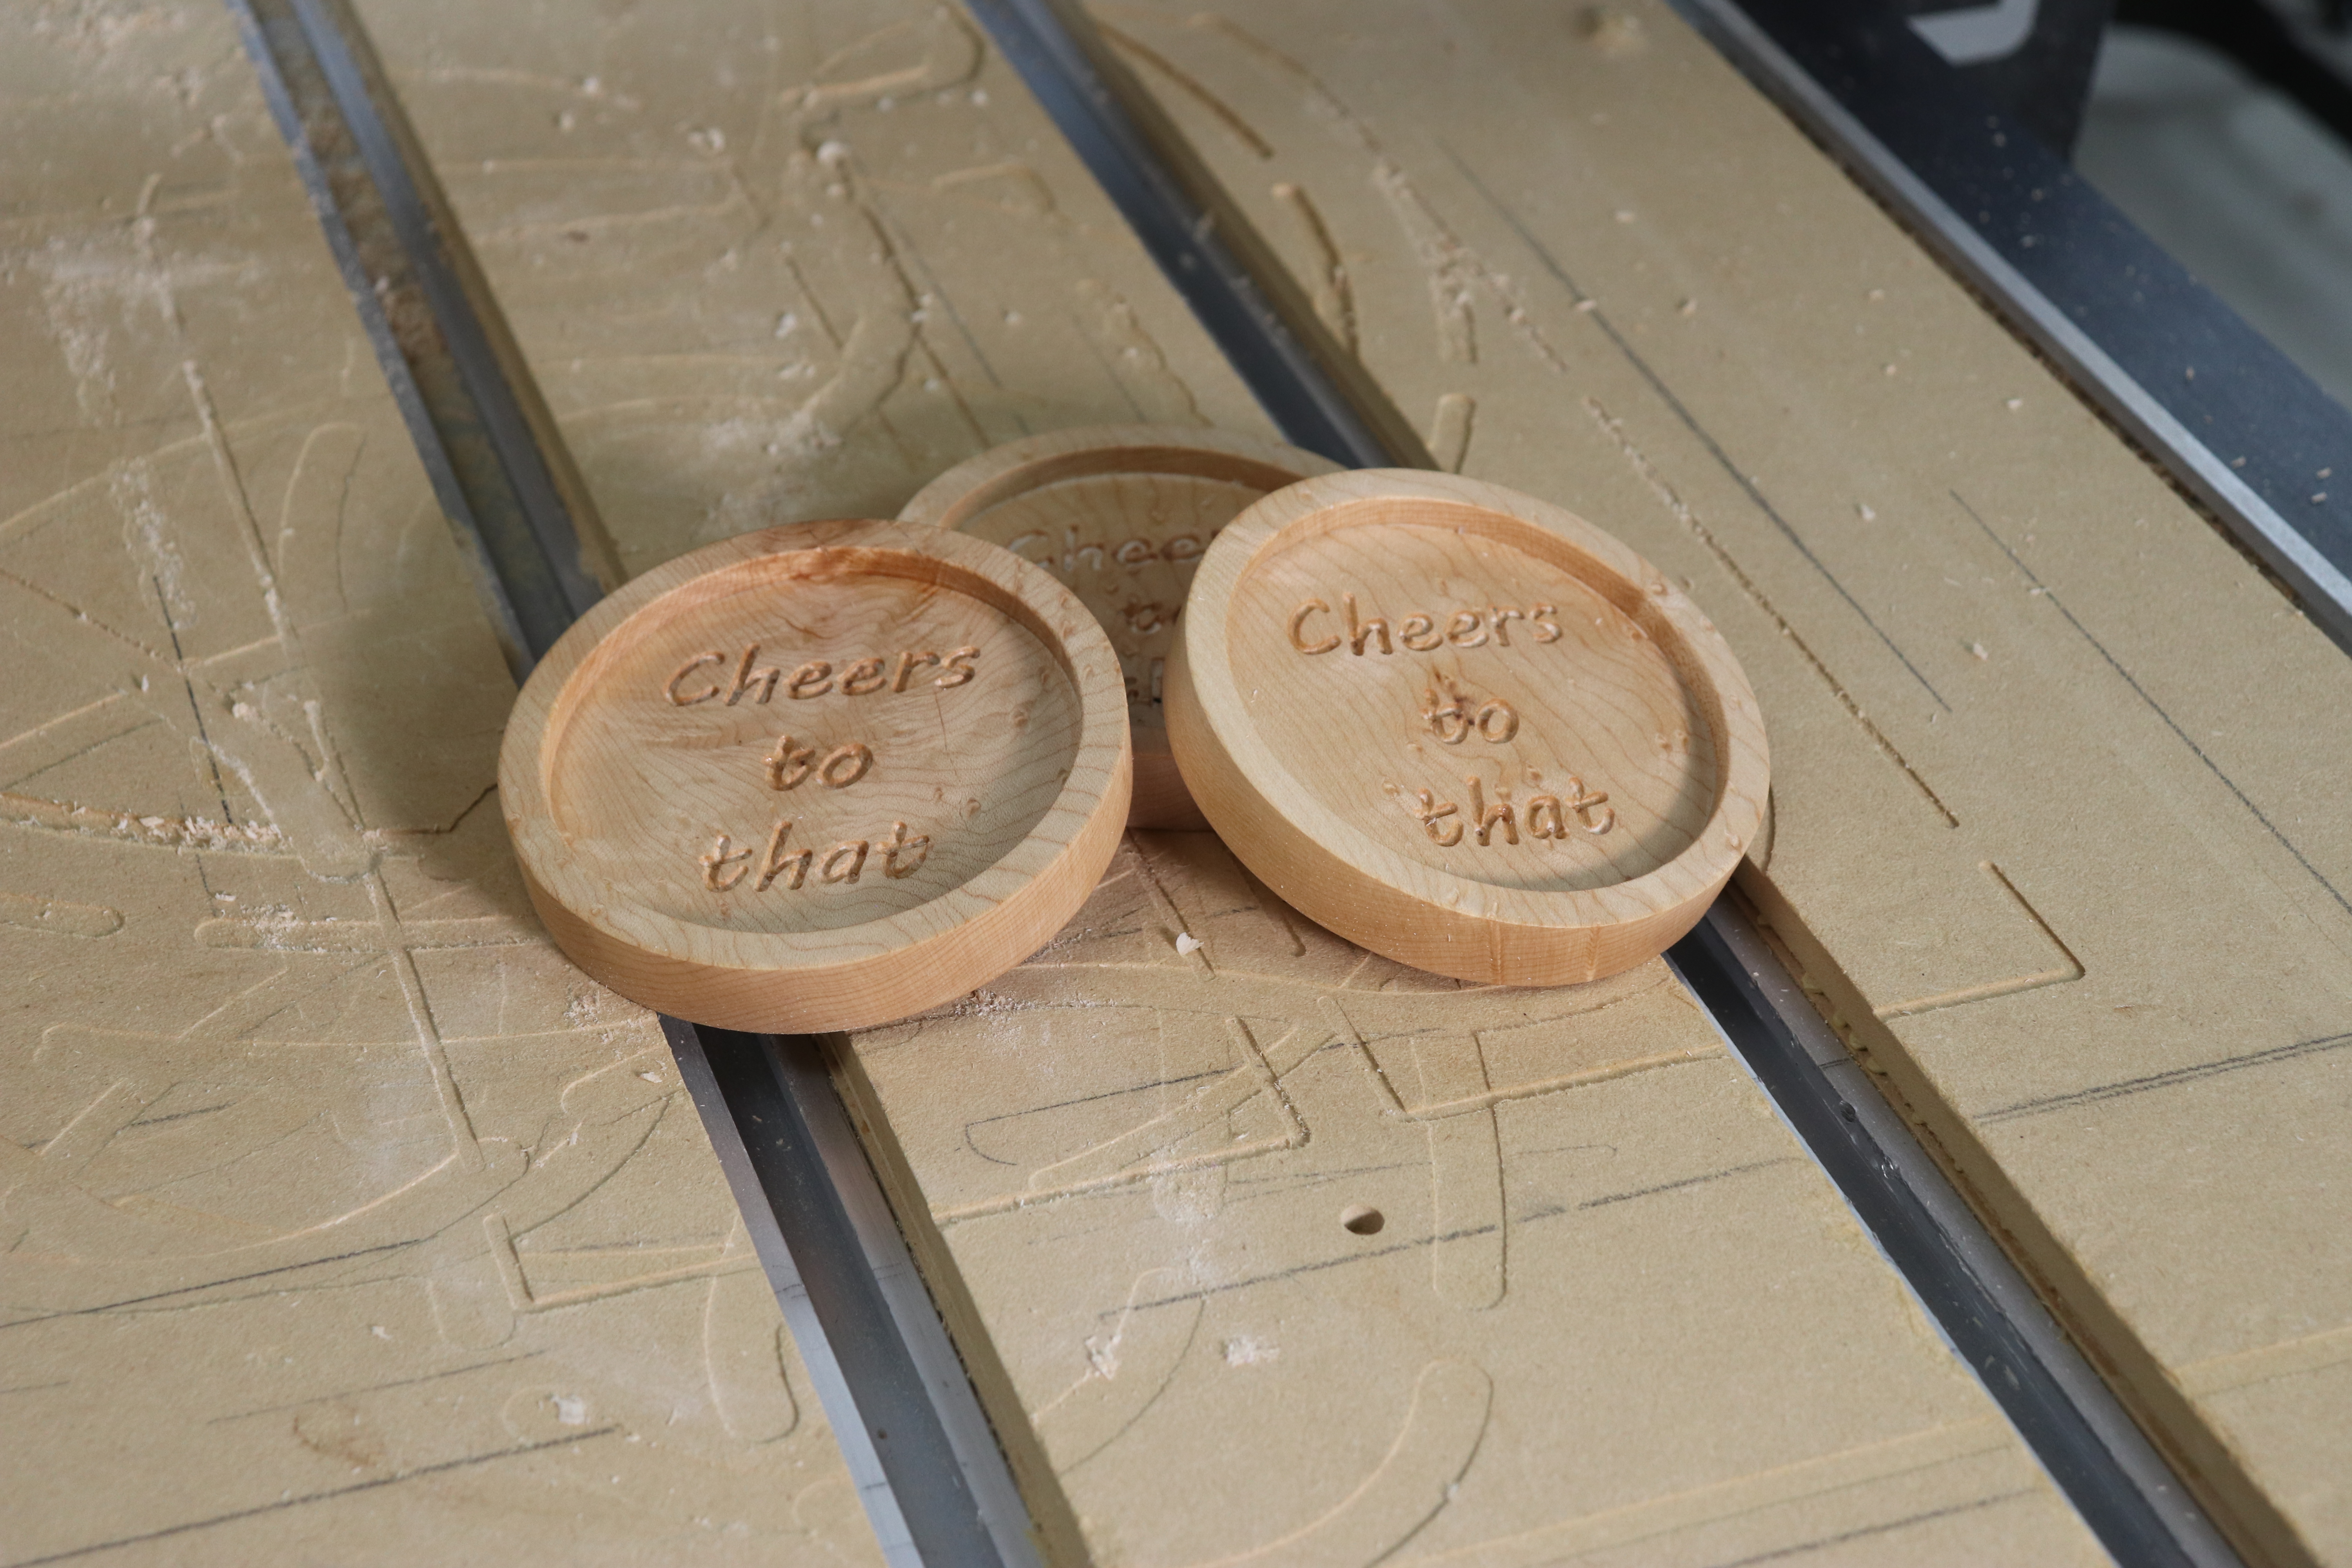
Create a new job with the dimensions of your workpiece. Thickness of the workpiece should be 5/8”. Diameter of the coasters is 4”, so keep that in mind as you’re choosing material.

Select the Draw Circle tool.

Make a 4” diameter circle at the center of your workpiece.

Select the Offset tool.

With your 4” circle selected check Inwards/Left and set the Distance for 1/4".

This creates a ¼” wall thickness on the coaster.

Choose the Draw text-within a vector box tool.

Select the inner circle. Choose your font and type your text. Use your most clever adult beverage quote, the initials of the person you’re making the coasters for or a piece of clipart. This article will help you learn how to convert clipart to vectors you can use in your design.
Hmm….the text looks too large.

You can easily change the size of the text by changing the size of the Bounding Box.

Change the width and height in the Bounding Box Dimensions to provide a much better fit for the text within the inner ring of the coaster.
Duplicate your work
You’re probably going to want more than one coaster. As a rule it’s easier, and more efficient, to create one final design and duplicate the entire design than to create the design multiple times. Copy and paste is your friend.

Select the entire design (make sure every aspect is magenta) and right click. That opens a menu. Navigate to and click on Copy. Or, select the design and use the keyboard shortcut Ctrl C. Then paste the design as many times as you need to by right clicking and using Paste, or use the keyboard shortcut Ctrl V.
Toolpaths

Use the 2D Profile Toolpath with tabs and ramps to cut the outside shape of your coasters.

Use the Pocket Toolpath with a Cut Depth of ¼” to dish out the center of the coasters.

Sanding the dished area of the coasters will be a pain, so you should optimize the cut quality there by managing the passes. The default for this cut depth with a 1/2" bit is two passes. To add a very light final pass click on Edit Passes.

Change the Number of Passes to 3 and check Set Last Pass Thickness. Set that to .05”. Similar to a hand-held router or router table, making a very light cut on the final pass gives you the best cut quality. Click OK.

Select all the text and use the VCarve/Engraving Toolpath to cut the lettering. Since we want the letters in the bottom of the dished area it’s important to set the Start Depth to the same number as the Cut Depth on the Pocket Toolpath. That’s how the software knows you want the letters in the bottom of the dish, not on the top face of the workpiece. This state outline project also takes advantage of placing text in the bottom of a dished area.

Use Preview Toolpaths to check your work. Make any necessary changes.
Run the toolpaths

Mount your workpiece and zero the X, Y and Z axes. Run the Pocket Toolpath.

The final pass will be a very light cut.

Swap bits, rezero the Z axis and run the text toolpath. A 60-degree v-bit works very well on detailed lettering.

Run the Profile Toolpath to create the final shape.
Sanding and finishing

A 3” hook and loop sanding disc is a great way to sand the dished area of your coasters or any project, like trays, that you’ve dished. Otherwise, hand sanding works.

Apply finish to your coasters. Odies Oil is an easy to apply wipe on finish that really pops the grain of figured woods.


