
Turn your router bit storage from this….

…to this.
There are lots of good reasons for getting your router bits better organized. The best one is that you’ll extend the life of your bits. It’s bad for them to bang against each other. A router bit tray prevents that. You’ll also be able to fit LOTS more bits in a given space if they’re standing up in a tray, and you’ll have a much better idea of what bits you own.
It’s better to do this on a CNC than on a drill press. With a CNC router we can control the precise size of the holes. It’s easier to insert and remove the router bits from the tray if the hole is slightly oversized. It’s easier to get that precision from CNC routers than from drill bits.
Check your bit

To get the required precision we need to know exactly how big the router bit is. All of the holes will be made with a ¼”up cut spiral bit. If the bit has been sharpened it will certainly be undersized. Even if it’s brand new the may not be exactly .250” diameter, so take the time to measure from outside of flute to outside of flute. Digital calipers are the best tool for this.
Test the fit

Create a new job using a piece of scrap for the test cuts.

Use the Draw Circle tool to create slightly oversized holes for the router bit shank. For testing purposes it’s best to do a few different size holes. Make one .005” oversized (.255”), another .007” and another .009” oversized.

Do the same for your ½” shank bits, creating three oversize holes.

Select the six holes and open the Pocket Toolpath. Choose a ¼” endmill. Set Cut Depth to 3/8”.

Click on the Edit button to change the parameters of the bit you’ll be using for the cuts.

Within the edit window change Diameter to the dimension you got when you measured the bit. It’s important to do this edit here, in the toolpath, not in your bit library. Making the diameter change here affects only this toolpath. Changing it in the bit library would affect it every time you choose the ¼” endmill.

Zero the X, Y and Z axes.

Run the toolpath.

Check the fit. Use holes that allow the router bit to easily slip in and out but aren’t a sloppy fit. The holes that worked best for me were .257” and .509”.
Create the tray

Eliminate the holes that you don’t want to use from the test piece.

Open Job Setup and enter the dimensions of your tray. ¾” MDF works great for these trays, but you can use any sheet stock.

Select the large hole and click on Array Copy.

The number of rows and columns you can create depends on the size of the tray. It’s easy to play with these numbers, check the results, and do it over if needed. Remember that Control/Z undoes whatever you did last. Use that do undo arrays you’re not happy with.
Offset spacing of 1-1/2” allows plenty of room between bits, and also allows ¼” shank bits to nest between the ½” holes. Play with these settings and create the configuration that works best for you. Click Copy.

Center the group of holes on your tray. If the array of holes is larger than the tray, like shown here, use Control/Z to undo the array. Change the number of rows and/or columns and try again.

Rework the settings until the array of holes fits within the tray. Ten rows and 13 columns created the best array for my tray.

Select the ¼” hole and open Array Copy again. Reduce the number of columns and rows by one and click Copy.

Center the array of ¼” holes in the array of ½” holes.

Select all the holes and use the Pocket Toolpath to create the toolpath. Double-check the parameters for the endmill to make sure the correct diameter dimension is entered.

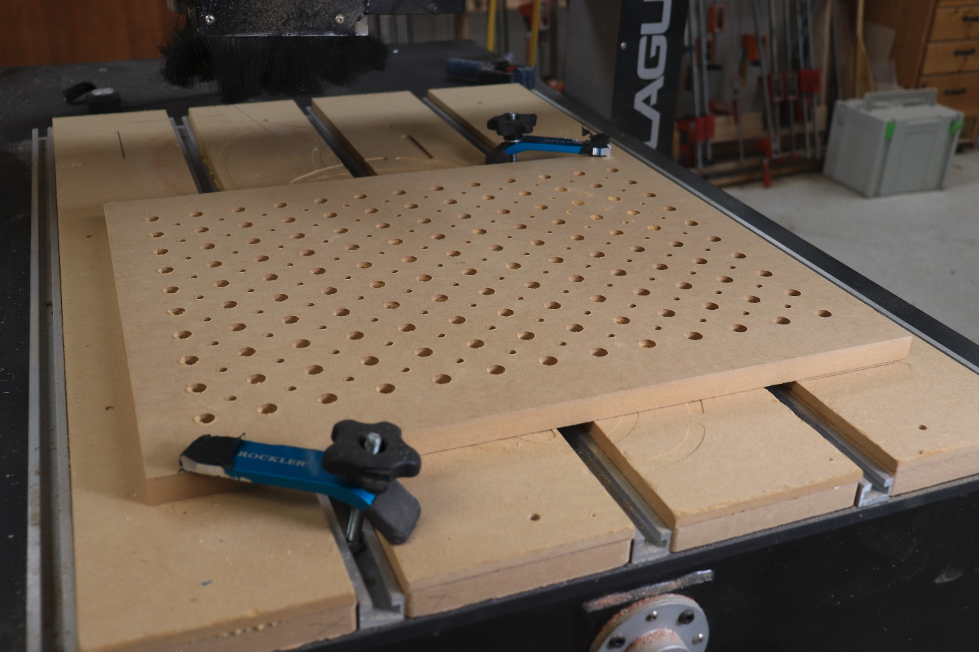
Run the toolpath.

Enjoy your newly organized router bit drawer.
Click here to receive the .crv and DXF files. Be sure to check the diameter of your bit and do test cuts before running the final toolpath.


