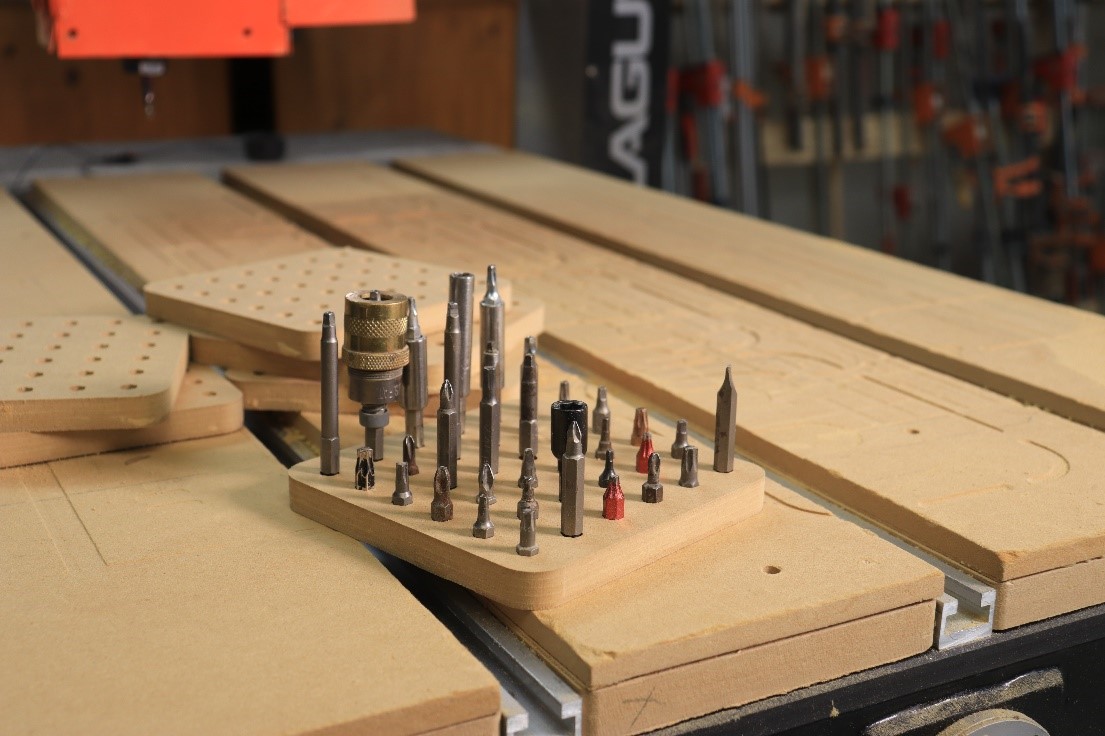
Don’t leave all those hex drivers rattling around in a drawer. If you have a CNC router you can easily make a tray for them. Having them standing on end makes it easy to see the tips so you can grab the right one.

There are some cool aspects of doing this on a CNC instead of just drilling holes. The CNC will make hex-shaped holes and, with a couple test cuts, we can get a snug but not overly tight fit that prevents the drivers from rattling around.
Design
The software used in this article is VCarve Pro 10. Even if you don’t need a hex driver tray this is a great way to learn about working with polygons and offsetting vectors. You can use the same approach to create trays for 1/4" and 1/2” shank router bits, working with circles instead of hexagons.
Create a new file and enter the dimensions of your workpiece. 1/2" MDF works great for these trays, but you can use anything. This is a great project for burning up scrap pieces.
It’s important to do test cuts to make sure the hex-shaped hole is the right size before creating a tray full of holes. Even though I have this figured out for my trays, you should confirm that the dimensions work for you before cutting a boat load of trays.

Measure your hex driver from point to point. Digital calipers are a must-have if you’re doing CNC work.

In VCarve click the Draw Polygon tool and set it for six sides. Notice that the software is asking for the radius from the center to a point. That’s why we measured point to point on the hex driver. Divide that measurement in two and enter it for the radius. Click Create.

We need to make the hexagon a little bigger because the router bit won’t create sharp inside corners, and we want the hex hole slightly oversize.
Select the hexagon (it turns magenta) and open the Offset Vectors tool. Click Outside/Right, use a dimension of .005”, click Offset. Another hexagon appears.

With the original hexagon still selected repeat the process to make two more hexagons, one .010” larger and another .015” larger. You’ll end up with three new hexagons that are .005”, .010” and .015” larger than the original. These are for test cuts so we can optimize the fit.
Toolpathing

Delete the original hexagon and select the hexagon that’s .005” larger. Open the Pocket Toolpath. Choose a 1/8” bit (1/8” upcut spiral bits work great for this project). Set depth of cut for at least 3/8”. Name the file Test05 and click Calculate. Repeat the process two more times with the other two hexagons. You’ll end up with two more files; Test10 and Test15.
Notice that each hexagon is centered on the same location. As a result, you can run all the toolpaths in the same spot on your test board.
Test cuts
Secure a test board to your CNC router and zero the X, Y and Z axes.

Run the Test05 toolpath and test the fit. If your hex drivers don’t fit, run Test10. The second toolpath will slightly enlarge the hole left by Test05. Check the fit and repeat the process with Test15 if necessary. A .010” offset made the holes the perfect size for me.

Change the offset as needed and continue making test cuts until you have a good fit.
Final layout
I make my trays 5” x 5” with 36 holes. The number of trays you can make will depend on the size of the board you’re starting with.

Use the Draw Rectangle tool to create a 5” x 5” rectangle with 1/2" radiused corners.

Move the correctly sized hexagon to the center of the square.

Select the hexagon and open Array Copy. Be sure you don’t change the Objects Size. Set the array for 6 rows and 6 columns with 1/2" gap in both the X and Y. Select Group Copies and click Copy.

Select the grouped holes first, then the square, and use the Center Objects tool to align them.

Toolpathing will be easier if the holes and squares are on separate layers. Right click the holes and move them to a layer called Holes. Click OK.

Turn off the layer the squares are on, select the holes, and set up a Pocket Toolpath. Click Calculate.

Turn off the Holes layer, turn on the layer the squares are on, and create a 2D Profile Toolpath, with tabs, using a 1/4” bit. Click Calculate.

Be sure to use the same bit you used for the test cuts, just in case there are slight dimensional differences in bits. Zero the X, Y and Z axes and run the toolpath for the holes.

Install the 1/4” bit, rezero the Z axis, and run the profile toolpath. After this toolpath is complete cut through the tabs to release the trays.

Load your trays, and enjoy your new level of organization.


