3D clipart is a wonderful way to enhance your CNC work. With the correct choice of toolpath and bits you can easily get incredibly detailed results.
3D or 2D?
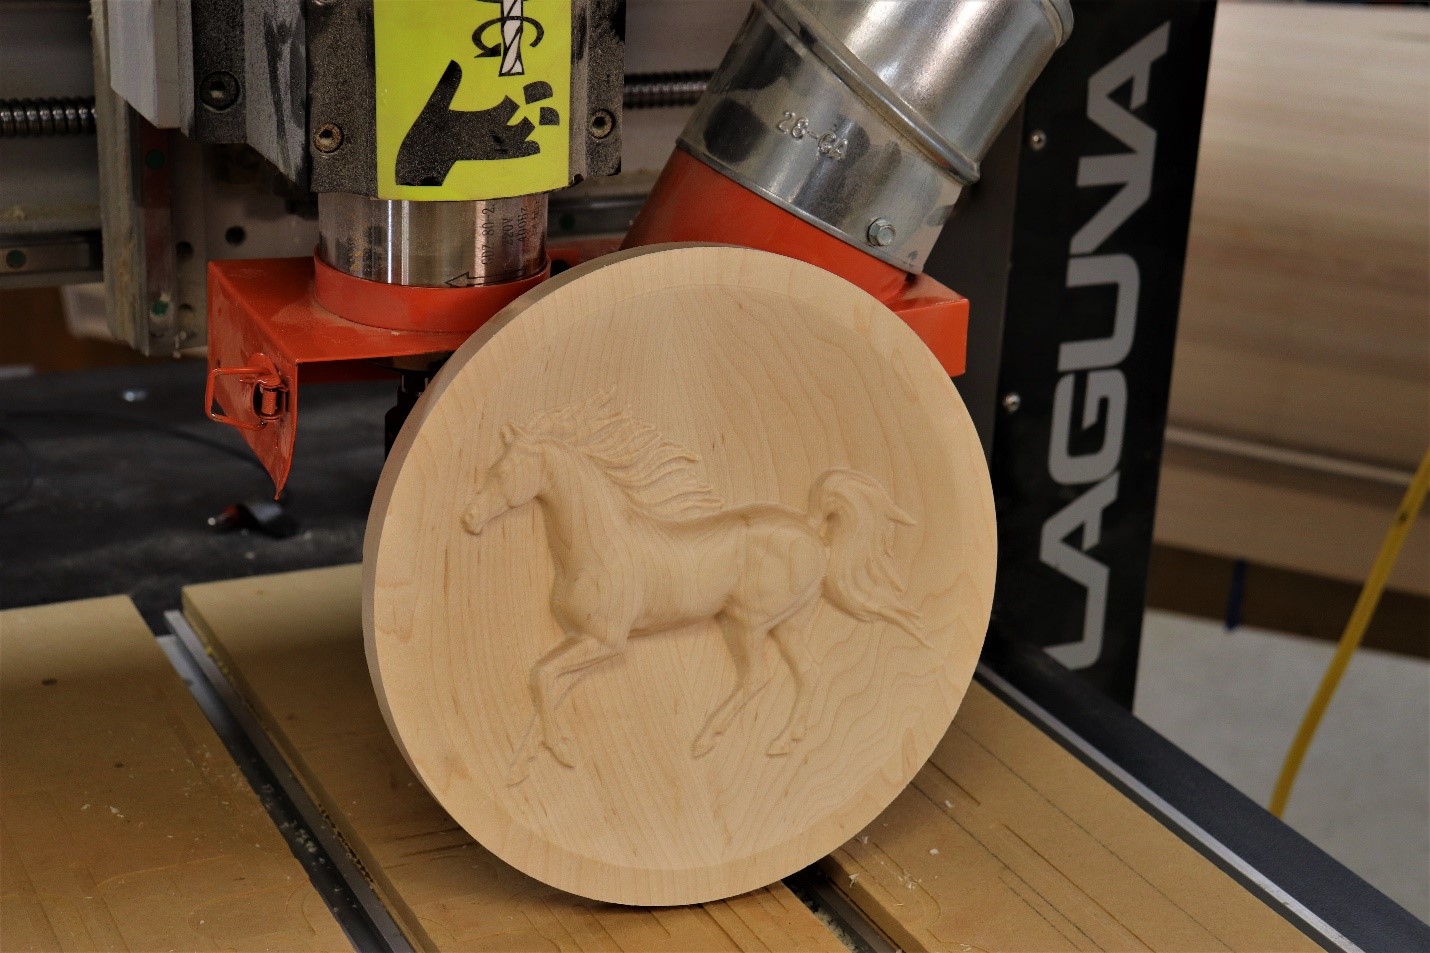
Technically speaking, the work being done isn’t actually 3D because it isn’t machined on all sides. We’re not cutting a complete horse here, we’re getting about half a horse. But it isn’t quite 2D either. So, the clipart and work are commonly referred to as 3D.
Software and clipart
The software used in this article is VCarve Pro, version 10. The software comes with quite a bit of 3d clip art. A very cool aspect of the clipart is that, because it’s vectors, you can make it as large as you want and you won’t lose detail.

If what you’re looking for isn’t included with the software you can purchase a HUGE array of models from Design and Make. Prices range from $15 to $100 (or more) depending on the complexity. Models are available in three styles; standard, dished and recessed. I use dished the most. You typically get a discount if you buy all three styles. The models can be downloaded as V3M, STL or RLF files.
Designing

Create a new file. Add the dimensions of your workpiece and click OK.

Find and click on the Clipart tab in the lower left corner.

Locate the clipart you want to use.

Drag and drop the clipart onto your work piece.

Use Set Size to dimension the clipart. Leave the Link XY box checked so the clipart remains proportional as you change dimensions. Locate the clipart where you want it on your workpiece.

If you want to cut the clipart from the workpiece, outline it with a circle or square. You don’t need to isolate the clipart like this if it’s part of a sign or some other large design.
Toolpathing

It’s common to use two bits for 3D clipart. An endmill is used for the roughing pass, and a tapered ball nose bit for the finishing pass. The cantering horse was cut with a 1/4" upcut spiral and a 1/8” tapered ballnose.

Select the clipart and click on the Rough Machining Toolpath. For this artwork, 8” across, a 1/4" end mill is a good size for roughing. On larger pieces of clipart you may be able to use a larger diameter endmill, which will do the work faster. But a larger end mill also leaves more work for the ballnose to do, so you have to find the compromise between the two. Use the Model Boundary and a Machining Allowance of .040”. Click Calculate.

Use Preview Toolpath to check your work.

Make sure the clipart is still selected and use the Finish Machining Toolpath. Select a 1/8” ballnose bit.

The small stepover on the ballnose cutter, along with a good quality bit, contributes to great cut quality and very little sanding of the completed piece.

Use Raster as the machining strategy and a Raster Angle of 90-degrees. Click Calculate.

The goal of the raster angle is to machine in the same direction as the grain of the board, not across it, to get the best cut quality. My intention is for the grain on the board to run vertically. If you zoom way in on the toolpath you an see the toolpath lines (in blue) are up and down, like the grain. If you want the toolpath left and right set the raster angle to 0.

Preview the toolpath and check if you’re getting the detail you want. More detail can be achieved by using a smaller diameter ballnose bit.


Using Preview Toolpath to evaluate the results the detail difference between a 1/8” ballnose and 1/16” ballnose on the finishing pass was negligible. But the Toolpaths Summary reflects a very significant machine time difference. This analysis, taking advantage of the preview and summary aspects of the software, helps you evaluate which bit to use.

Select the outside shape and use the Profile Toolpath, with ramps and tabs, to cut the artwork out.

Preview Toolpath one last time to make sure you’re getting what you want.
Machining
 Secure your material to the CNC spoilboard, install the 1/4" bit, and zero the X, Y and Z axes. Run the roughing toolpath.
 The roughing toolpath removes a large portion of the waste…..
 …leaving the board looking a little like a tiered cake.
 Install the 1/8” ballnose bit and run the finishing toolpath.
 Reinstall the 1/4" bit and do the profile toolpath. Even though it means removing and reinstalling the 1/4" bit, I prefer to do this as the last step to keep the workpiece as stable as possible for the finishing toolpath.
 Enjoy your 3D machining!


