You’ve got to have your work secured, and secured well, when you’re running your CNC router. You simply can’t take a chance that your work will shift. Here are a variety of approaches you can use to confidently fasten your work to your spoil board.
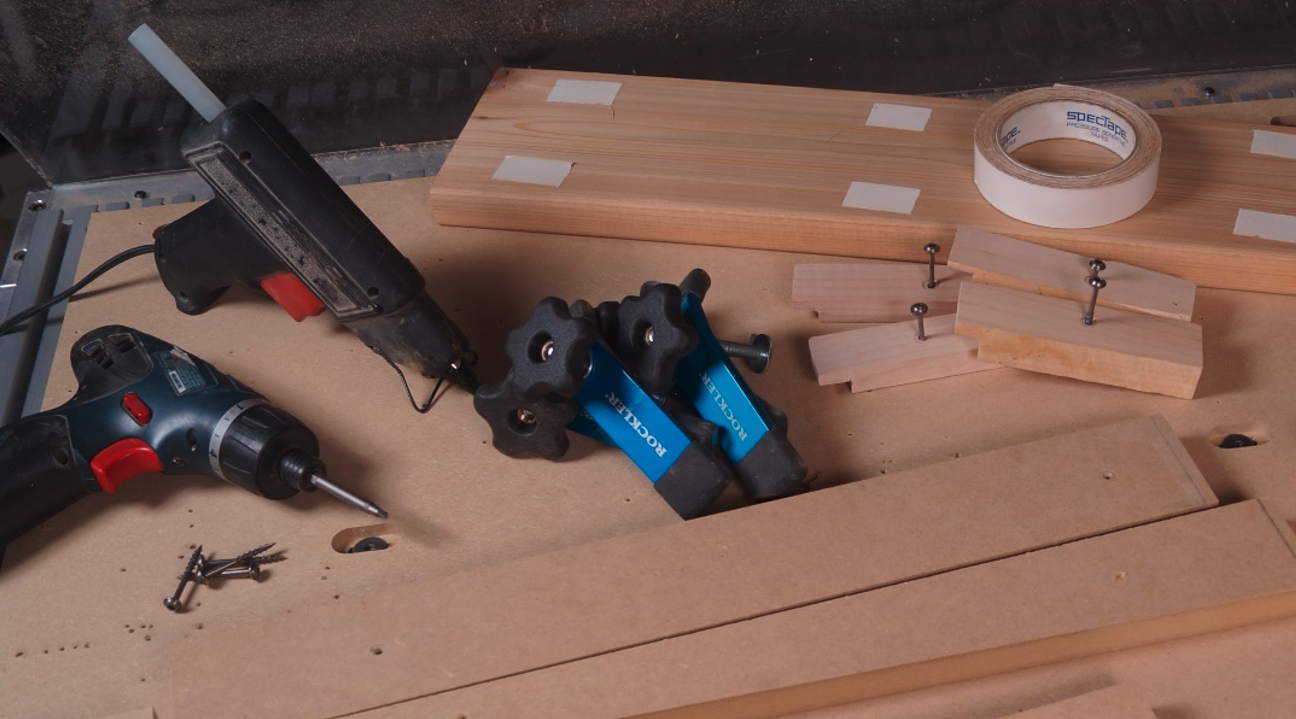
Hot glue

Hot glue guns aren’t just for crafts. Hold your workpiece on the spoil board and use a hot glue gun to lay a bead of hot glue in the inside corner formed where the edges of the workpiece meet the surface of the spoil board. Do this on all four sides. DO NOT put hot glue on the back of the workpiece, between the piece and the spoil board. A bead of glue in this location will prevent the workpiece from sitting flat on the surface, and possibly mess up your machining.
This is a dirt simple approach to work holding, but is also a bit of a pain to use. After the machining is complete use a utility knife to slice the bead of glue so you can separate it from the spoil board. This typically leaves some glue on the spoil board that you’ll have to clean up with a chisel before mounting your next piece. There will also be glue reside on the edge of the workpiece. But, since most people own a hot glue gun, this is a very accessible approach that does a good job of holding workpieces in place. This approach works well if your spoil board doesn’t provide T-track access.
Double-faced tape

Unlike hot glue double-faced tape can be applied to the back of your work. Use pieces that are approximately 1” x 1”, spaced every 4” to 6”. The back of the workpiece and top of the spoil board both need to be clean of dust and dead flat for double-faced tape to work effectively. Tape isn’t able to overcome irregularities or gaps between the work and the spoil board.
Double-faced tape doesn’t hold well in a cold environment. It’ll hold best if the workpiece and spoil board are both 60-degrees or warmer. After the toolpath is complete insert a chisel or putty knife between the back of the workpiece and spoil board and gently pry the two apart. Do a light sanding on the workpiece to remove any remaining adhesive residue. This is another approach that works well if your spoil board doesn’t provide T-track access.
Commercial hold-downs

If you have a CNC router with T-tracks built into the spoil board, commercial hold downs provide a fast, easy and very effective way to secure your work. Hold downs should be aluminum, not steel, just in case you miscalculate and the router bit runs into the hold down.

Before running your toolpaths, make certain the bit will clear the bolt that secures the hold down in the T-track.
Wooden hold downs

Shop-made hold downs will do a great job holding your material in place. These are handy for spoil boards that don’t have T-track built it.
Simply cut a rabbet in the end of a piece of hardwood. The depth of the rabbet should be slightly less than the thickness of the material. Coarse thread pocket hole screws work very will on these hold downs. Their threads provide a good grip in the MDF spoil board.
Screws

When you’re planning on screwing your workpiece to the spoil board it’s best to include the screw locations in the design and toolpaths. This allows you to double-check the locations to make sure the router bit won’t hit the screws when you’re cutting your design.
This design has four screws, one in each corner, indicated by the red arrow. Use a Drilling Toolpath for the screws, setting up a V-bit to penetrate the surface with a .060” depth of cut. We simply need a mark indicating where the screws are located.

For the first toolpath, the one that will locate the screws, you can simply tape your project piece in place since there is such a minimal cut.

Mount a V-bit in your CNC and zero the X, Y and Z axes. Run the screw location toolpath. Notice that the V-bit simply “kisses” the surface to indicate where the screws are located. Follow this up by drilling for and driving a screw in each of these locations, and then safely running the rest of your toolpaths.
There are lots of strategies that will safely hold your work on a CNC router. Make sure the one you’re using keeps the workpiece solidly in place.


