A really interesting aspect of doing CNC work is creating a design, and then experimenting with different toolpaths to get different results. In this article we’ll look at how the VCarve toolpath, used two different ways, can give you two completely different looks. The software being shown is VCarve Pro, version 10.

The design includes lettering and clip art. If you like the design and would like a copy of it for yourself, you can get the .crv file and the .dxf files. See Sources It’s set up to be cut from an 11” x 13” board.
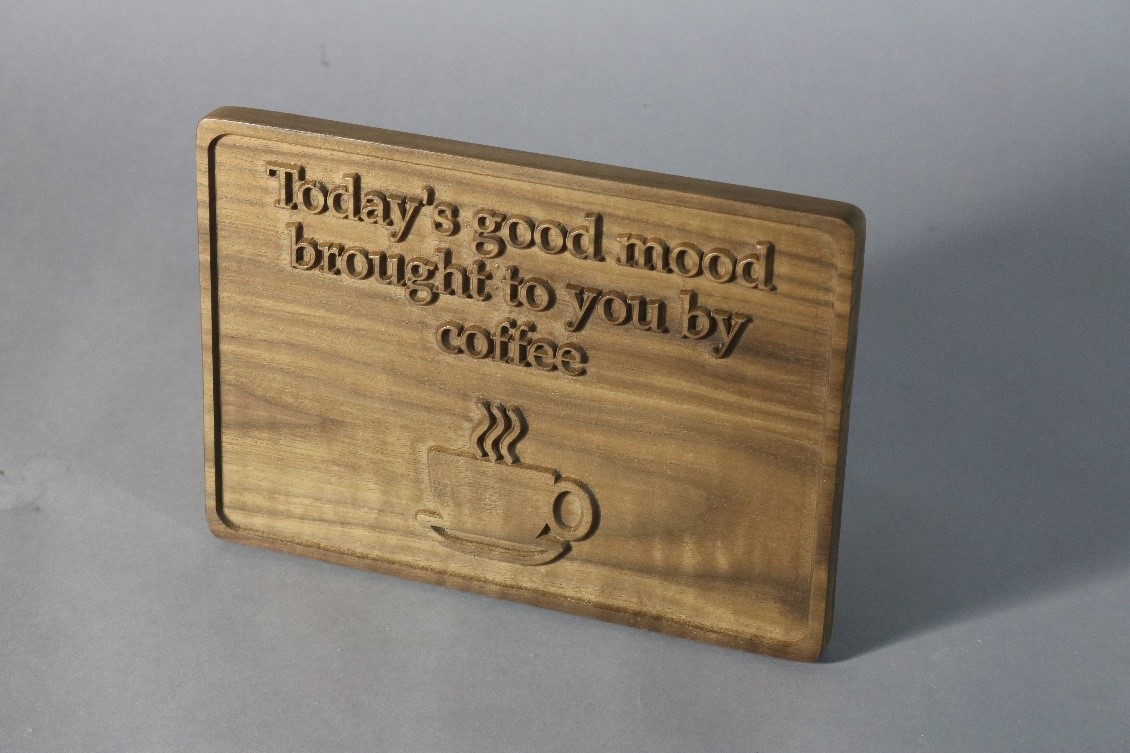
Incised letters and clip art

This look, with the letters and clip art cut into the board, is the simplest to create. It also has a faster machine time than the second option shown in this article.

A 60-degree, 1/2" diameter V-bit is used for the detail cuts. See Sources.

A 1/4" bit is used to cut the sign to its final shape. See Sources. I prefer upcut spiral bits for these cuts, but you could use a straight bit.

Within the design select the text and clip art.

Use the V-Carve/Engraving Toolpath and select the V-bit you’ll be using. Click calculate. There’s no need to set depth on this toolpath.
The software automatically “fills” each letter and the cup based on the angle and diameter of the bit. The V-bit automatically cuts between the lines on the letters and cup.

Select the interior border.

Use the 2D Profile Toolpath with a Cut Depth of .06”. In this case, since we’re following a single line, we need to tell the software how deep to make the cut. Note that under Machine Vectors we’ve chosen to cut on the line. Click calculate.

Select the outside border line.

Use the 2D Profile Toolpath with a cut depth .020” more than the thickness of your material. VCarve automatically sets the number of passes based on material thickness. Under Machine Vectors choose to cut Outside/Right.

Click Edit Tabs and add 8 tabs, two per side, to the project. Close the Toolpath Tabs window and click calculate.

Use Preview Toolpaths to check your work. This is a great opportunity to make sure the toolpaths you’ve created are providing the look you want. Use your mouse to manipulate the image; rotate and zoom.
Confirm the look of the project, and edit the design and toolpaths as needed. If you’re happy with what you see you’re ready to cut the project on your CNC router.
Raised letters and clip art

This look was produced using the same design, but different toolpath methods. It’s done using the same router bits as the incised look. In this case the letters and artwork are raised from the background.
Select the letters, interior border line, exterior line of the coffee cup, and interior line of the coffee saucer. We don’t use the interior line on the cup at all for this design.

Use the V-Carve/Engraving Toolpath. In this case we do need to set the depth of cut. Check the Flat Depth box, and set the depth of cut. I’m using .14”. Select the 60-degree V-bit.

Instead of asking the V-bit to clear away all the waste surrounding the letters and cup, we’ll remove the bulk of it with an endmill bit. Check the Use Clearance Tools box and select the 1/4" endmill. Click Calculate.

Use Preview Toolpaths to view only the 1/4" bit clearing cut and you can see that the bit will automatically run as close as possible to the letters and cup, leaving detail work to be done by the V-bit.
A larger diameter bit will do the clearance work faster, but leave more wood to be removed by the V-bit. You need to strike a balance between the two.

Use Preview Toolpaths to view the V-bit toolpath. This shows you the lettering and cup details.
Just like we did for the first design use the 2D Profile Toolpath to cut the outside shape of the sign, leaving tabs to hold it in place. Use Preview Toolpaths to check your toolpaths, and edit as needed.
Sources
VCarve .crv file, incised letters


