Here’s a simple project that’s easy and fun to make, and to play. If you’ve got kiddos around the house, they’ll enjoy playing this with you. This is a great opportunity for using contrasting species of wood.
Design the board

Set up a new job. The final size of the game board is 9” x 9”, so use a workpiece that’s slightly larger than that.

Use the Draw Rectangle tool to create a 9” x 9” square centered on your workpiece.

Open the Draw Line tool and create a 9-1/2” long line that’s centered on the square. Select the line, hold the Shift key, and select the box.

Use the Align Top tool to move the line so it’s perfectly even with the top of the square.

This move creates a zero point from which we can move the line to create the tic tac toe pattern. Click on and select the line.

Open the Move Selected Objects tool.

Select Relative and enter -3 in the Y Position box. Click Apply to move the line downward 3”.

Click on the line to select it and right click to get the menu. Navigate to and click on Copy. Then right click again and click on Paste. Repeat the process of using the Move Selected Objects tool to move the new line downward 3”.

You now have two horizontal lines dividing the square in thirds. Click on and select one of the lines and use the Copy and Paste trick to create another line. Make sure the new line is selected.

Open the Rotate Selected Objects tool.

Rotate the new line 90 degrees.

Selected the vertical line and then the box, in that order.

Click on Center Vertically to move the line so it’s perfectly centered on the box. Then click on and select the vertical line and the box, in that order.

Use the Align Left tool to move the line to the left side of the box. Select the vertical line.

Use the Move Selected Objects tool to move the line 3” to the right. Copy and paste that line and move the new line 3” to the right.

You now have the layout for a tic tac toe board. The lines intentionally go slightly beyond the box. This is to make sure that the V cut used for the lines goes past the edge of the finished board, doesn’t stop at the edge.
Toolpaths for the board

Select the grid lines and open the 2D Profile Toolpath. Use a V-bit and a cut depth of .06” (about 1/16”).

Make sure the toolpath is set to cut On the lines. Then use the 2D Profile Toolpath and a ¼” upcut spiral bit to cut the outside shape of the board.

Use Preview Toolpaths to check your work. Make any necessary changes.
Design the Xs and Os

Create a new job with the dimensions of the workpiece you’ll use for the Xs and Os. Notice this board is thinner than the game board.

Open the Draw Text tool. Choose a font that’s blocky, like Arial Black. Set the Text Height to 2-1/4” and type a capital X. Repeat the process typing a capital O.

You now have an X and an O on your workpiece. But you know how to copy and paste, so…

…make four more of each letter and create a layout.

Select the letters and use the 2D Profile Toolpath, cutting Outside, to cut the letters. Use a 1/8” upcut spiral router bit and set Cut Depth to .005” less than your material thickness. We’ll use onion skinning to keep the letters in place. Look at this article for more info on how to onion skin small parts on your CNC.

Use Preview Toolpaths to check your work. Make any necessary changes.
Cut the parts

Secure the game board to your CNC, install the V bit and zero the X, Y and Z axes.

Run the grid toolpath.

Swap bits, rezero the Z axis and run the Profile Toolpath to cut the board to size.

Secure the workpieces for the letters, install the 1/8” bit and zero the axes. Instead of finishing sanding each individual letter it’s easier to finish sand the entire top face of this board before doing the CNC work. Then only light sanding will be needed on the small letters afterward. Run the letter toolpath.

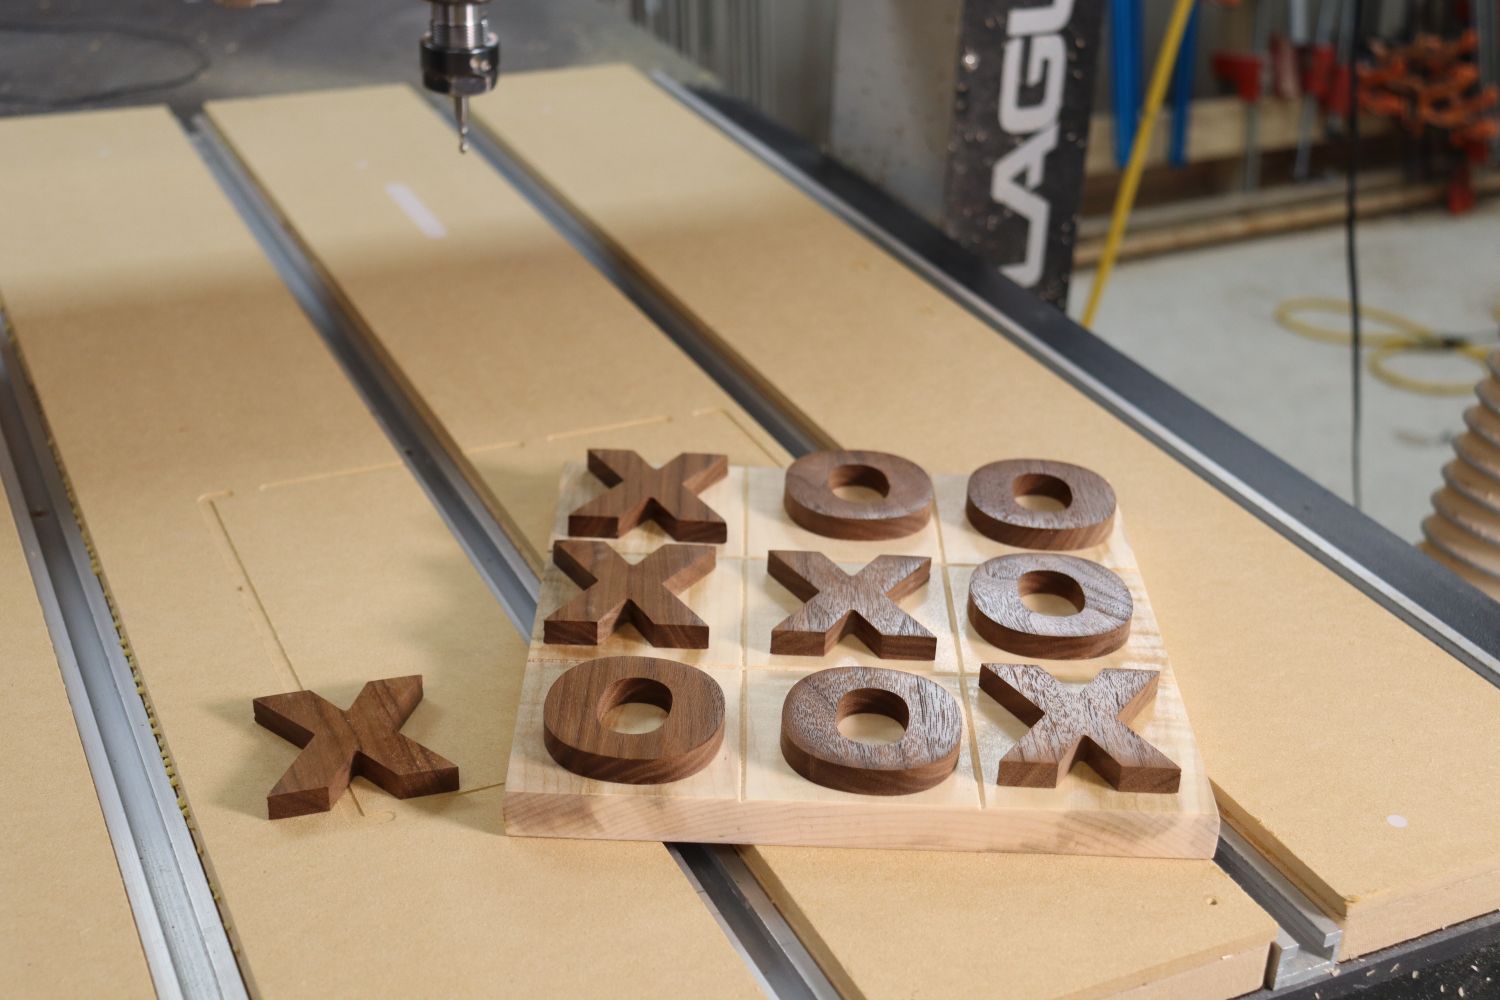
Sand the back face of the board to set the letters free. Sand the letters and the game board as needed.

Apply a coat of finish and in no time you’ll be ready to take on all comers with your CNC Tic Tac Toe board.


