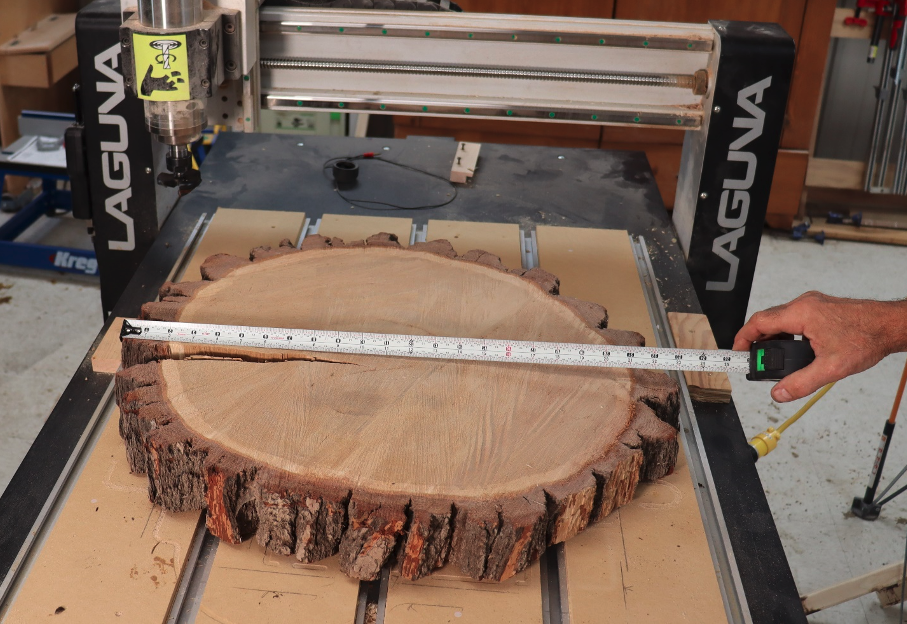
Fly cutting is a very important maintenance task that you need to do, but it can be used for more than just leveling your spoilboard. This burr oak cookie is over 1” thicker on one side than on the other. Would you sand it to uniform thickness? No thanks. Would you use a planer? Not recommended because you shouldn’t plane end grain. Your CNC router is the choice that provides a great way to deal with this issue. Before diving into this article you should understand how to fly cut, and you should also have a basic understanding of log cookies and how to secure them on your CNC. After you understand those things, then you’re ready to dive in.
First, grab some measurements. Measure the item you’re going to fly cut. Do this in a couple of spots, looking for the largest dimension.
Measure the thickness in a few different spots. You’re looking for minimum and….
…maximum thickness. You need to know the difference between the two. On this cookie, there’s a 1-9/16” difference between the high side and the low side.
Design and toolpath
Start a new job and enter the dimensions of the cookie as the Job Size. Even though the cookie is nearly round, it’s fine to create a square workpiece.
Navigate to the Draw Circle tool. 
Create a circle that’s slightly larger than your cookie.
Navigate to the Pocket Toolpath.
Choose the end mill you’ll use (more on fly cutting end mills in the fly cutting article) and set the Cut Depth. The Cut Depth should be equal to or slightly more than the difference between the high side and low side of the item you’re leveling. There’s lots of material to remove on this cookie, so will likely need several passes.
Check Ramp Plunge Moves and click Calculate. This is the same design process you’d follow for fly cutting, but in this case, there’s a significantly greater Cut Depth.
Make the cuts
Secure the cookie to your CNC and mount a fly-cutting bit in the collet. Zero the X and Y axes.
On thick items, like this piece of burr oak, you may not have enough room to fit the Z zero puck on top of the workpiece and below the cutter. Instead, zero the Z axis using paper as a feeler gauge between the cutter and workpiece. Zero the Z axis.
Run the toolpath. You’ll find that the cutter makes contact on parts of the surface, but misses other parts, because of the thickness discrepancy.
This is part of the beauty of a CNC. You can do other things in the shop while the cutter removes material and finds its way down to a point where it’s cutting a uniform surface.
When one face is flat flip the workpiece over and level the opposite face. You’ll need to create a new toolpath with a smaller depth of cut.
Sand it smooth
A drum sander is perfect for cleaning up the router marks. If you don’t have one, you can sand it smooth with a belt sander and random orbit sander.
Your log cookie is now ready to be incorporated into a project.


