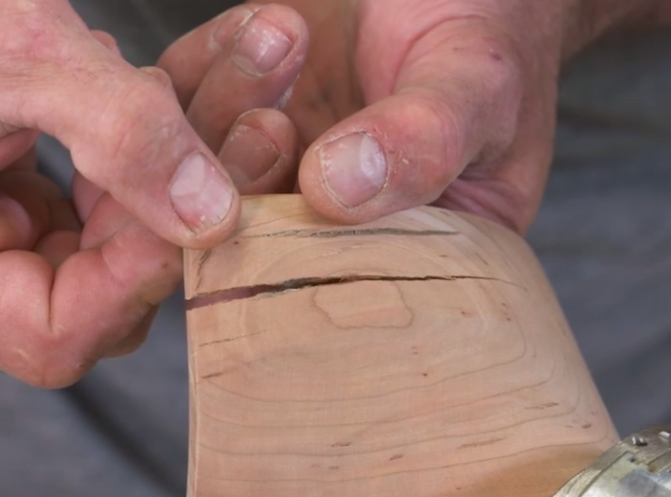
It’s really frustrating, and disheartening when a bowl you’ve been working on develops a crack. This could be the result of internal stress in the wood, a defect you couldn’t see before you started turning the bowl, or a chisel catch.
No need to chuck your bowl into the firewood pile. Small cracks can typically be repaired. Check out this video for the full process.

CA (cyanoacrylate) glue is the key to success. Honestly if you’re going to turn bowls, you MUST have a bottle of CA in your shop. I’ve used it for tons of bowl repairs. CA glue is available in a variety of viscosities.
I typically use thick or medium for these repairs. Thin CA glue is really runny, and I find it difficult to prevent it from running all over the bowl on these repairs.
Additionally, thick and medium are more forgiving when it comes to filling gaps. This is important if the crack you’re working on won’t quite completely close.

CA glue dries really fast, but I typically use accelerator with the glue. Spritz the accelerator first because the accelerator has a really long open time, and CA glue has a really short open time.
Don’t overdo the accelerator. If you use too much it can crystallize the glue and significantly weaken the joint.

Gently open the crack and squirt some CA glue into to the void. This can be tricky, depending on how willing the crack is to open up.
You may have to use a toothpick or the edge of a business card to encourage the glue to go into tighter spaces. If the cracks are really tiny, like spiderwebs, you may need to use thin viscosity CA glue.

If the blank and crack are flexible enough to allow it, pull the crack open and closed after the glue is in place. This often helps “pump” the glue around, giving you better distribution of the glue. CA glue is slightly gap filling.
As a result, even if you aren’t able to get the crack completely closed, the glue will most likely bridge small voids and you’ll have a sound repair.

Since CA glue dries quickly you could stand at your lathe and hold the crack closed till the glue dries. I prefer to use masking tape as a clamp, drawing the crack closed, freeing me up to do other things while the glue dries. Plan on giving it a few minutes to fully cure.

Once you’re confident the glue is dry peel the masking tape off.

Give the repair a few “test tugs” to make sure it’s fully cured, and that your repair worked. If you need a little more glue, it’s much better to know now than when the bowl is spinning.

Once you’re confident the glue is fully cured and the crack is repaired you can return to your normal turning process. On this bowl the chisel work was complete when the crack appeared. All that remained was sanding.

On this bowl the repair is fine, but there are some small voids where I didn’t get enough glue on the first go round. No big deal.
Simply add glue to these voids, let it cure, and go back to your turning process. You can even mix CA glue with sawdust and pack it into the voids for a more seamless appearance.

This is another three-point bowl I was working on that also developed some cracks. No surprise, since it came from the same chunk of cherry wood.
The spider web of cracks near the rim, including a piece that fell completely out of the bowl, would have sent this bowl to the scrap bin if CA glue hadn’t saved the day.

A chisel catch on this southern yellow pine bowl took a big piece out of the rim. Again, CA glue saved the day. It is important to note that the CA glue may leave a dark line that can be seen in the final bowl.
You have to weigh if saving the bowl, but having that dark line, is a better move than discarding the cracked bowl.


