With the type of woodworking I do – building furniture, small cabinets and bookshelves- I often find myself using a dado blade with sacrificial fence at the tablesaw. With the dado blade partially buried in the fence, you can make a rabbet or tenon of virtually any size. It’s a technique I turn to time and time again.

When I upgraded my tablesaw to a Laguna Fusion F2 model, I noticed that the European style High-Low fence works a little differently than a standard fence. It has some great advantages because you can use the fence in the standard ‘High’ position, or flip the fence to the ‘Low’ position for veneer, laminate and certain specialty cuts. The aluminum extrusion can also slide forward on the fence, making certain crosscuts safer and easier to manage.

One thing I didn’t figure out initially was how to attach a sacrificial fence to this interesting and useful High-Low fence. My specialty clamps for this purpose didn’t seem to fit on the Laguna F2 fence. So, I needed to come up with a reliable solution.

While I couldn’t find an off-the-shelf clamp that would fit the bill, I stumbled upon a product that came close. 90 degree positioning squares often come with small specialty clamps of their own. They look somewhat similar to the woodworking clamps for sacrificial fences, and they even include “L-bolts” and small clamping knobs. So, I purchased a kit to see if it would work on the Fusion F2 fence. It did work, but I noticed that the non-threaded leg of the L-bolt supplied with the kit was too short. This could be a safety concern, so I’d have to come up with something better.

I searched online hardware stores to see if longer L-bolts were available. I struck out there, but had an idea after browsing a local hardware store. I found a square “U-bolt” that could be cut in half to make the perfect size L-bolt for this application. Simply saw the non-threaded portion of the U-bolt to length, and file the edges smooth. Ideally, the non-threaded leg of the bolt should be 2” long. The threaded side was about 3” long, which worked perfect for my F2 saw.

The hardware that came with the positioning squares was M8 x 1.25 thread, however the hardware store U-bolts were 5/16” x 18 threads. So, this meant I had to replace the knobs as well. Small 5/16” star knobs are available almost anywhere, and I picked some up from Rockler. They are 4-wing star knobs with a rubber overmolded grip, and they work great for this application. Make sure your star knobs are no more than 1-1/2 inch diameter.

With all the hardware sourced, it’s time to make the sacrificial fence itself. Mine are usually made from ¾” cabinet grade plywood, but I suppose MDF might work as well. Make the sacrificial fence the same height and length as the aluminum fence. Drill several 5/16” diameter holes in the fence, deep enough to accommodate the L-bolts.

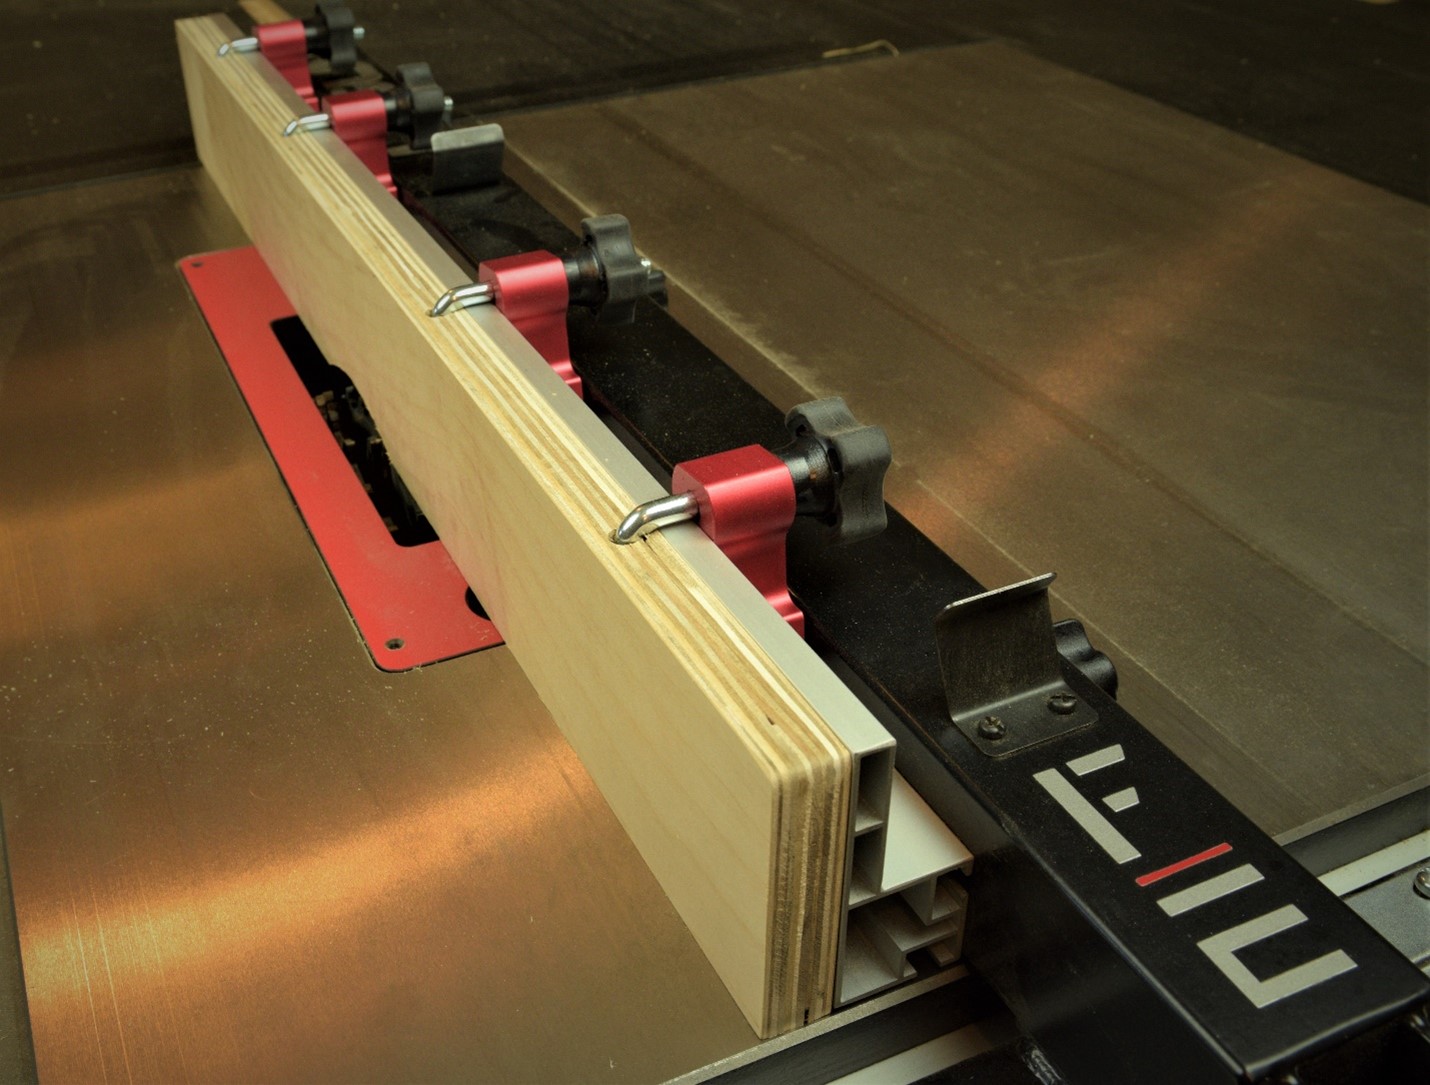
Since the sacrificial fence is the same size as the fence on the Fusion F2, it’s easy to install. Just align the wooden fence with the aluminum fence, and the dado cutout will always be in the right spot. Use 3 or 4 of these custom clamps to secure your sacrificial fence. Tighten the knobs, and you’re ready to go to work cutting rabbets, tenons, dado notches and more!
Learn more about the Incredible Dado Blade and how it can elevate your woodworking here!