It’s easy to make a gazillion stocking stuffers on your CNC router. You can even add letters to these ornaments if you want a more personal touch. Here’s how to do this project.
Material
Baltic Birch plywood (also called multi ply plywood) is a great CNC material. For the ornaments 1/8” Baltic Birch is a great choice. You could also re-saw and plane solid wood to 1/8”. But it’s hard to beat the economy of movement of working with sheet stock.
Clipart

Jump on the internet and search for the ornament shape you want. Once you find something you like you should be able to right click on it and save the image to your computer. Make sure you’re not infringing on anyone’s copyright by using their artwork.

Set up a new job.

Bring the clipart into VCarve Pro. Use Trace Bitmap to change a JPEG or PNG file into vectors. Check out this article for more info on using Trace Bitmap.

Remember that the resulting lines are all grouped together. You need to ungroup them in order to use them.

Delete lines so you have one line for the outline and one line for the hanger hole. Adjust the size of the ornament as needed. This one is 3” x 3.6”.
Make multiples

Select the ornament and click the Nesting icon. Enter the data about the diameter of router bit and clearance between each ornament. Enter the number of copies you want to make. It’s hard to predict how many ornaments will fit on your workpiece. Make your best guess and click Preview.

If the number of copies you picked was too high, you’ll end up with multiple sheets of ornaments, instead of one. If it was too low you’ll have blank space on the sheet. If you have either of those scenarios click Reset Preview, enter a new number of copies, click Apply and try again.
Toolpaths

Select the outline of the ornaments and use the 2D Profile Toolpath. Set the depth of cut .005” less than the thickness of the material. This is called onion skinning. The profile cut will leave a thin layer of material on the back of the board we’ll deal with later. Check out this article for more info on onion skinning.

Select the holes and use the Drilling Toolpath to drill all the way through. Set Cut Depth for .004” more than the thickness of your material.

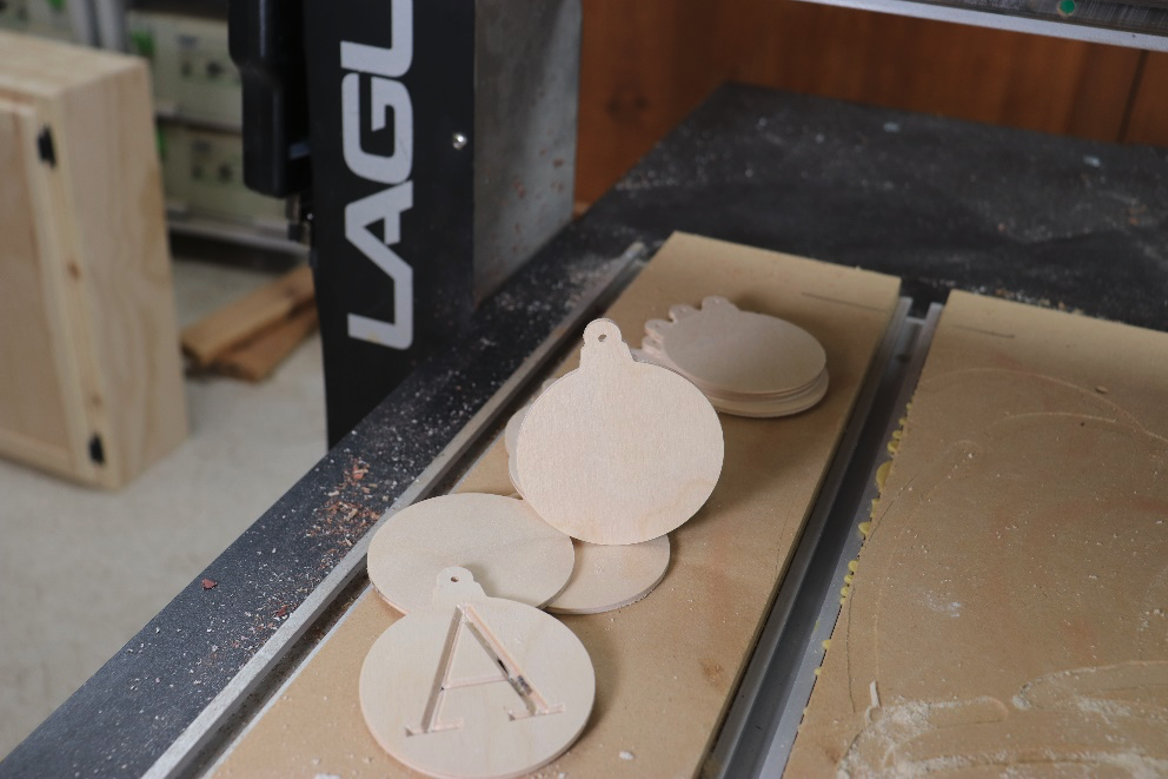
If you want to add a letter select an ornament and click Draw text-within a vector box. Using this text option will force the letter to fit in the ornament. Type the letter you want.

Select the letter or letters and go to the VCarve/Engraving Toolpath. Check the Flat Depth box and enter a number in the box. For 1/8” thick material .1” works well. If you don’t do this in the VCarve toolpath you may get a warning that the bit is cutting beyond the thickness of the material. Select your router bit and click Calculate.

Use Preview Toolpaths to check the outline and hanger hole…

…and any letters you created.
Make the cuts

Secure your material to the spoilboard and zero the X, Y and Z axes. There are lots of hold downs on this project. Not because there will be a lot cutting pressure, but because thin material has a tendency to cup and bow. It’s very important to hold the material flat in order for the onion skin to work.

Run the lettering toolpath.

Swap in the 1/8” bit. Rezero the Z axis and run the profile and drilling toolpaths.
Sand past the onion skin

Sand the back face with 80-grit paper on a random orbit sander to sand through the onion skin and release your ornaments. You’re ready to stuff stockings.


