I love using this joint on drawers. It’s so fast! With one set up you’ll cut the corner joint and the groove for the drawer bottom. This works great for ½” solid wood or Baltic birch boxes.
Be sure the router is unplugged for all set up operations.
Bit Required

The rabbeted drawer lock requires a ¼” slot cutter, which allows you to machine ½” thick drawer sides. The slot cutter has to be half as large as the material thickness. Use a 3/8” slot cutter on 3/4" material. That works for the lock rabbet but wouldn’t be practical for the groove for the drawer bottom. If you’re using thicker stock use the larger slot cutter for the lock rabbet and a 1/4" cutter for the groove for the box bott
Setup

Set the height of the slot cutter so the top of the cutter is even with the top of your material.

Position the fence so that depth of cut is ¼”
Make the cuts

Cut a test front/back piece. The thickness of the test piece must perfectly match the thickness of the drawer. Use a backer board to support the piece.

Cut a test side piece. Use a push pad to hold it firmly against the fence.

Test the fit. If the joint is too tight, lower the cutter. This makes the tongue smaller. If it’s too loose, raise the cutter to make the tongue larger. Check the depth of the dado/length of the tongue. It should be 1/4". Adjust the fence position as necessary. Make sure your test pieces are the same thickness as your project parts. If it was necessary to change the height of the router bit or position of the fence, cut two more test pieces.

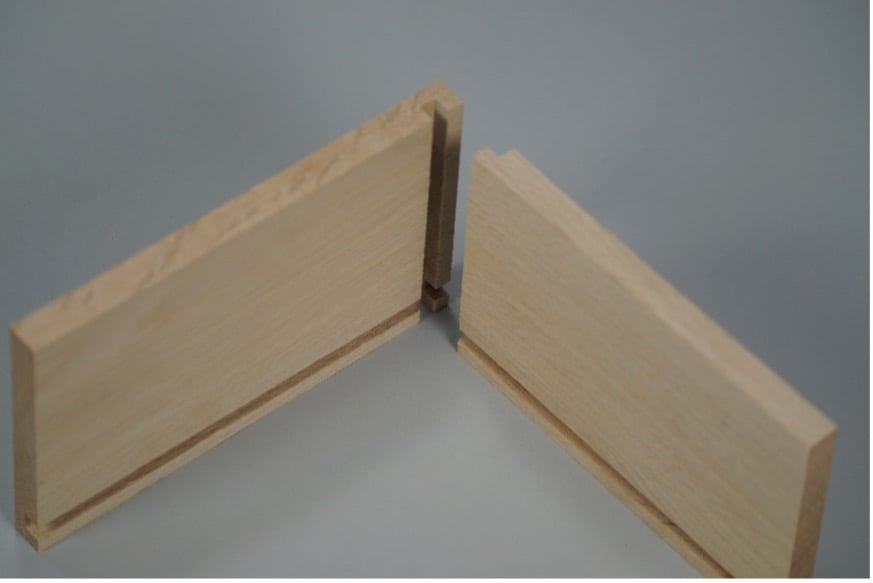
If the fit is good but the front/back test pieces look like this, your material is too thick. The thickness of the “feather” that was left behind by the cutter shows you how much you have to reduce the thickness by.
When the tongue and groove are a perfect fit, machine your drawer parts. Keep track of how each piece should be cut. Fronts and backs are machined horizontally on the table. Sides are machined vertically. Cut both ends of all the pieces.
It’s a good idea to zero clearance the infeed fence. This will help prevent chipping when you do the vertical pass. Watch this video to learn more about making your router table fence zero clearance. Don’t do this until after you know the setup is perfect.

Pay careful attention to the orientation of the parts when you cut the grooves for the drawer bottoms. Groove the fronts and backs with the rabbet facing away from the fence.

Groove the sides with the dadoes facing the fence. Your drawer joinery is done!


