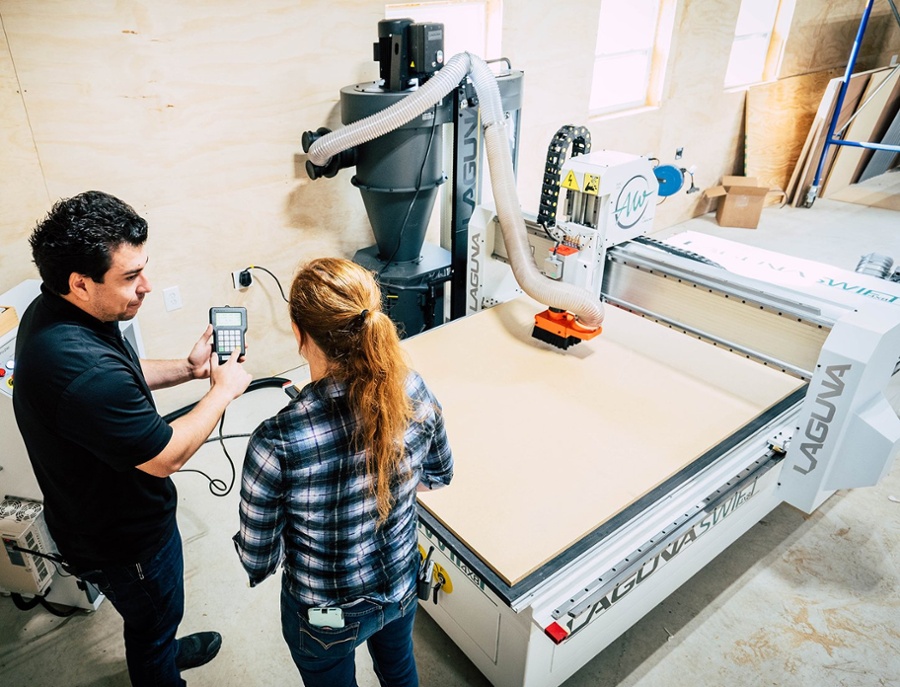
Here at Laguna Tools, we are well-known for our CNC machines. Whether you are considering an investment in a Swift or a SmartShop machine, these routers are easy to learn on and perfect for all skill levels.
Beginners and professionals can all take advantage of our machines’ user-friendly interfaces and functions.
In this post, we will explore the Swift CNC router with April Wilkerson and help you get started using it.
Meet April Wilkerson
Woodworking enthusiast and Laguna Tools customer, April Wilkerson, decided to invest in one of our Swift CNC router machines.
Happy with her decision, April has referred to the Swift as a modern-day printer that prints out her thoughts. Referring to the machine’s technology and capabilities, she described the experience of using the Swift as magical.
As a surprise for April, our experts here at Laguna Tools made sure to color match the Swift lettering on the side of the machine with her logo. This is just one of the customization options that we are happy to offer our customers.
Setting Up the Swift CNC Router
With the help of our Laguna Tools expert, Robert, April was able to get her CNC machine set up and running quickly.
Arriving on the back of a semi-truck, the team used a forklift to move the Swift machine to its permanent home inside April’s woodworking shop.
After taking the time to set up the machine properly, Robert was able to walk April through the user-friendly software program that is used to create wood designs.
Learning the Software
Using the Aspire software program, Robert began to show April the ropes of the system.
We have broken down the steps for you to follow here.
1. To start any new project design, you must first select “Create a new file.”
2. Next, you will be prompted to input the width, height, and thickness of the material you have chosen for this particular project. Click Ok to move on to the next step.
3. Now it’s time to import the vectors.
4. Make sure all the pieces are positioned closely together without overlapping. Once you are satisfied with the layout of the various pieces, you can “pin” them down.
5. Working from the inside to the outside, you will begin this next step with the inside cutouts. To do this, hold the shift key and select all of the holes. Once they are all selected, go to Tool Path and select the Profile Tool Path. Choose your cut depth, tool, parameters, and then select OK. Double-check that Inside Cut is also selected, and check the box for Ramp as well.
6. To save the inside cutout tool path, select Calculate and OK.
7. You can now preview this first tool path to ensure that it is running exactly how you want it.
8. Switch back to the 2D view and begin the process for cutting out your logo or design. This starts by holding down the shift key and selecting the logo.
9. Select VCarve, and make sure the settings are correct. If you are satisfied, select Calculate and OK again. You can preview this part of the process as well.
10. Go back to the 2D view to begin the outside cutout process.
11. Holding the shift key down, you can now select the outer pieces that need to be cut out. Then select Close on the right side of the screen.
12. Next, choose Tool Path, select Outside Cut, and change your tool and parameters as needed. Check the box for adding a Ramp, and hit Calculate.
13. Now you can preview the entire process before giving it the green light.
14. Once you are happy with the design, you can transport the files onto a flash drive to import onto the machine.
Operating the Swift CNC Router
To turn on the Swift machine, you need to switch the knob to the ON position. Then, turn the key switch to power up the machine. Press the green ON button to finish the process.
Once the handheld controller has booted up, it will prompt you to choose All Axes Home. Push OK, and the machine will position the X and Y axes to their original placements.
There is an E-Stop button that you can press if you need to machine to stop for any emergency reason.
Changing Out Tools
The next step in the learning process is to figure out how to insert a tool into the spindle.
First, grab the collet nut and collet. They need to have the same diameter shank as the tool you will use. Next, insert the collet into the collet nut and press down until you hear it snap into place.
Then, thread the collet combo into the holder piece, and slide the tool in until it reaches the indicator line. Tighten the tool into place, and insert the completed piece into the spindle.
Insert the tool to the set screw, and lock the cap into place to secure the tool. Now you’re ready to get started cutting out your first wood designs.
The Learning Curve
By now, you may be wondering how long it takes to get comfortable using a CNC router by yourself. In general, it usually takes about 3 days, which isn’t very long in the grand scheme of things.
Before you know it, you’ll be carving out your original designs faster than you ever thought possible. Just like with anything else, practice makes perfect. Our machines are so user-friendly that most people are running the show solo within two or three practice rounds.
Our Laguna Tools experts are always available to assist you. If you run into an issue, simply get in touch with us. We will walk you through whatever problem you seem to be having.
If you would like to learn more about our current product line, check out our video library or get in touch with us today.


