If you’re doing woodworking, you’re using glue. Here are some great tips and tricks that’ll help you with your gluing up processes.
Get rid of squeeze out

Edge to edge glue ups often produce a lot of squeeze out, with glue coming up from every seam you put together. DON’T wipe that squeeze out with a wet rag. All that does is smear the glue further into the grain of your project. It’ll show up when you try to apply finish.

Prep a putty knife by sanding both of its faces with 180-grit sandpaper to make sure they’re flat.

Sand the tip of the putty knife to make it square to the faces.

Slice the squeeze out from the surfaces using the putty knife. Let the glue beads dry to a point where they’re rubbery. In order for this to work the squeeze out can’t be completely dry, and it can’t be so wet it’ll smear. Generally, about 15 minutes drying time works, but it may be different for you depending on your shop conditions. When the glue has set up just right it’ll peel off the surface like caulk.
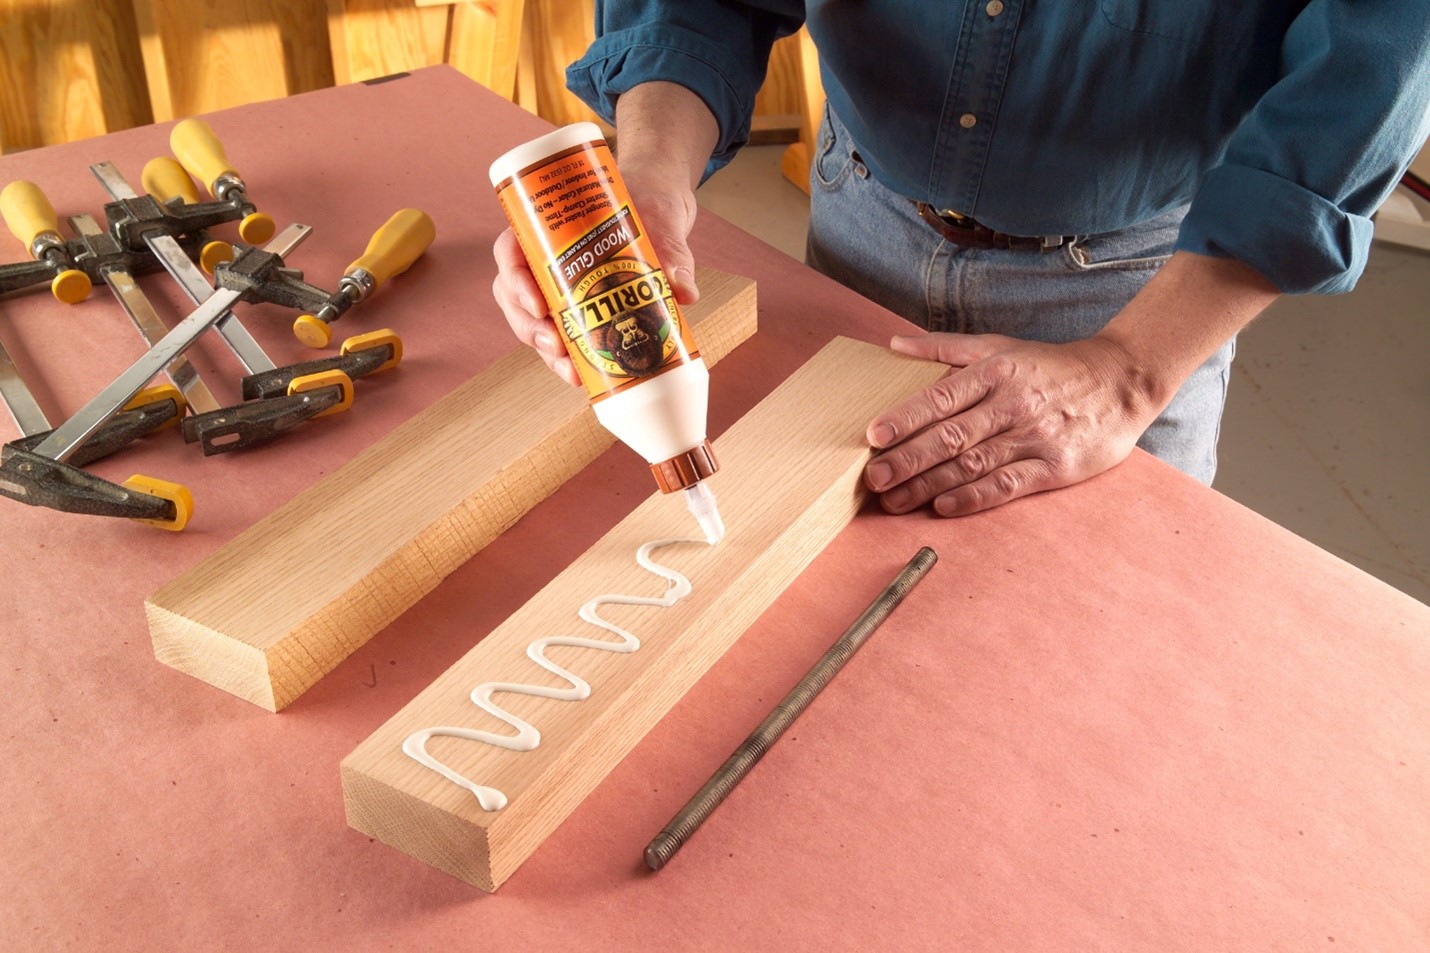
Spread glue fast

When you have a lot of surface area to cover with glue, like a large face to face glue up for a lathe turning, have a piece of threaded rod nearby and ready. Squeeze glue onto one surface….

…and use the threaded rod like a mastic knife to evenly distribute the glue over the face. The threads on a 16 TPI (threads per inch) rod leave just the right amount of glue where you need it.

Clamp your pieces and rinse the rod with water so you can use it again next time.
Filling voids

Despite our best intentions our projects sometimes end up with voids. Here’s a great trick for filling them and making them nearly invisible.

Sand an extra piece of the project material with 100-grit sandpaper and save the sawdust.

Mix the sawdust with thin viscosity CA (cyanoacrylate) glue.

Push your homemade putty into the void. Work quickly. CA glue dries really fast.

When the glue is completely dry, sand the surface. The Preppin’ Weapon is an excellent hand sanding block.

A great save!
Filling voids on paint grade projects

If you have a crack or void on a project you’ll be painting, CA glue will save the day again, but you don’t need sawdust. Instead fill the crack with baking soda, using your finger to pack it in.

Dribble thin CA glue over the baking soda, getting it completely soaked with glue.

After the glue dries, sand off any excess. This technique works great, but remember to use sawdust for clear coated projects, baking soda for painted projects.
Seal end grain
If you’ve ever stained a project you’ve probably noticed that end grain stains MUCH darker than the rest of the board. That’s because it absorbs more stain. CA glue will help you avoid the excessive color that end grain normally gets from stain.

Squeeze thin CA glue onto the end grain. Make sure all of the end grain is covered.

Spritz the glue with a little accelerator if you want to hurry up the drying time.

Sand the end grain with 220-grit sandpaper. Sand lightly to abrade the glue, but not remove it.

Apply stain.

Enjoy the great results!


