Just in time for Halloween, here’s how to convert pumpkin clipart from the internet to vectors that you can cut on the CNC. And, by choosing different toolpaths, you can get completely different looks on the resulting project, including a tray for that great Halloween candy.
Find the clipart

Using a search engine like Google search for “pumpkin black and white clip art.” Color images can also be used, but it’s easiest to work with black and white clipart.

Be sure to select Images in order to see the most results.

You’ll get a wide array of choices.

Click on the image you like. Look for clipart with smooth, flowing curvess. The pumpkin being used in this article came from this site.

Right click on the image and you’ll get the option to Save image as.. Click on this option and save the image.

I save all of my clipart in a Clip Art folder within my CNC Projects folder.
Working with the clipart

Create a new file for your project. Enter the part dimensions, Z zero position and XY datum position.

Click on the pumpkin clipart and drag it from the clipart folder onto your workspace in VCarve Pro.

Click on the pumpkin clipart in VCarve to select it. In this case it won’t turn magenta like vectors do, but you’ll see a magenta square around it.

We’ll use Trace Bitmap to convert the JPEG or PNG image to vectors that VCarve can work with.

For this piece of clipart choose Black/White

Leave the other sliders in their default positions and click Preview.

It’s subtle, but you’ll see lines appear that outline the clipart image. If the lines aren’t crisp you can move the sliders on Corner Fit, Noise Filter and Bitmap Fading and click Preview again. To be honest I find that changing the settings is more art than science. I simply play with the settings and retry until the resulting lines are crisp.

You now have vectors, created by Trace Bitmap, overlaying the clipart image you brought in.

Click on one of the vectors and they’ll all turn magenta. The vectors are grouped because the Group Vectors box was checked in Trace Bitmap. Once the vectors are selected use your keyboard arrows to move them slightly. This creates separation from the original clipart.

Click on the clipart to select it. Once again you’ll get a magenta box around the clipart. Hit your delete button to eliminate the clipart.

Select the pumpkin vectors and set the size of the artwork. Be sure to leave Link XY checked so the artwork remains proportional as you change its size.
Play with toolpaths
You can get a number of different results from the same clipart by using different toolpaths.

Select the lines and choose the VCarve/Engraving Toolpath. Select a V-bit, in this case a 60-degree V-bit. Click Calculate.

Use Preview Toolpath to see the results. The V-bit simply engraves each line of the pumpkin.

We can also CNC rout the pumpkin as a relief carving to give it a 3D look. Start by adding a square around the pumpkin.

Select the square and the pumpkin and, again, choose the VCarve/Engraving Toolpath. Set the Flat Depth. I typically use 1/8” to 1/4" for this. This is the depth to which the wood surrounding the pumpkin will be removed. Choose a Clearance Tool, typically an end mill. The end mill removes the majority of the waste, leaving nothing but detailing for the V-bit.

Use Preview Toolpath to check the results. This approach leaves the pumpkin standing proud of the background area, looking like a relief carving.

To create a tray we need to eliminate the lines inside the pumpkin. Select and right click the pumpkin. Click on Ungroup Objects and Ungroup objects back onto original layers.

Click on all the lines inside the pumpkin to select them. Hit the delete key to eliminate them.

This leaves you with only the pumpkin outline. Click on and select the outline.

Click on the Offset Vectors icon and use it to create another pumpkin shape inside the existing shape. The Distance you enter will become the wall thickness of the tray.

Click Offset and you’ll see a second line.

Click on and select the outer line and use the 2D Profile Toolpath to cut its shape. Use an endmill like a 1/4” upcut spiral bit for this cut. Set Cut depth to slightly exceed your material thickness and Add tabs to toolpath.

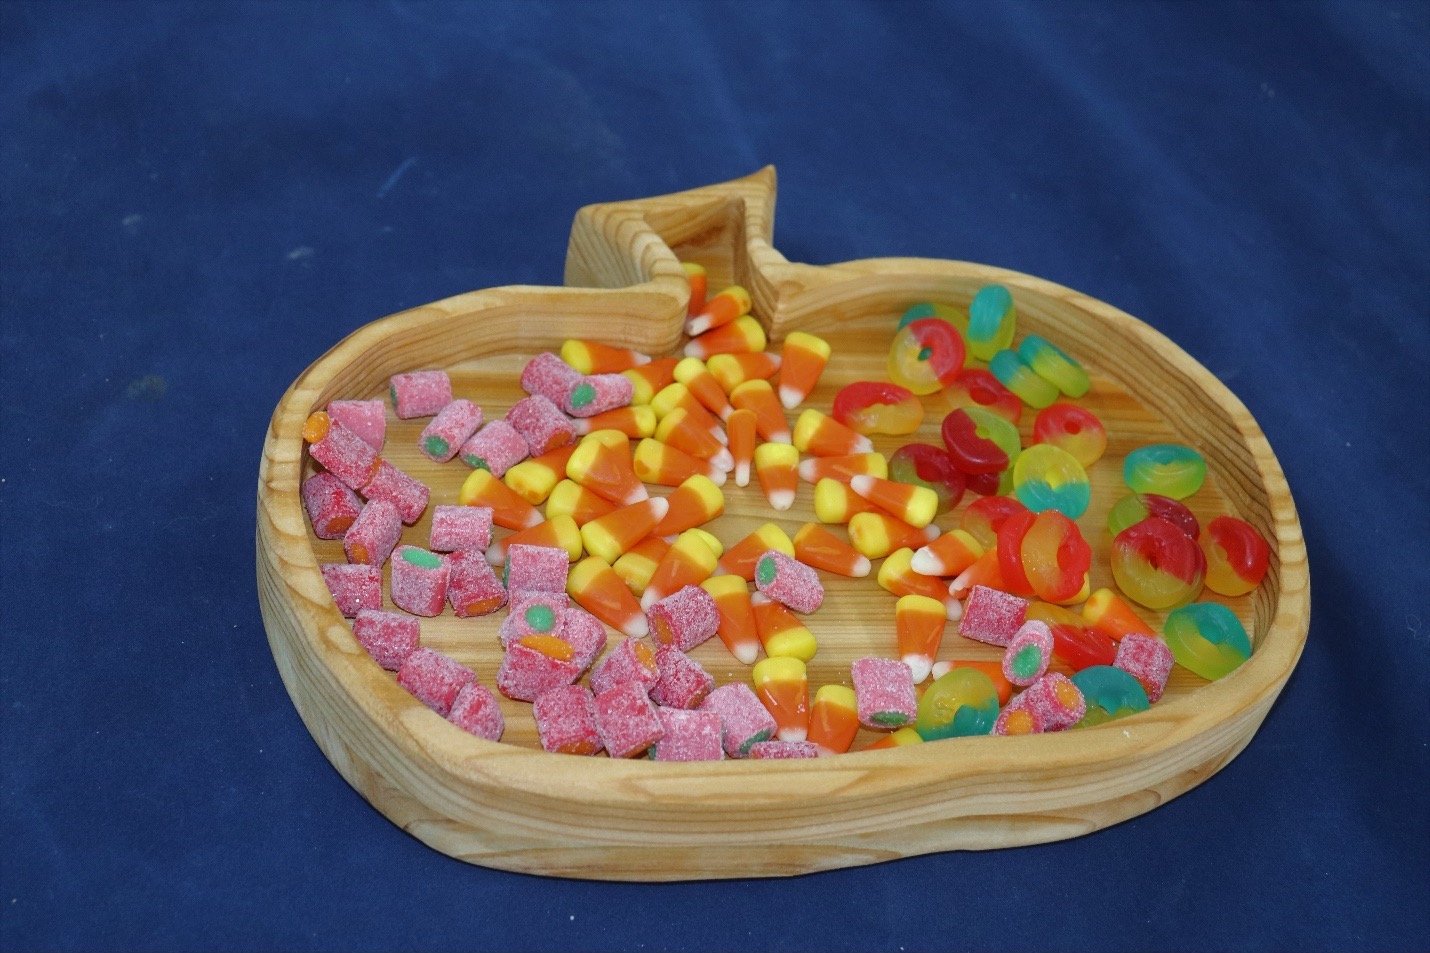
Click on and select the inner line and use the Pocket Toolpath to create a recess, a tray. Use an endmill for this cut, setting Cut depth to an amount less than the thickness of the material.

Use Preview Toolpath to check your work.
Knowing how to convert readily available clipart to vectors opens lots of doors for you and your CNC router. It’s also fun, and valuable, to try different toolpaths on the same design to see how the results change. Check out this article for more information on changing toolpaths to change the look of your work.
Download the pumpkin tray file here to easily make this fun fall project at home!


