The best thing about CNC routers is that they can be used to cut and engrave a wide range of materials besides wood.
For example, acrylic is a commonly used material when making signs and other decorative pieces. In the video below, we show plastic sign making with the SmartShop® II vacuum table CNC router.
Even though there are many different kinds of acrylic, we will be referring to the extra hard thermoplastic acrylic in this post. Without further ado, let’s explore the process of cutting acrylic on a CNC machine.
Choosing an Acrylic

With hundreds of acrylic variations including different sizes, shapes, and colors, the first step to creating an acrylic piece is to choose which type you want to work with.
We recommend cast acrylic instead of extruded acrylic because it’s much cleaner to cut through. Extruded acrylic can get gummy during the cutting process.
Clear acrylic is lightweight, shatter-proof, and can be used to create unique pieces of art. If you’ve heard of Plexiglass or Lucite, then you know exactly what we are talking about.
Choosing the Right Bit
One of the most important decisions you will make when cutting acrylic on a CNC router is choosing the correct bit. This step is entirely dependent on what you are hoping to achieve.
A 1/4-inch solid carbide O-flute is a great choice for cutting because it has an up-score that will pull out the chips as the cutting occurs. It prevents plastic chips from building up inside the curve of the cut.
If you want to engrave acrylic, a 60° engraving bit is perfect for V-carving. It has a flat-edge tip that leaves you with a better edge quality than other bits.
V-Carve Pro Software
V-Carve Pro is the perfect software for cutting acrylic because it allows for 2D, 2.5D, and 3D engraving. It comes with everything you need to design whatever is inside your imagination.

Drawing and editing tools allow you to come up with original designs or customize ready-made templates. The numerous toolpath options enable you to customize the settings for drilling, auto-inlays, profiling pocketing, prism carving, fluting, texturing, V-Carving, and so much more.
Check out our recent blog post to learn more about the V-Carve software as well as other programs we offer here at Laguna Tools.
Cutting Acrylic on a CNC Machine
Now that you've chosen your material, bit, and design, it’s time to get started with the cutting process.
Step #1 - Set the feed-rate according to the size of your bit. The recommended feed-rate for cutting acrylic is generally between 75-300 IPM. Larger bits work well with higher feed-rates, and smaller bits require a lower feed-rate.
Step #2 - Set the RPM. We recommend that you use at least 18,000 RPM to optimize the spindle’s ability to cut through acrylic without melting it.
Step #3 - Set the cutting depth. In general, we recommend that the cutting depth be about 1/2 of the diameter of the bit. This will prevent the bit from breaking.
Step #4 - Make sure that you choose to begin cutting with a ramp. You can choose this option inside the V-Carve Pro software. Going into the acrylic with ramping instead of plunging in will prevent distortion.
Step #5 - Secure the acrylic material to the CNC router table.
Step #6 - Run the CNC router to cut out the acrylic design you want.
Why Use a CNC Router?
If you’re wondering why you’d want to use a CNC router instead of a laser, we’ve got a few reasons for you.
A CNC router cuts much faster than a laser, it can cut through painted materials with no problem, and it is more accurate for engraving and 3D designs. While you can use a laser for acrylic designs, a CNC router offers more versatility overall.
The Swift MT CNC Router
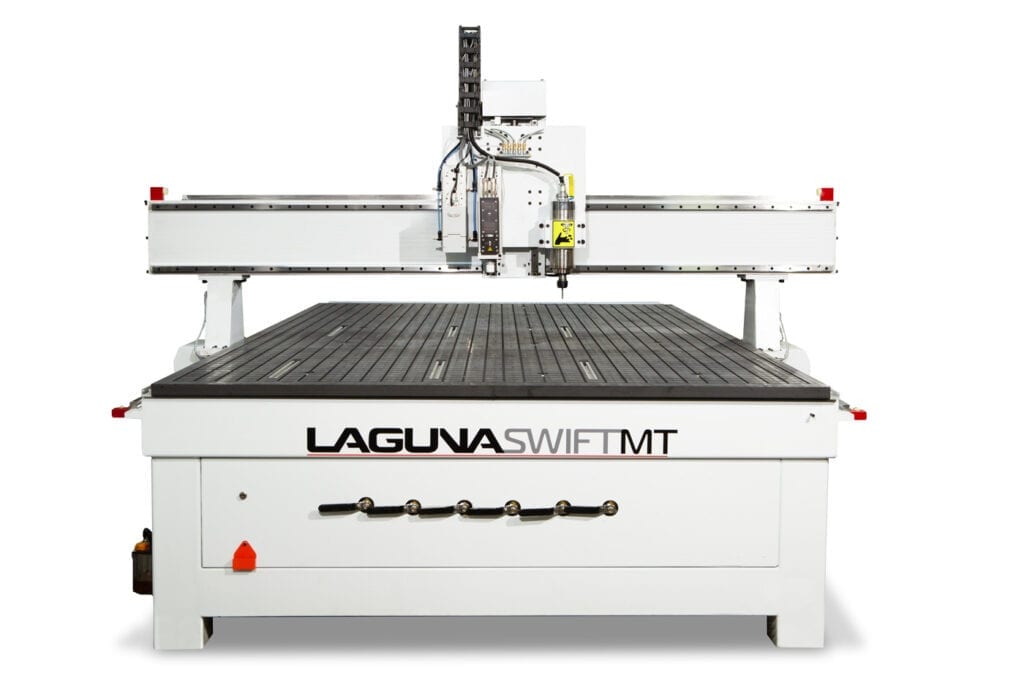
Our favorite CNC router for cutting acrylic is the Swift MT (Multi-Tool). This well-rounded machine can handle cutting, routing, and creasing on a wide range of materials including wood, cardboard, rubber, foam, leather, carpet, gaskets, aluminum, veneers, and, of course, acrylic.
It features a 4- to 6-zone phenolic vacuum table to keep the material secured in place, a tangential knife system, and a multi-tool head. It also comes with a 7-inch gantry clearance, helical rack and pinion on the X and Y axes, and a ground ball screw on the Z-axis.
The liquid-cooled industrial spindle produces 3 horsepower, and you can choose from 3 different table sizes depending on your specific needs. The one-piece, welded steel frame is sturdy enough to withstand the maximum cutting speed of 60-inches/minute.

In other words, you can cut acrylic and other materials without worrying about vibrations. The RPM range is between 6,000 and 24,000, which is ample to accommodate the recommended 18,000 RPM for cutting acrylic.
With the Swift MT CNC router, you can do just about anything. From making intricate signs to producing beautiful 3D engravings, this machine will take your acrylic cutting to the next level.
Special Financing
If you are looking to upgrade your workshop to include a CNC router that can cut acrylic, then now is a perfect time. We are currently offering special financing terms until June 30, 2020. Under this special financing plan, you can purchase one of our CNC routers and make no payments for the first three months.
There's another option to make $99 monthly payments for the first six months. You can choose whichever financing plan that works best for you. Start working on your new CNC router without worrying about making monthly payments right off the bat.
Get in Touch
Want to learn more about our CNC routers and other products here at Laguna Tools? It’s easy to get in touch with our experts by filling out our online contact form. One of our representatives will be in touch with you shortly to answer any questions you may have about our current lineup.


