I love the lock rabbet joint. It’s incredibly strong, providing lots of glue surface and mechanical grab between the parts. With these set up tricks the joint is very easy to do on the router table. This joint is great for boxes and drawers.
The bit

The joint is made with a slot cutting router bit. Use a 1/4" slot cutter for 1/2” thick material, and follow that proportion rule for whatever material you’re using. The size of the slot cutter is half as big as the material thickness.
This technique allows you to cut the joint AND the groove for the drawer bottom. As a result it works best to use 1/2" thick stock, allowing for a 1/4" thick bottom.
Set up
Plane your material to thickness, trying hard to precisely hit 1/2" thickness. It’s hard to beat digital calipers when it comes to accurately measuring stock thickness. Alternatively, you can use Baltic Birch plywood. It’s slightly under 1/2" thick (12 mm) but works fine.
Install the bit in your router table. Be sure the router is unplugged whenever you’re doing set up or making changes.

Set the height of the bit so the top of the carbide cutter is even with the top of the material.

Mark the center of the material (1/4”) and position the fence so the depth of cut hits that center line. The rule to remember for this joint is 1/4", 1/4", 1/4". Use a 1/4" slot cutter. Set it 1/4" above the router table, with a 1/4" depth of cut. Easy peezy.
Test cut

Make a test cut. Hold the piece horizontally on the router table with the end grain against the fence. Support the material with a piece of scrap to prevent it from twisting away from the fence, and to prevent chipping when the router bit exits the cut. Use a push pad to move the material past the bit.

Cut the mating piece for the joint, holding it vertically against the fence.

Test the fit. One of three things will happen.
- The fit is perfect with the tongue easily slipping into the groove. Congratulations! You got it on the first try. (Rare, but possible.)
- The tongue is too big and won’t fit into the groove.
- The tongue is too small and is sloppy in the groove.
Resolving fit issues
The first aspect of resolving issues with the fit of the joint is understanding what makes a good fit. In a joint like this you should be able to slip the parts together with hand pressure. You shouldn’t have to use a mallet to drive them together. To judge if the joint is tight enough, you should be able to lift a dry fitted joint without the joint readily falling apart.
As you work through adjusting the router bit for a perfect fit, keep in mind that the groove or dado made by the router bit is always the same size. The only variables are the height of the router bit and position of the fence. The position of the fence doesn’t affect the fit of the joint.
If the joint is too tight, the router bit is too high. Lowering the router bit will result in a smaller tongue.
If the joint is too loose, the router bit is too low. Raising the router bit will result in a larger tongue.
Make changes to the height of the bit and do additional test cuts until the fit is perfect.

If the tongue is a good fit in the groove but the piece looks like this, you didn’t accurately surface your material to 1/2". It’s slightly too thick.
If you find that you’re getting a lot of chipping on the cuts, which often happens when using Baltic Birch plywood, you can eliminate the chipping by making your router table fence zero clearance. This video shows you how to do that.
Groove for the bottom
When you’ve got the set up perfect, cut all the joints. If you’re making a box you’ll cut four tongues and four dadoes. If you’re making drawers the tongues are cut in the drawer front and back, the dadoes in the sides. Don’t change the set up before making the grooves for the bottom.

Position the tongue pieces against the fence and push them past the bit. Note that the rabbet is away from the fence for this cut.

Position the dadoed pieces against the fence and push them past the bit. Note that the dado is against the fence for this cut.

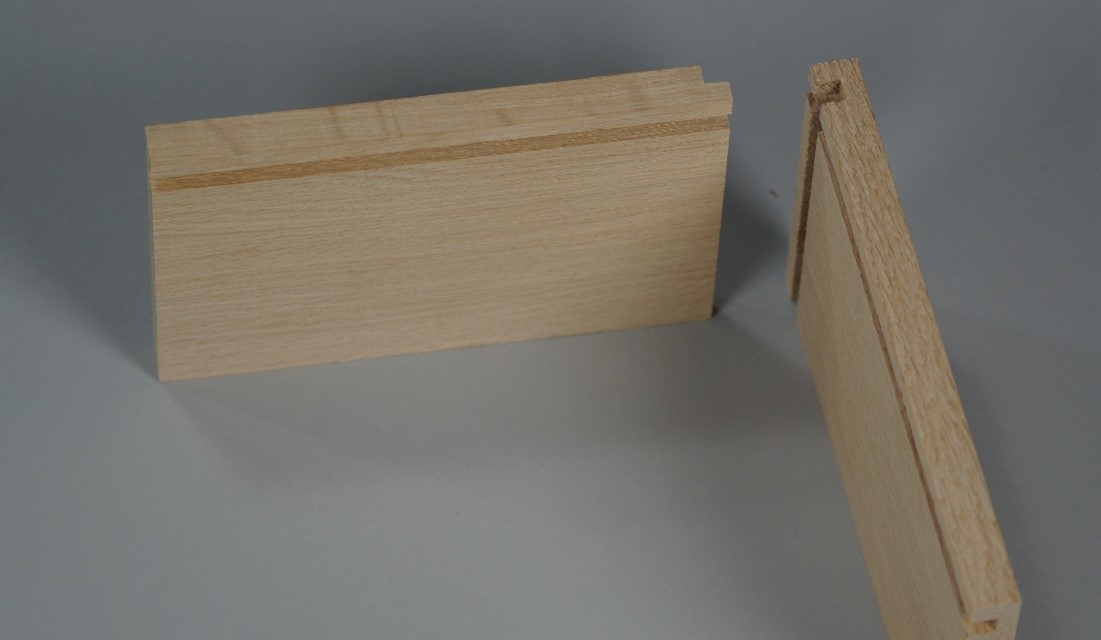
The joint is complete and ready to glue up.
Check out this article on making a mortise and tenon for more on router table joinery.


