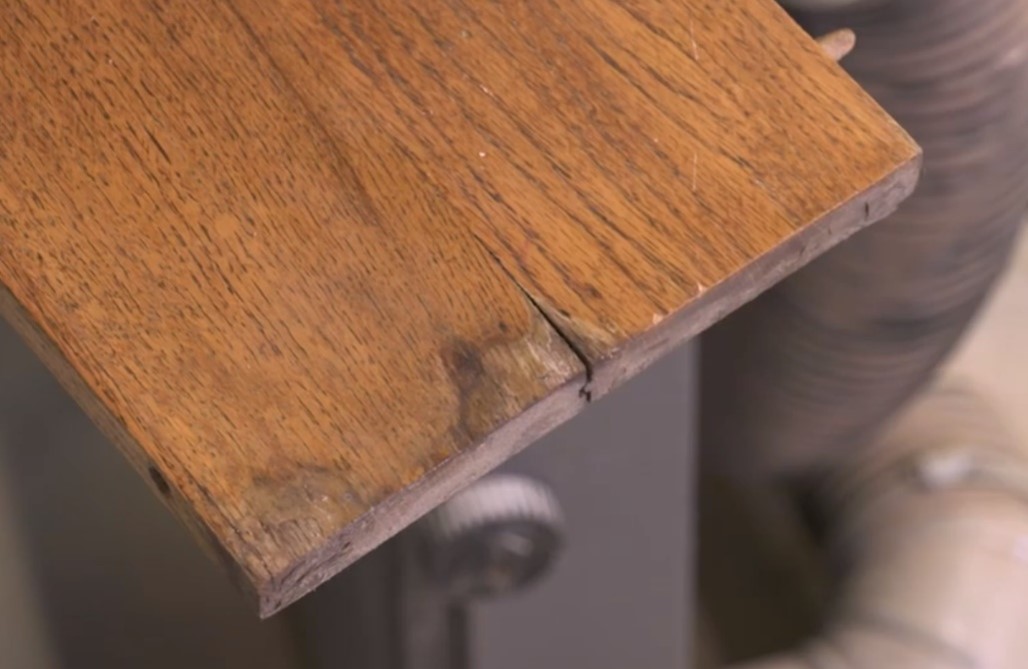
If you do any woodworking at all, I bet people bring you items like this all the time. This table leaf is from an older table that the owner really likes, but all of the leaves have cracks like this. It’s an easy fix that we’ll cover here. Check out this video for comprehensive how-to on this project.

The leaves developed cracks on the original glue joint. It looks like they may have become wet, maybe from standing on end on a damp floor. The original joinery is interesting, a tongue and groove. We don’t duplicate that on the repair.
How NOT to do the repair
You may be tempted to simply force glue into the crack and clamp the heck out of it. With enough glue and enough pressure you could probably successfully close the crack, for a while. But you’re treating the symptom, not the problem. Something introduced stress to the material and caused the crack. Forcing it closed will only remedy the problem for the short term. Eventually the crack will open again, or the wood surrounding it will crack.
The best way to do this repair is to cut the leaves, cutting right through the crack, clean up the cuts, and create a fresh glue joint.
Cut the leaves

If you have a bandsaw use it to rip the boards. Set up a fence on your bandsaw that positions the cut directly in line with the crack. The benefit of doing this with a bandsaw instead of a table saw is the exceptionally thin kerf. The kerf of a bandsaw blade is about 25% as big as even the narrowest table saw blade. The thin kerf and minimal stock removal helps the grain patterns remain aligned when you put the leaves back together.
Clean up the cuts

The bandsaw or table saw will leave saw marks on the fresh cuts. These marks need to be removed before you can glue the parts back together. The easiest way to do this is by using a jointer. In addition to removing the saw marks the jointer guarantees that the resulting edges are perfectly straight, which is important for a good glue up.

Joint both pieces from the leaf.

The joint is ready to be reassembled when you can put the parts together with nothing but hand pressure and the joint closes.
Insure alignment

Before gluing the parts back together add biscuits, dominos or dowels to the joint. This isn’t done to add strength, the joint is plenty strong without them, it’s done to help with alignment of the faces of the pieces. The parts already have finish on them and can’t be sanded flush after reassembly so it’s very important for the faces to be flush as they’re clamped.
Glue it up

Apply glue to the joint.

Run your fingers across the joint as you apply clamp pressure to make sure the faces are aligned. Manipulate the pieces as needed to get alignment.

At the ends of the joint you can add clamps that bridge the seam. As you tighten these clamps they’ll pull the faces into alignment. Remove the alignment clamps after you’ve tightened the bar clamps.
Clean up

The glue squeeze out needs to be cleaned up before it dries. If it dries completely it will have to be sanded or scraped off, and that will mar the finished surface. Instead, wipe the wet glue with a damp rag to remove the glue beads.

The result, when done correctly, is a seamless repair. The heirloom table this leaf is from is ready for many more years of service.


