Use your CNC router, and a little wood stain, to turn pictures into engravings. The process produces a tintype appearance.
The original image

This can be done with any picture, but higher contrast works better. This image would work, but it’s a little busy. It has too much background.

You’ll get a better result if you use photo editing software like PhotoShop or PicMonkey to isolate the image from the background so it stands out.
Handling the image in VCarve Pro
VCarve Pro version 10 includes Photo VCarve. If you don’t have that version you can also get Photo VCarve as a piece of standalone software. The standalone software can also be used to create lithophanes. The version included with VCarve Pro cannot be used for lithophanes.

Create a new job in VCarve Pro, providing the dimensions of your material. Close grained, light colored, wood like maple works best for this process.

Drag the image onto the workspace and size it.

Open the toolpath menu and locate the Photo VCarve icon.

With the image selected, choose the bit, a 60-degree V-bit works well, and set the other parameters as shown here. These numbers provide a good starting point, but it’s worth trying different V-bits and different settings to see how your image cuts. Changing depth of cut by as little as .010” can have a significant effect on the look.

Use Preview Toolpath to check the result. Set up a Profile toolpath or other cuts as needed for your project and save the toolpath to a flash drive.
Making the cuts

Mount the material on your CNC router, install the router bit and zero the X, Y and Z axes. Start the toolpath.

There’s no contrast at this point in the process, so the image won’t look like much. Don’t panic. It’ll get better.

Swap bits and make other cuts required for the project. Remember to re-zero the Z axis when you change bits.
Staining and sanding

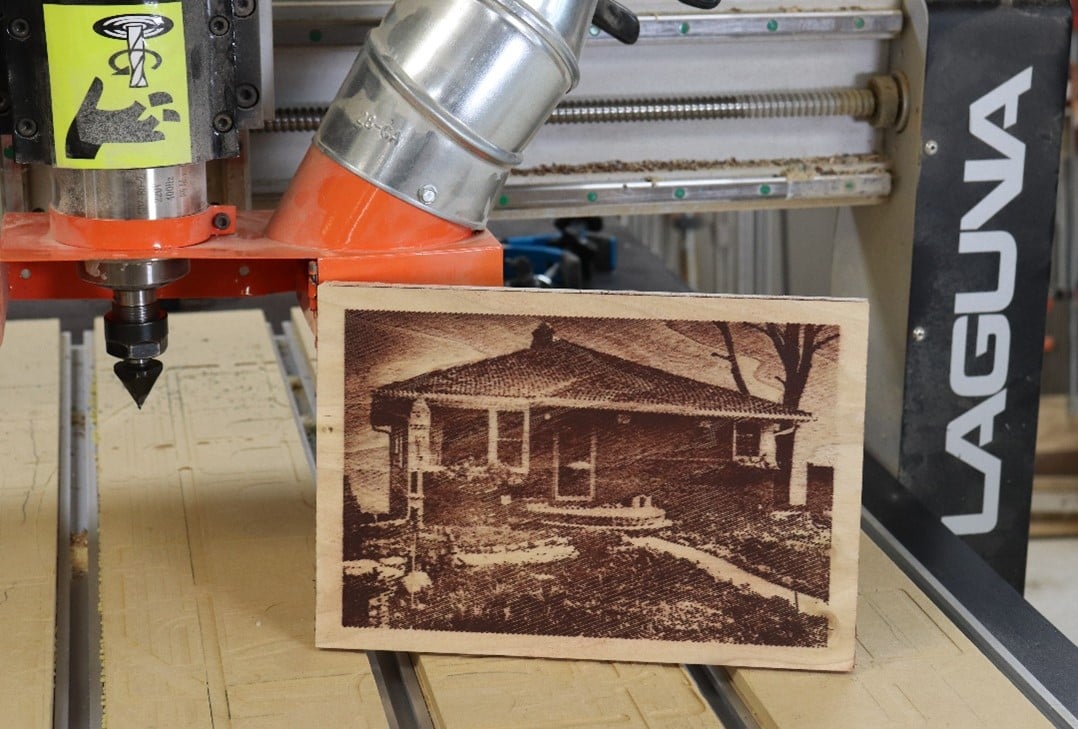
At this point you can begin to see the image, but it’s ghosted. If you’re happy with how the image looks at this point, you can be done.

Adding stain will give the image greater contrast. Use a brush to apply the stain so you can work it into the V-grooves. Brush in the same direction as the grooves, 22.5-degrees in this case.

Allow the stain to dry and sand the surface with 150-grit sandpaper. The image will appear.


Know when to stop. If you over sand the piece it’s possible to remove all or nearly all the stain, and there won’t be any contrast or image remaining.

Apply a topcoat. A gloss or semi-gloss topcoat often further deepens and enhances the look of the image.
This is a fun process. Use this article as a starting point and experiment with different bits, settings, material, stain and topcoats to see what kind of result each change gives you.


