Old School Meets New Tools. Japanese style joinery is awe-inspiring craftsmanship that’s usually cut with hand tools. Most people don’t have the patience to develop those generations-old skills, but what if you could recreate the look and function of traditional joinery with a tablesaw?
 A Scarf Joint Matches Boards End-to-End. This very traditional looking scarf joint can be cut entirely with power tools. If you take it step by step, it’s not that hard to execute. Of course, an accurate tablesaw fence and a good blade certainly help.

Start with the Vertical Cuts. Use a shop-made tenoning jig, with toggle clamps to secure the workpiece. A thick ¼” kerf blade makes this cut in one pass. Learn how to make a tenoning jig for your Laguna Fusion tablesaw here

Flip one Board, and Notch Them Both. The offset notches start to make sense once you flip the maple board over. The inside cheeks of these cuts should align, so the outside of the boards will stay flush. Layout the remaining notches on both boards.

Dado Notches. Now switch to a full ¾” dado stack on your tablesaw, and make notching cuts to remove most of one leg of the joint. A miter gauge helps guide the cut, and luckily all of these cuts can be made with the workpiece horizontal on the saw.

Flip and Repeat. Now turn the workpiece over, and make a ½” wide notch from the other side. Raise the dado blade incrementally, until the tongue fits in the groove. Complete this same cut on both boards.

Peg the Scarf Joint. Glue would certainly hold the joint together, but you can add a nice decorative element with a zebrawood cross-peg. Create a 3/8” mortise all the way through the joint, and reinforce it with a snug-fitting peg.

Mitered Saddle Joint. Add a touch of elegance to a traditional saddle joint by mitering one side. It’s fun to watch people scratch their heads trying to figure it out. Luckily, it’s another great joint that you can make at the tablesaw.

Dado Down the Middle. Start with a tenoning jig to make an accurate dado notch on the end of the board. This cut is centered, and removes about 1/3 the width of the post.

Square Tenon Cheek on One Side. Create a simple cheek on the mating piece, just like you were making a tenon, but only on one side. Keep making passes until the workpiece abuts the fence.

Angled Dado Work. Then flip the workpiece over, and cut an angled tenon cheek. Raise the blade as needed until the tenon fits the saddle mortise. Here, the board is clamped to a miter gauge, which is angled to 45 degrees. Make a few passes until the tenon cheek is nice and flat.

Miter Madness. Then switch to a single kerf blade, and trim the parts at a 45-degree angle, but just on one side of the joint. Make sure to clamp the board to a miter gauge so it doesn’t shift.

Right off the Saw. It’s extremely satisfying to fit complex joinery right off the tablesaw. Check out the latest classic tool lineup including the Fusion F2 tablesaw.

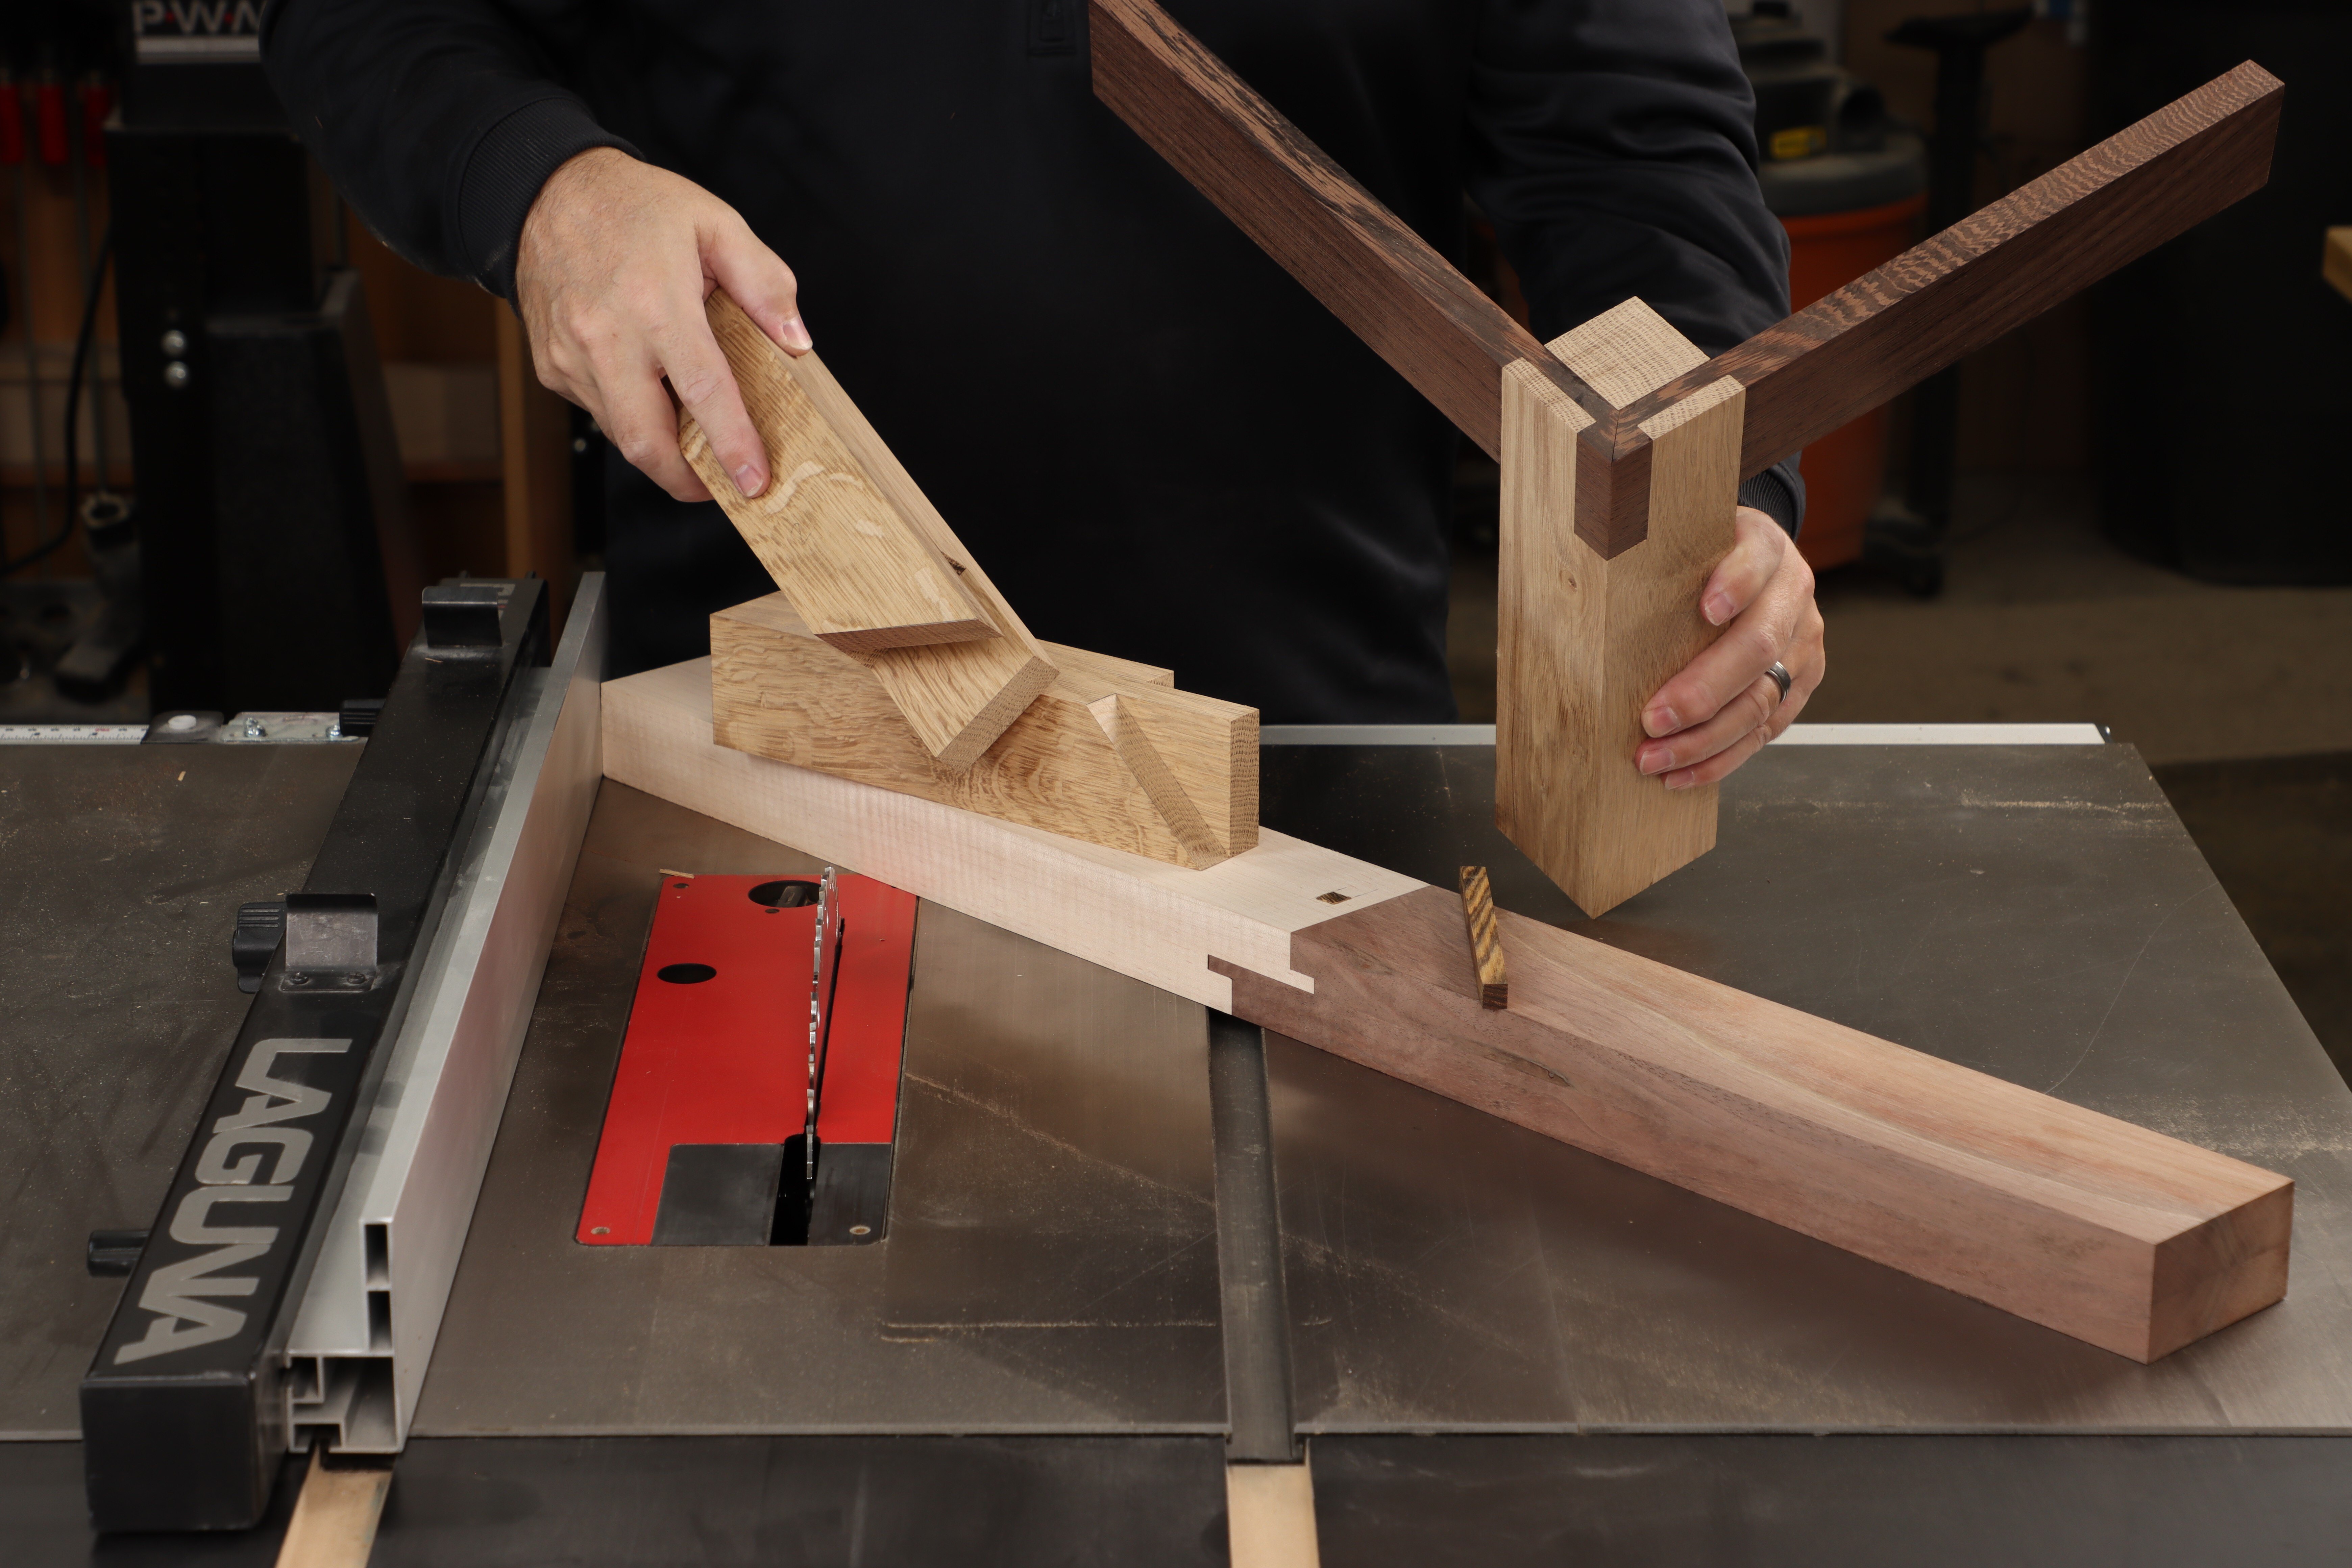
The Notched & Mitered Castle Joint. This variation on a castle joint includes notches in the wenge rails, so the joinery must be precise. The rails are mitered for a clean corner where they meet. Incredibly, this too can be cut entirely with power tools.

Criss-Cross Dado Notches. Cut two notches in the end of the post, oriented 90 degrees from each other. The height of the 3/8” wide dado blade should match the width of your rails.

Notches to Match. Now use a full ¾” wide dado stack to cut notches to fit around the post. Aim for a snug fit, that’s not too tight. Blade height is half the thickness of your wenge rails, or 3/8” in this case.

Miter the Ends to Fit. Finally, trim both rails at a 45-degree angle. Then test fit your parts to see how you did.

Just Slide the Rails in Place. The notched and mitered rails fit over the post with precision. While I’m truly inspired by traditional Japanese woodworking, you can get a similar effect with the power tools in your shop. If it’s time for an upgrade, shop classic tools here.
Safety First. Guards are sometimes removed for clarity in blogs and videos. Always use all appropriate safety devices.
 |
|