You don’t have to rely strictly on lumber yards or hardwood suppliers for your woodworking material.
If you have a chainsaw, you can do your own milling. This approach is especially handy if you’re looking for smaller live edge slabs, or material for bowl blanks.
Set up
Cut the log while it’s still green (the wood is wet). Do the milling as quickly as possible after the tree is cut.
You don’t have to have a ripping chain on your chainsaw, but be sure the chain is sharp. This process is easiest if the log is shorter than the bar on your chainsaw, but (spoiler alert) that isn’t a must.
Don’t cut from the end grain of the log. It’s MUCH easier to cut through the bark, long ways. Lay the log on a couple 4x4s so it’s up off the ground and can’t roll.

Give yourself lines to follow by using a level to make plumb lines on the end grain of the log.
As you’re deciding on the thickness of the planks you’ll cut, keep in mind that the cuts won’t be perfect, so you’ll have some flattening to do after the wood is dry.
Plus, the wood will shrink as it dries. So, lay out your cuts at least ¼” thicker than the finished thickness you want. Keep in mind that the chainsaw has a HUGE kerf, so you’re losing a fair bit of material to that.

Align the bar of the saw with the lay out line and position it perpendicular to the end grain. Rip your boards. Don’t cut all the way through. Stop approximately 1” up from the bottom.

If the log is longer than your bar, make a second cut from the opposite end of the log, again stopping 1” up from the bottom.

Finish the planks by standing the log on end, keeping it on the 4x4s, and cutting through the final 1” of material you left at on the cut.

You can cut larger scale logs with a different approach. These cuts will be made from the end grain of the log.
A crosscut chain can do this, but a ripping chain will make your life easier. You may also need a longer bar if the log has a large diameter. Mark your cuts on the end grain.

Align the bar with your lay out lines and start the cuts. This is a more difficult process than the first approach because you have to freehand cut the length of the log. But the benefit is getting much larger slabs.
Take your time and make corrections as you go. You may want to lay out your cuts for extra thick slabs to allow plenty of room to flatten the slabs later, just in case your cuts aren’t great.

On a large diameter log you’ll need to work from both sides, alternating your cuts from each side.

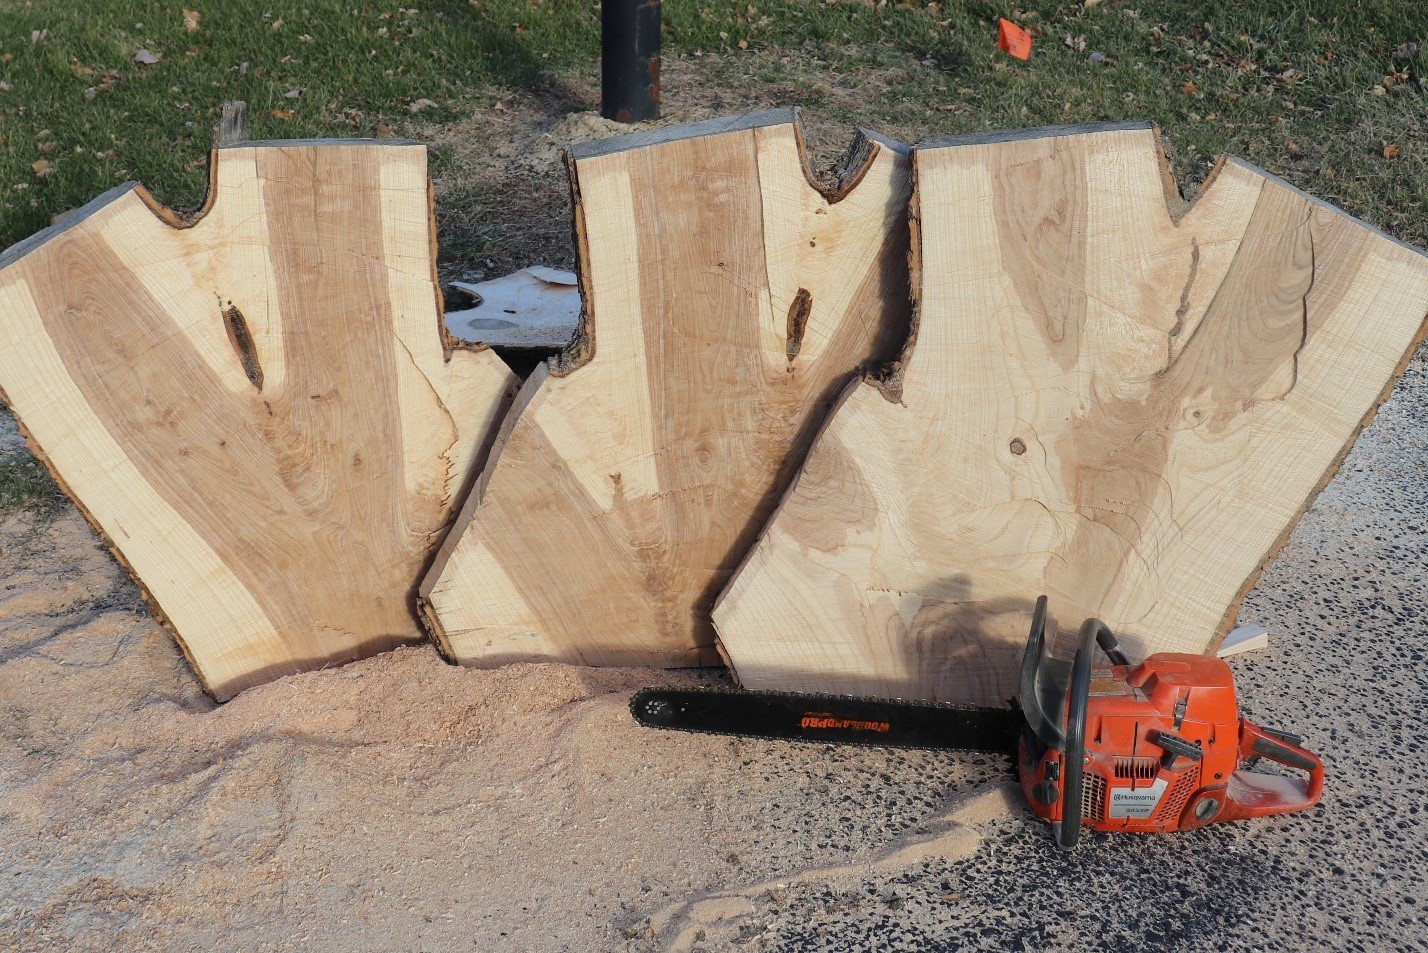
This ash log was definitely worth the effort! It yielded beautiful pieces.

A moisture meter is a must if you’re milling your own lumber. Freshly cut lumber will have a very high moisture content and won’t be ready to use in your projects until it’s had a chance to dry. This meter penetrates up to ¾” for its readings. Depth of reading is important on thick stock.

Prep the wood for drying by painting the end grain. Task-specific end grain sealer is best for this, but if you don’t have any on hand you can get by with latex paint.
If the bark is still on, leave it on. We want the wood to dry, but dry slowly. Drying too fast can cause lots of cracking. That’s why the end grain gets sealed and the bark stays on. Those “skins” slow the drying process.

Stack, sticker, and forget you own this stuff for a while. The stickers provide space between each piece so you get uniform air flow. That’ll facilitate drying. As a general rule it takes about one year per inch of thickness for wood to dry. Air drying should get it down to 8-12%. You’ll get some great info from this video about air drying lumber.
It’ll take some practice, and a sharp chain, to produce nice pieces using this process, but it’s worth it. The next time you see a tree getting taken down, grab a log or two.


