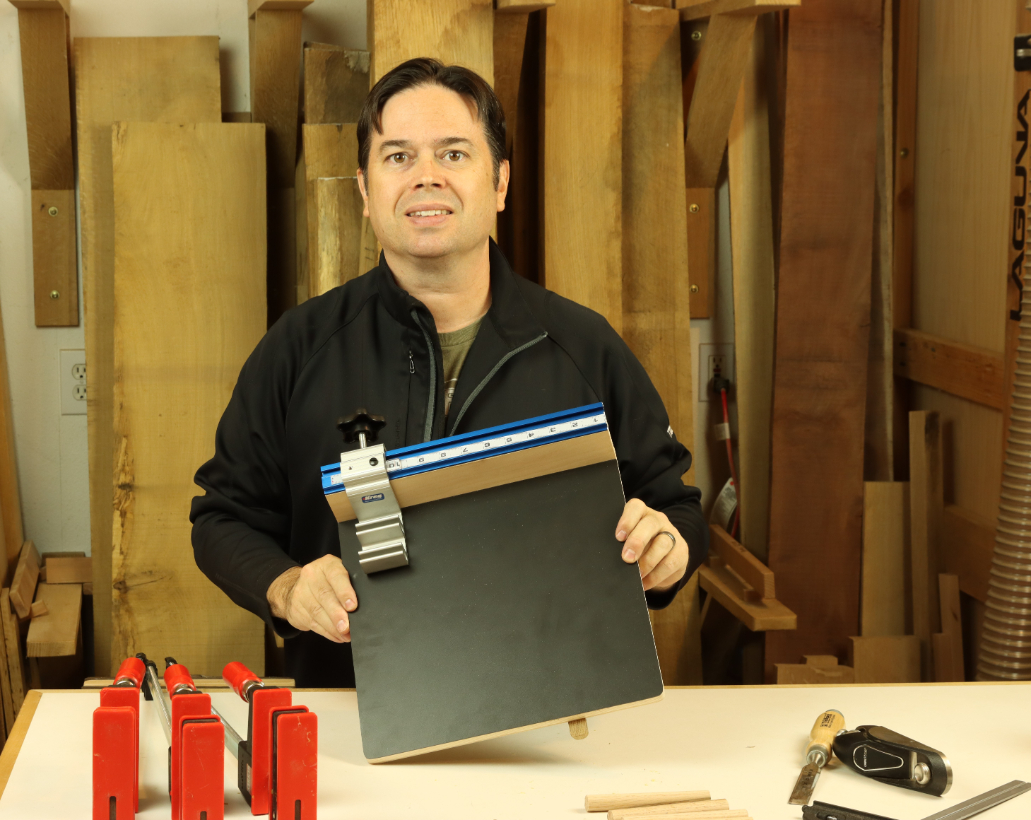
Most serious woodworkers have a crosscut sled for their tablesaw, but do you have a crosscut sled for the bandsaw? They’re a handy accessory that will let you cut dowels and small parts to size with ease and precision. Have you ever tried to cut a short dowel to length at a miter saw? If so, you know how hazardous it can be, and usually results in the dowel ricocheting off several walls of the shop before coming to rest in an indeterminate location. Solve the problem once and for all with a durable DIY crosscut sled for the bandsaw.

Start by trimming a piece of ½” Baltic Birch plywood to 13” square at the tablesaw. This will form a stable base for the bandsaw sled.

Apply contact cement with a smooth paint roller to the Baltic Birch plywood, as well as a piece of plastic laminate. Let the contact cement dry to a glazed appearance, before applying the laminate to the substrate. Finally, apply firm pressure with a J-roller or workpiece support roller from the shop.

Trim the laminate flush with the plywood base with a compact router and bearing-guided flush trimming bit.

Install a dado blade and sacrificial fence on the tablesaw for the next step. Cut a shallow rabbet on one edge of the jig base to receive a ¾” plywood fence. The rabbet only needs to be about 1/16” deep.

You’ll also need a shallow groove on the bottom of the plywood base to receive a hardwood runner. The location of the groove is determined by the size of your bandsaw. I’m building this crosscut sled for a Laguna 1412 bandsaw, so the groove is located about 3-1/2” from the edge of the plywood. The width of the groove needs to match a hardwood runner that fits precisely in the miter slot of your bandsaw. So make the hardwood runner first, and mill the groove to fit the runner.

I previously sized a hardwood runner to the miter slot in my bandsaw table. Aim for a fit that lets you slide the runner back and forth without any binding. If you were careful setting the width of your dado, the runner should drop right into the groove with a friction fit. Secure the runner permanently with glue and clamps.

Next, pre-drill and countersink holes screws that will attach the fence to the plywood base from underneath. A drill press makes quick work of these repeated holes.

Glue the fence in place, making sure it stays square to the jig base.

Reinforce the glue joint with five #8 x 1-1/2” wood screws, for a sturdy fence that will last for years.

Install the track system on top of the fence with four 5/8” long pan head screws.

Next, add the self-adhesive tape measure to the track. Set the stop block a known distance from the bandsaw blade (shown with 10” wood block) and align the 10” mark with the cursor on the stop block. Press one end of the tape in place, then remove the stop block to finish installing the adhesive tape.

Now give your new bandsaw crosscut sled a try. It’s the perfect accessory to cut dowels or loose tenon stock to length for your projects.

With your new crosscut sled, you’ll make quick and accurate work of trimming small parts to length in the shop. Get busy in the workshop this week, and start by making this handy crosscut sled!
Willie is a Freelance Writer for several woodworking magazines, blogger, and YouTube creator who enjoys making traditional arts and crafts style furniture.
Find tips and tricks on his channel The Thoughtful Woodworker.


