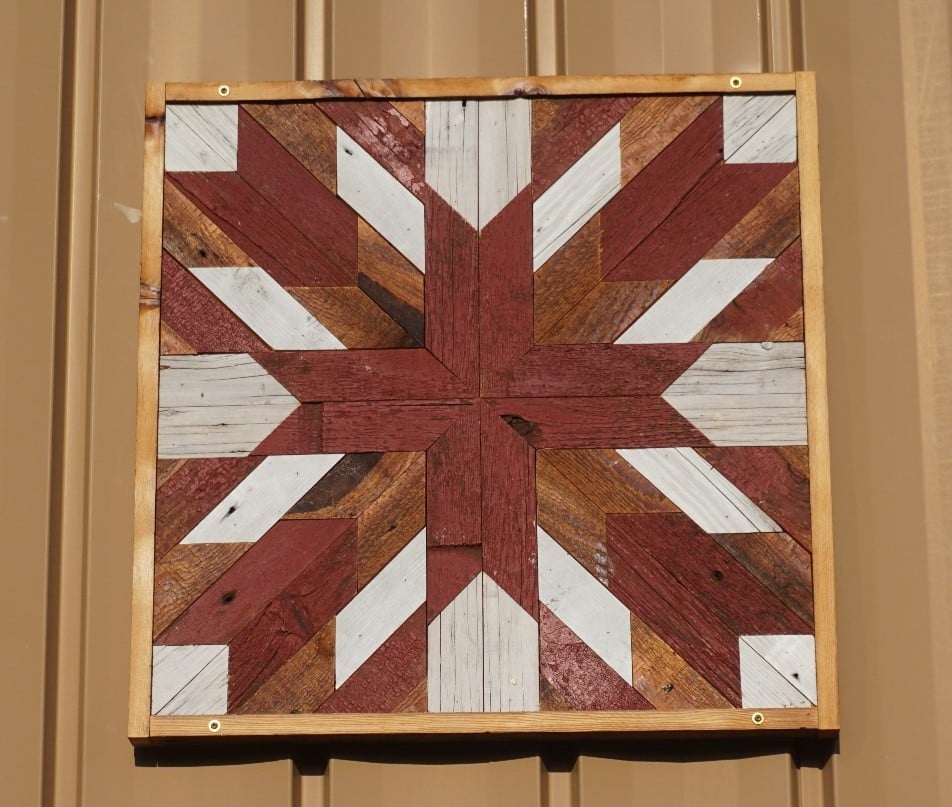
Barn quilts are fun to make, and a great way to let your creative juices flow. The barn quilt shown here is 24” x 24”, but you can make yours as large or small as you like, ready to be displayed inside or outdoors. The color contrast comes from using species of wood with contrasting colors or, in this case, using boards that were painted different colors. This article provides you with an overview of what it takes to make a barn quilt.
A little history
It’s a little hard to pin down the real beginning of barn quilts, but many people attribute them to a woman in Ohio who wanted to honor her mother. She had a quilt square painted on her barn, and eventually other quilt blocks were painted.
This led to a quilt trail: a guided tour of the countryside tp view barn quilts and check out scenery. 46 states now have quilt trails like the one that started in Ohio.
Where to get a pattern
To figure out your barn quilt you can jump online and search for quilt square images. Use those to develop the geometric design you want. This video takes you through the process of making a barn quilt. It also provides a PDF plan for you if you want to build the exact barn quilt shown here.
Material
There are a number of ways to solve the problem of how to achieve the color contrast required for a barn quilt. As you choose your material keep in mind where the barn quilt will “live” when it’s done. If it’s going to be outside you need to choose an exterior material, or plan on sealing the project after it’s complete.

Barnboard is a great choice for a barn quilt. Typically weathered by being outside, it has a very organic look and feel. Thickness commonly vary, and that can add another dimension to your barn quilt. The barnboard I found had previously been painted white, red and pink. Some boards were a naturally weathered brown.

You can also get color contrast by using new materials and intermixing species. Cherry, maple, walnut, padauk, purple heart….all have distinctly different colors and would provide excellent contrast.

Another way to achieve contrast is by staining or painting new material. With this approach you could even use plywood for your barn quilt pattern parts. Aniline dye provides really great vibrant colors (see Sources below).
Machining parts

Rip your parts to width. On my project all of the parts are the same width, but they don’t have to be. Keep track of how much of each color and each size you need to be sure you rip enough stock.
It’s better to over produce than to run out later. If you’re working with reclaimed material be sure to check for fasteners before cutting anything. A metal detector makes short work of this (see Sources).

Cut your pieces to length using a miter saw or the miter gauge on your table saw. Be sure to use a stop block where necessary to guarantee uniform length. If you’re cutting parts with angles on them, as shown here, remember to make lefts and rights so you have mirror image parts.
Substrate and glue

The barn quilt is made by fastening the small pattern parts you cut to a backer or substrate. Exterior barn quilts need an exterior material used for this. I’m using 1/2" thick MDO, medium density overlay.
It’s exterior grade, and commonly used by sign makers. The backer needs to be thick enough to allow using brads to hold the pieces while the glue dries.

Exterior barn quilts should be assembled with exterior glue (see Sources). Any glue can be used on barn quilts that will be indoors.

It’s very helpful to add lay out lines to your backer board to help you locate and align the parts as you install them.
Build your quilt pattern

Spread glue on the back face of your parts.

Locate the parts on your layout lines and use a brad to hold them in place till the glue dries. A 23-gauge pinner works great for these applications, leaving such a tiny nail hole that it’s nearly invisible.

Repeat this process with the remaining pieces. As you work your way toward the edge of the board, cut parts to fit between the pieces you already have in place and the edge.

Capture the outside edges of your barn quilt with a frame. Glue and brad the frame to the edges of the backer and quilt pieces. If necessary, seal the barn quilt with an outdoor sealer.
Sources
Aniline dye


