Bowl turning is a fun hobby all by itself. With today’s interest in working with epoxy you can combine bowl turning and epoxy to create epoxy accents in your bowls. This article gives you a nice overview of the process. Watch this video for complete details.
Prep the blank

Cut the blank round and drill a hole in it. The diameter of the hole must match the jaws of the chuck you’ll be using. Make the hole slightly smaller than the largest diameter the jaws open to. This hole is drilled in what will be the top face of the bowl when it’s complete.
Speed
Lathe work typically consist of three steps; roughing, shaping and sanding/finishing. It’s very important to run the lathe at the correct speed for these steps. The larger the diameter of the bowl blank, the slower it should spin.

This chart will help you set your lathe to right rpm. Make sure you set the speed BEFORE putting the bowl blank on the lathe.
Turn the bottom of the bowl

Turn the outside of the bowl to make it round, then start evolving the outside shape of the bowl.

Mark out the size of the tenon you want to make on the bottom of the bowl. The diameter of the tenon should be slightly larger than the smallest diameter of the closed jaws.

Cut the tenon using a square-nose chisel.

Sand the exterior of the bowl using a 6” sanding disc on a cordless drill. Sand to at least 220-grit.
Work on the inside

Begin hollowing the interior of the bowl.

As you’re hollowing the bowl use bowl calipers to monitor how thick the walls and bottom are.

Continue working on the interior until you wall a wall thickness of about 3/8”.

Sand the bowl interior.

Mark out the diameter of the recess.

Cut the recess approximately 1/4" deep with the square nose chisel.

Sand the recess by wrapping the sandpaper around a block of wood in order to keep the bottom of the recess flat. Don’t sand beyond 120-grit or you might have an adhesion problem with the epoxy. The area surrounding the recess can be sanded to 22-grit or higher. Don’t put any finish on the bowl yet. Epoxy may not stick to a finished surface.
Epoxy!
Jess Crow of Crow Creek Designs is a well-known epoxy artist and was very helpful with this project. If you haven’t already you should check out her work and videos. This article will also provide you with in depth info on working with epoxy, pigment and mica powder. Epoxy work can be tricky. It’s best to practice on scrap before using epoxy on a project.

Make sure the bowl is perfectly level on your work surface. Use shims as necessary to make it level. If it isn’t level the epoxy won’t pour to a uniform depth and may spill over one side of the recess while, at the same time, being below the rim on the other side of the recess.

Mix the epoxy, add color and create your pattern in the recess. MakerPoxy is the brand being used for this project.

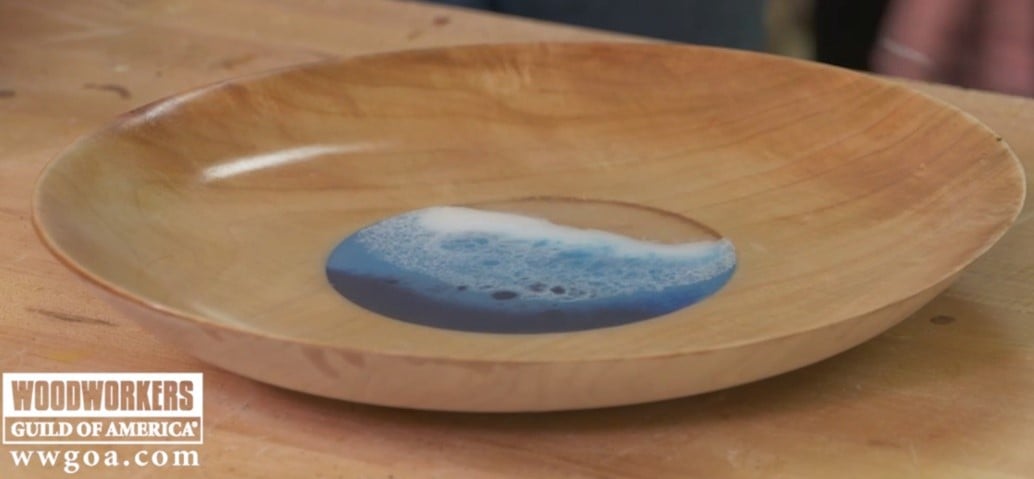
Create a wave by adding a stripe of white. The white needs to be a specific pigment in order to “lace” and create the wave look.

Use a heat gun to slightly dissipate the white toward the other colors.

Spritz the surface of the epoxy with isopropyl alcohol to create the lace look. Be sure to use 99% alcohol in order to get the best possible effect.
Allow the epoxy to cure (read the manufacturer’s directions for cure time) and finish the bowl with your choice of finish. Enjoy your bowl with epoxy accents!


