If you own a router table you can easily produce a mortise and tenon joint. Commonly used in furniture construction (tables and chairs) mortise and tenon joints are incredibly strong. With the setup tips provided here, they’re simple to make.
Router bits

Use a 1/4” upcut spiral bit for the mortise. An upcut bit, like a drill bit, will excavate the dust out of the mortise for you.

A 3/4" straight bit works well for the tenons.
Mortise and tenon rules of the road
A general guideline for dimensioning a mortise and tenon joint is to make the thickness of the tenon 1/3 the thickness of the rail you’re cutting it into, and twice as long as it is thick. So, a 3/4” thick rail gets a 1/4" tenon that’s 1/2" long.
Always make the mortise first, then make the tenon so it fits the mortise.
Router table set up
Install the 1/4" bit in your router table. Set the depth of cut so it’s 1/16” more than the tenon length. This allows a glue pocket beyond the tenon. Position the fence to provide the correct mortise location in the leg of your project.
Unplug the router whenever making changes or adjustments.

Gently slide a piece of scrap against the router bit and trace the end of the scrap on the router table fence. Do this on the infeed and outfeed sides of the cutter. This shows the start and stop point of the cut.
Lay out the mortise locations on the legs of your project with the layout lines on the face opposite the face the mortise will be cut in.
Cut the mortise

Cut the mortise in two passes. Instead of reducing the depth of cut, lay a piece of 1/4" thick material on your router table. Clamp it in place. Use this as a shim to reduce the depth of cut for the first pass. Position the leg over the cutter.

Align the far layout line of the mortise with the far line defining the position of the router bit. Plunge onto the bit and move the leg forward, toward the second layout line.

Continue cutting until the near layout line of the mortise aligns with the near line defining the position of the router bit. Stop the router and lift the leg off the bit.

Repeat the process without the 1/4" shim removed to take the mortise to full depth.
Cut the tenon
Install the 3/4" bit in the router table. When you’re preparing the rail material make extra pieces you can use for test cuts. It’s important that the test pieces are exactly the same thickness as the project pieces.

Mark out the approximate dimensions of the tenon on the end of the rail, and set the height of the router bit so it’s slightly lower than the layout lines. On the preliminary test cuts it’s better for the tenon to be slightly too large.

Cut a test piece, removing material from both faces. Support the piece with a piece of scrap. This prevents chipping as the router bit exits the cut, and helps keep the rail perpendicular to the fence.

Test the fit. The tenon should slip into the mortise with hand pressure. You should not need to use a mallet to drive the tenon in. Once the tenon is in there should be enough friction in the joint that you can pick up the rail, and the leg comes with it.
Adjust the height of the router bit as necessary to achieve a good fit. Raise the bit to make the tenon smaller. Make small changes and additional test cuts until the fit is correct.

When the router bit is the right height cut both faces of each rail. With a large support block behind the rail hold the rail on edge and make two more cuts to produce the shoulders on the top and bottom of the tenon.

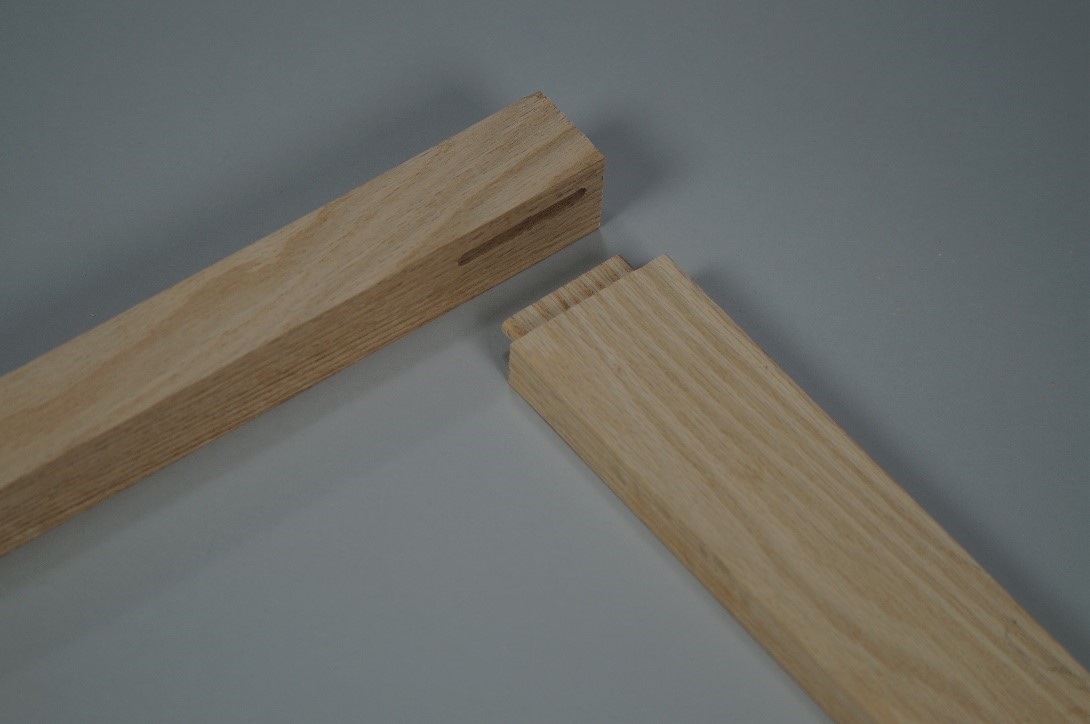
The ends of the mortise are round, but the corners of the tenon are square. Use sandpaper, a chisel or utility knife to slightly round the tenon’s corners until it fits in the mortise.
Check out this article on lock rabbet joints for more on router table joinery.


