If you never got comfortable cutting perfect miters, or you simply want to make a picture frame with a little different look, this project is for you.

This approach relies on a router table equipped with a rabbet bit. This particular bit is capable of cutting different size rabbets, depending on what bearing it’s equipped with. For a frame it’s set up to cut a 3/8” rabbet.

Working with test pieces, set the height of the bit to half the thickness of the material, or slightly below that. The test pieces must be EXACTLY the same thickness as the project pieces. Be sure the router is unplugged for all set up changes.

Use a straight edge to align the face of the fence with the ball bearing.

Rabbet the end of two test pieces. Notice the scrap behind the piece that’s being cut. The scrap supports the piece being cut, keeping it perpendicular to the fence, and also prevents chipping as the router bit exits the cut.

Check your work. When the height of the bit is correct, the faces of the pieces you cut will be flush. In this case the rabbet bit is too shallow; it’s not set high enough above the router table. As you make height adjustments remember that the change you make in bit height has twice that effect on the resulting joint, because you’re cutting two pieces. If the step between the pieces is 1/16”, raise the bit 1/32”. The best approach on this is to raise the bit in very small increments, make additional test cuts, check your work, repeat. If your first cut is too shallow you can simply cut the same test pieces and rabbets again. If your first cut is too deep cut off the resulting rabbets and make new cuts.

When the height of the bit is correct, machine both ends of your rails. Be sure you rotate, don’t flip, the pieces so the rabbets are both cut on the same face. The rabbet cut is only made on the pieces that will be the horizontal parts of your frame.

Add feather boards to your router table fence and cut the rabbet that receives the picture, glass and backer. Don’t change the fence position or height of the bit. On the parts that have the end grain rabbet make this cut with that rabbet up, as shown.

Cut the long grain rabbet on the vertical components of your frame. These pieces don’t get end grain rabbets.

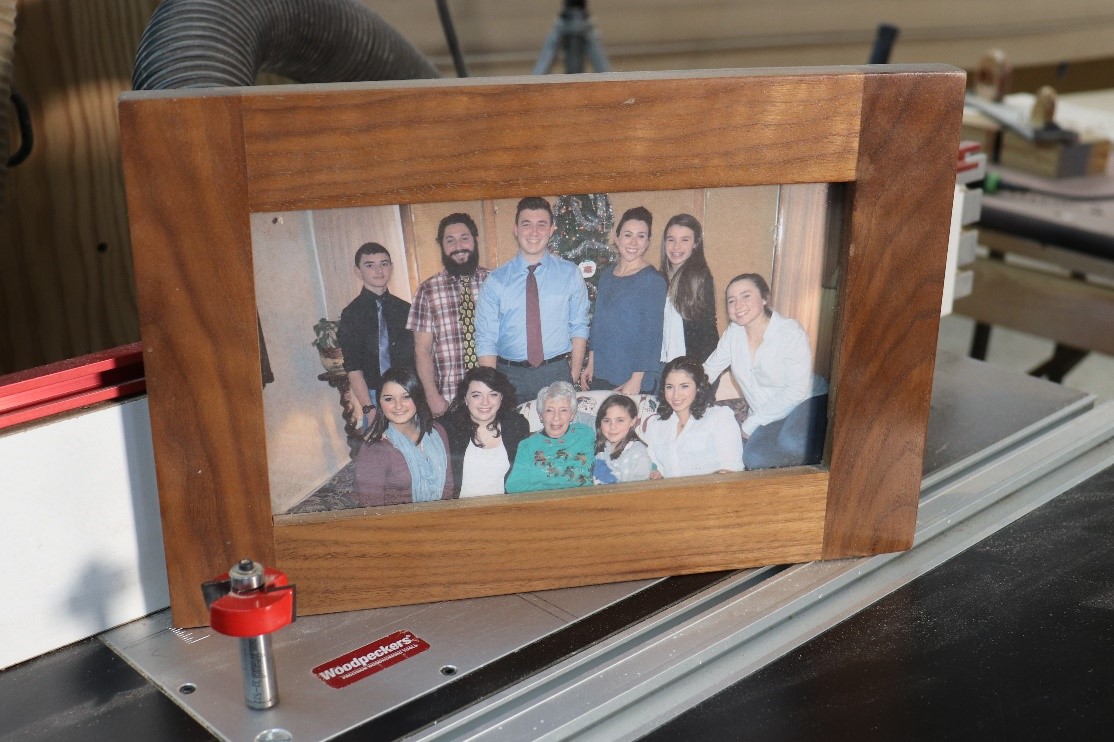
This is what the resulting joint will look like.

Glue the frame together by applying glue to the end grain rabbets and squeezing the joints closed with bar clamps. Use spring clamps to make sure the rabbets are seated vertically.

After the glue is dry sand and finish the frame and insert the glass, image and backer. Glazing points work well for holding everything in place.
Dimensioning your frame parts
Here’s how to calculate the sizes of parts you need to make a frame. We’ll call the vertical frame parts stiles, and the horizontal parts rails. The rails butt into the stiles, as shown in the first picture.
The length of the rails is equal to the horizontal dimension of your picture. If, left to right, the picture and glass are 10”, the rails are also 10” long.
To calculate the length of the stiles you need to know the width of material you’ll be using. Stile length is equal to the dimension of the image in that direction, plus two times with width of the rails, minus two times the width of the rabbet. As an example; frame width = 2”, rabbet is 3/8” wide, and the dimension of the picture in that direction is 8”. The stiles need to be 11-1/4” long.
If math, especially fractional math, isn’t your bag, a fractional calculator is a great addition to the shop.


