If you have a bathroom or kitchen that needs an update, consider re-facing the cabinets instead of replacing them. Re-facing cabinets simply means replacing the doors and drawer fronts, while keeping the existing cabinet boxes. If you’re changing the stain or paint color, you can refinish the cabinet frame in place, and start fresh on the doors and drawer fronts. For a small bathroom vanity, it’s a project you can finish in a long weekend.

The “before” of this bathroom vanity wasn’t too bad, but I’ve never been a fan of golden oak cabinets. Particularly when the grain pattern is a wavy flat-sawn look. However, the cabinet box itself was in great shape. Despite being over 20 years old, it showed little to no wear, making it a great candidate for re-facing.

Start the project by sizing all the door parts according to your plan. With a 50 tooth combination blade installed on the tablesaw, make a groove in the edge of all the rails and stiles. Make the groove in two passes, and flip the workpiece 180 degrees between passes, to ensure a centered groove. If you size the groove specifically to a ¼” hollow mortising chisel, it will save time in future steps.

Deepen the mortises for rock-solid door construction. The groove is only ½” deep, so I like to cut the mortise to a full 1” depth at the mortiser. If you don’t have a dedicated mortising machine, just use a drill press and hand chisel.

With a dado blade and sacrificial fence installed on the tablesaw, cut tenons on all the cabinet door rails. Raise the blade incrementally until the tenon fits snugly into the mortise.

Now turn the rail on edge, and haunch the tenon. The notch needs to be ½” x ½” to fit into the stiles.

I like to leave the tenons a touch oversized, and head over to the bench to hand fit each joint. A few minutes with the shoulder plane is all it takes to fit both doors.

Now that the corner joints are sorted, you can dry assemble the doors and get accurate measurements for the solid panel. Cut the panel so it’s about 1/8” undersized for both length and width. With the same dado setup and sacrificial fence, mill a rabbet along the back side of the panel. Expose ½” of the dado blade, and raise the blade until the tongue fits into the groove. Saving your offcuts to make test cuts is extremely useful when building cabinets.

Sand the face of the panel, as well as the inside edges of the rails and stiles before gluing the doors together. Give the mortises a liberal coat of glue, and spread a little on the tenons too. I usually dry fit and number the parts, so there are no surprises when it comes time for permanent assembly.

Solid wood panels will expand with seasonal changes, so it’s important not to glue the whole panel in place. However, since wood mainly expands across its width (and very little along its length), it’s okay to put a dab of glue at the center of the rails. This will prevent the doors from rattling over time.

Turn the door face down, and use a thin putty knife to center the solid wood panel in the frame. This gives the best appearance, but also makes sure there’s proper room for the panel to expand seasonally.

Use a 35mm bit to drill for cup hinges. My favorites are adjustable Blum hinges that can be quickly disconnected to occasionally remove the cabinet door. That feature is quite useful as you’re trimming them to final size and adjusting gaps between doors.

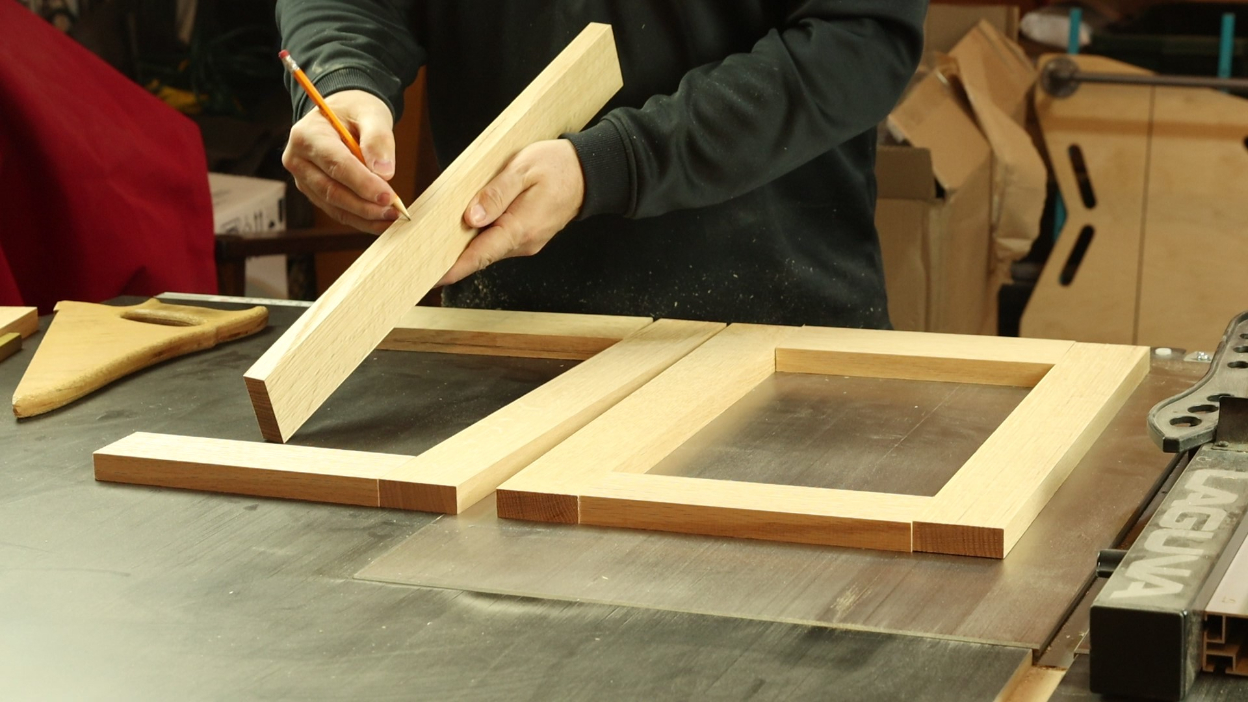
Now hang the new doors on the existing cabinet. Trim the stiles where the two doors meet, if needed, and adjust the hinges for an even reveal. Finally, take a measurement across the width of both doors. This will help you size the drawer front above correctly. The goal is to make the drawer front the same dimension as the pair of cabinet doors. Finally, take measurements for any additional drawer fronts you need for the project, and trim them to length.

Finish your cabinet and newly built faces as desired. The finish shown is a medium brown oil based stain (Rodda Fruitwood #19) and a lacquer topcoat which was applied with a sprayer. Make a plywood template for drilling accurate holes to mount the hardware. The hardware was sourced from House of Antique Hardware, which I’ve used on many occasions. Good hardware is the final touch on your project, so spend a few bucks more and get high quality hardware.


