How many times has it happened to you? You are finished with your CNC carving and realize the name is spelled wrong or something is not right with the design. This is what I will be writing about today: how to go back and fix something on a finished carve.
For the most part if you discover your finished piece has an error in it, then that carving just became firewood. This is one of the big drawbacks of CNC carving.

Unless you have planned out in advance where your roughstock is once you take your finished piece off the machine, it is extremely difficult to put it back in the exact same place. This is even more challenging if your final piece is not a regular shape.
I will say that this technique will not work for all pieces, but it has helped me out on a few occasions. This technique will also work if you would like to add something to your piece and then carve it again too.
Here is my example!
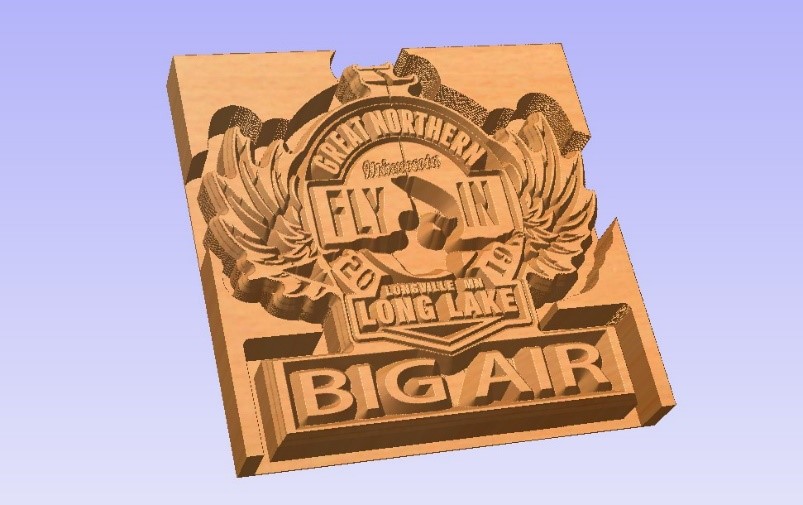
I have been creating wood plaques as trophies to be given out at a weekend event. I have been making these for this group for several years. Every year it was a new design. For this year, they said go ahead and use the design from last year.
They were carved into a nice piece of 4/4 Red Oak and they turned out wonderful. Except the fact that they had 2019 in the design. Unfortunately, I did not notice this until I was putting on the last coat of finish.
After a few choice words, here is how I fixed it.

First off here is what the design looked like when I was ready to start carving it the first time. For the most part whenever I do a profiled piece, I leave a very thin piece on the bottom and then run it through my Supermaxx 19/38 Drumsander to separate it.
I use Vcarve Pro 9 from Vectric which is the software that runs most of these smaller tabletop CNC machines. The Laguna IQ CNC machines utilize Vcarve.
In order to modify this, I created a small pocket in the location where the 20 and the 19 are located. If you need help with this step here is a great link to how to create a pocket.
For this pocket I utilized the node edit mode to refine the vector and make it fit nicely into the original design.

I was able to copy the original 20 and pasted it in the 19 spot. This worked out perfectly since I did not have the original font. I set this up to carve with a 90-degree v bit. Accounting for the new pocket depth.
Here is the important step utilizing the original profile vector. Create a new toolpath slightly smaller.

For this toolpath I originally set it up to carve outside the profile vector with a .25 End Mill. I changed the allowance to -0.125 for this new profile toolpath. You will probably have to adjust this a bit on the fly depending on your carving.

Once you have all this design work done, it is time to move over to the machine. You can utilize any piece of scrap that is bigger than your original design.
It is important that for this once you start you do not move the template carving. Lock it in good. With a little fine tuning the original carving should be able to slot right in.

Now your original carving is perfectly aligned with the new design. Once this is done you are ready to start carving.
The order of toolpath carving should be.
Cut out the pocket.

Then carve the new part.

And with that you have saved your piece.
It may seem like a lot of work to fix this carving when I could just throw down another piece of wood. The original carving took around 6 hours of machine time. The cost of the material, Red Oak although not the most expensive wood is still not cheap. This all affects my bottom line.
This fix was 45min of design and 30 minutes of machine time for the 5 pieces I needed. This is a substantial savings for me and well worth the effort.
With a little pre planning this process can be applied to a piece where you know you would like to add different levels to a piece. I will do this with my epoxy work. Create the carving pour the epoxy and then drop it back on the machine for more carving.


