Woodworking machines may look complicated to install, but don’t worry. Our experts here at Laguna Tools are here to guide you with a handy set-by-step tutorial for setting up your new Swift CNC machine.
When operating woodworking tools, it's important to be aware of safety tips. The Occupational Safety and Health Administration (OSHA) on the Machine Shop Safety website outlines a list of do’s and don’ts to keep you safe.
Keep in mind that this useful guide can also be used for setting up the IQ and Smartshop CNC machines.
The Delivery Process
The first step in getting your Swift CNC machine set up comes right after the delivery.
While we will have your new machine delivered on a flatbed, we do ask that you have a forklift available to move the machine from the truck into your workspace.
If you ordered an IQ machine, you don’t need the forklift.
Step 1: Unpacking the Machine
Once you open the packaging, you will notice that the Swift CNC machine will be sitting on a palette with packing materials around it for protection. Take the time to inspect the machine for any damage that may have occurred during the shipping process.
If you happen to find damage, take note of it on the paperwork that you sign with the delivery service. You are also encouraged to take photographs and send them to us within 24 hours.
Now that you have unpacked the machine, you will find a test sample that was run on the machine before shipping to ensure that the system was working properly.
You will also find a bucket that will later be sued to collect water. Inside the bucket, there is a dust shroud, a couple of wrenches, the owner’s manual, order paperwork, and a plastic bag of attachment pieces.
A small toolbox is also included. It contains more tools that will need later including router bits, spare fuses, the control panel, a flash drive, a cable to connect the machine to your computer, and a few other things.
Step 2: Connecting the Pieces
First, unbundle all the wires and tubes by cutting off the zip ties. Then, it’s time to get all your wires set up. If you are uncomfortable with electrical work, you can always bring in a professional electrician.
Make sure that the power is off before getting started with this step. Open the electrical cabinet panel and connect the wires to the main cutoff switch.
Next, you can start the machine. To do this, you need to turn the main power switch on. The fans will start, and a red light will glow on top of the system. Turn the key to start the power to the controller and press the green On button. Now, the machine is running.
One more piece that needs to be added in the touch-off puck. All you have to do is plug it into the socket located on the front of the machine.

Step 3: Homing the Swift CNC Machine
The Swift CNC machine operates with three axis planes known as X, Y, and Z. So, the first thing you need to do to work with the hand-held controller is to home the machine.
This enables the machine to know where to cut based on a series of sensors. To home the machine, make sure that the control panel has “All Axis Home” highlighted and press the green button.

Step 4: Connecting the Water Pump
Now it’s time to address the water pump. First, you need to fill the provided bucket with water and unpack the water pump from its box. This 220-volt pump comes with a cord and an adapter.
To ensure that the pump is working, feed the tubes through the top of the bucket lid and connect one to the water pump. Then, place the pump into the bucket of water. Make sure that the other tube is positioned to expel water back into the bucket to avoid any messes.
Next, plug the water pump cord into the available hookup from the control cabinet. You can then turn the black knob on the control cabinet to turn on the water pump.
Before water comes through the tube, all the air inside the tubing will be expelled first. Then the fluid will come through.
Step 5: Lubricating the Moving Parts
The Swift CNC machine has a centralized oiling system that keeps all the moving metal parts running smoothly.
By pressing the handle twice, you will send oil to all the parts that need it. Our experts recommend that you do this about twice a day.
Tutorials with Laguna Tools
Now that you know how to set up your new Swift CNC machine, you can get started o your next project.
It may take a bit to get comfortable with the functions of the machine, but our woodworking experts here at Laguna Tools have created a series of useful how-to videos to help you learn the ropes.
Whether you want to create an intricate piece of art or simply learn how to maintain any of our machines, we’ve got a vast library of informative videos for you to browse through.
We love sharing our knowledge of woodworking equipment with our customers, and we want you to get the most use out of your machines. Click here to access our expansive video library.
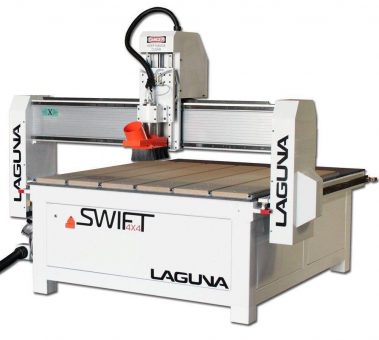
The Swift CNC Machine
Having a well-equipped woodworking shop is something that all passionate woodworkers should be able to accomplish. That’s why the Swift CNC machine was designed to be highly efficient and affordable.
With a 7.5-inch gantry clearance, you have the freedom to tackle all sorts of projects. The all-steel, one-piece frame has been built out of welded steel for the best, most precise cuts. Also, the handheld controller allows you to monitor, adjust, and program your cuts precisely.
We currently have three Swift CNC machines available. These are the Swift, Swift Vacuum, and Swift MT (Multi-Tool). Each machine is designed for workshops of different sizes.
If you would like to learn more about our products here at Laguna Tools, contact us or find a distributor near you.