Getting into wood turning doesn’t have to be complicated or difficult. Consider turning a few mallets in different sizes and weights for chisel work in the shop. It’s a project I consider a perfect introduction to turning that a novice can easily tackle. However, if you’re an old hand on the lathe, it’s still a fun and worthwhile project.

Start by gluing up some rough blanks for the mallets. I like to make the blanks about 11-1/2” long to start. Use contrasting wood species for an interesting look.

Once the glue cures, rough out the shape at the bandsaw. Here, my 1412 bandsaw and a ¼” ProForce blade make quick work of this rough shaping cut. Note the block of walnut attached underneath the maple handle with carpet tape. This simply supports the block as you make the cut.

Trim smaller mallet blanks as needed to make the turning process easier. You can even knock off the corners of the handle with a quick chamfer cut if you like.

Rough and Ready. With the basic shapes roughed out at the bandsaw, we’re ready to mark our centers and head over to the lathe.

Slide the tailstock into position over your center marks and lock it in place. Position the banjo as needed, and spin the blank by hand a few times, to ensure you have adequate clearance. The large padded handles on the 1216 lathe make it a pleasure to use.

Begin shaping the mallet. Many beginning turners don’t have a full compliment of tools yet. While a roughing gouge may be the preferred choice for initial shaping, a carbide tipped tool works too. Just take your time, and keep the lathe spinning fairly slow at first.

Check your Progress. Check the shape and size of the handle periodically. Keep working it down until you’ve removed any defects, and the handle feels good when you grip it.

Soon, the mallet will start to take shape. Increase the lathe speed gradually as the shape is further refined. Once the shape is pleasing, and the handle feels right, move on to sanding while the project is still on the lathe.

I’m using the Laguna 1216 Revo Midi Lathe, but with the optional stand and extensions, it becomes a seriously capable tool.

Reverse Reverse! When it comes time to sand your project, flip the lathe into reverse so the dust is directed away from the user. Turn the speed up for sanding, and work through your normal sanding grits.

Use a sanding block. Because the head of the mallet isn’t fully round, it would be difficult to sand it with a sheet of sandpaper alone. Instead, I use a sanding block that accepts 5” hook and loop sanding discs. For the smooth handle shape, a piece of sandpaper works fine to follow the contour.

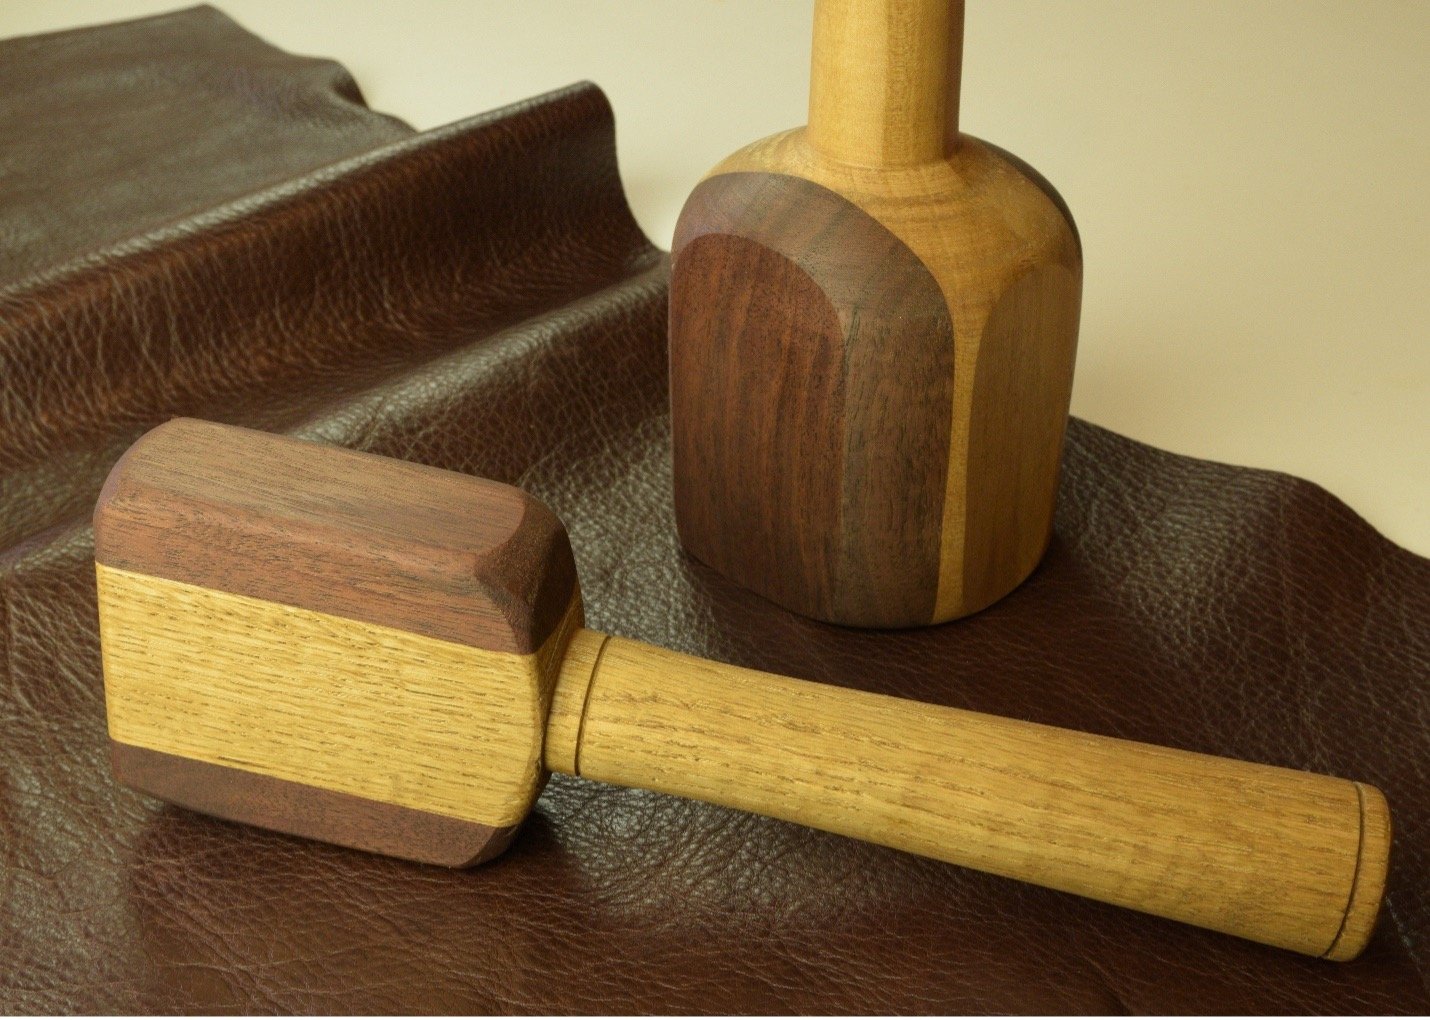
Before long you’ll have a bevy of mallets ready to go to work in the shop. These mallets were wiped with Watco Danish Oil in a medium walnut color. The medium walnut helps bring the walnut color to life, but doesn’t darken the oak and maple too much. This way, you’ll still have that nice contrast between wood species on your finished project.

For all the details on Laguna Lathes and Bandsaws used in this blog, check out LagunaTools.com
Especially the 1216 Revo Lathe spec page here… https://lagunatools.com/classic/lathes/revo-12-16/


