Sometimes mistakes happen. No matter how careful you are, if you’ve been a woodworker for a while, you know mistakes are sort of unavoidable sometimes. It’s often said, “Good woodworkers don't make mistakes, they just know how to hide them.” When you do make a blunder, stand back to assess the situation. How much work has been put into the component that you miscut? If it’s just a basic panel or small rail component, you may be better off scrapping the part and starting over. However, if you’ve already milled matching dados and made joinery cuts on the part, it’s pretty hard to abandon. 
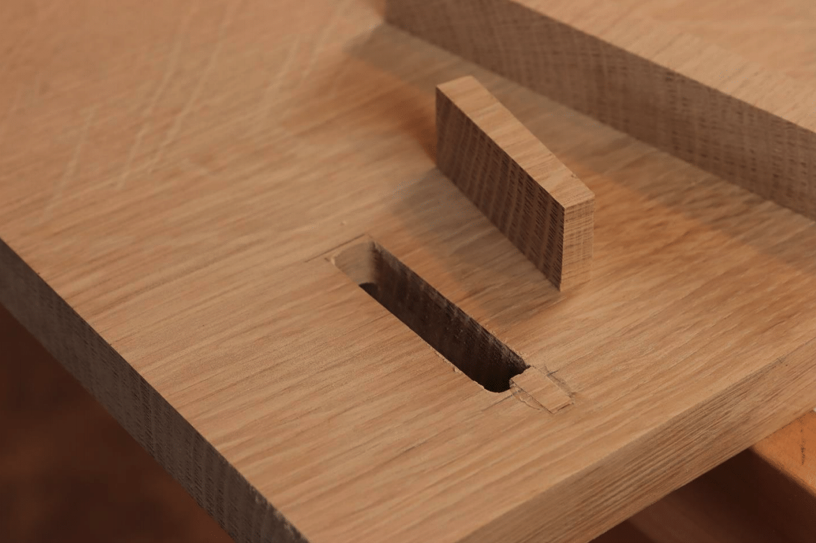
Here, a through mortise was routed too far. Since much of the joinery was already complete, I didn’t want to waste this large panel. First, use a chisel to over-cut area square, and make a suitable patch. You can find chisels at your local Home Depot or other woodworking stores near you. My main consideration is to pick a piece of wood with matching grain. Ideally, you’ll use one of your offcuts from the same panel. Then size the patch to fit and glue it in place. If the patch fits snugly, you won’t even need clamps, and friction alone will hold it in place. 
After the glue dries, the intended mortise can be squared up as well. After some final sanding, you’ll have an acceptable repair. 
Sand the repaired area thoroughly to prepare the surface for finishing. A sanding block is all the power you need for this tasks, find one here on Amazon.
In fact, once the stain is applied, you’d be hard pressed to even see the mistake. One final technique you can use is to paint the grain lines on the patch. After staining, but before applying a topcoat, use an artist’s brush with some dark-colored gel stain to extend any grain lines through the patch. Once you complete this final step, the repair virtually disappears. 
Ever notice a dent in your workpiece? There’s a simple solution to that problem as well! 
Of course, if the dent happens in stock that hasn’t been dimensioned yet, the easiest solution is to plane the boards to the final thickness. Nothing removes material more quickly and reliably than a good planer. However, if the dent happens in wood that’s already been planed to finished thickness, you’ll have to get creative. If you’re in the market for a new planer, check out Laguna’s recently updated lineup featuring segmented and spiral cutter heads for a top-quality finish here.
Pre-heat an iron while you wet a clean rag in water. Usually, the “cotton” setting works fine. Place the damp rag over the dent, and iron it just like you would iron clothing. Stay on the surface of the damp rag to avoid scorching the wood surface. Although the rag is already wet, using the iron on a “steam” setting will replenish the water and help remove larger dents. 
Check the wood surface periodically to see how you’re doing. Usually, shallow dents disappear very quickly with this method. If the dent is still present, try re-wetting the rag and ironing it again. 
Sand the entire board to make the damage invisible. Usually, the dent will become a small ridge or raised area, so sanding it flat again is very important. I’ve used this technique several times on woodworking projects, and never noticed any irregularities in the finish. Once the dent is removed, the sanding and finishing can proceed as usual.
Willie Sandry is a Freelance Writer for several woodworking publications and enjoys building Arts and Crafts style furniture. Check out his latest wood and leather projects on his YouTube channel The Thoughtful Woodworker
How-to
Woodworking
Tips & Tricks
Simple Hacks to Common Woodworking Mistakes
By
Willie Sandry on August, 24 2022

Recommended Articles
- February 17, 2025


