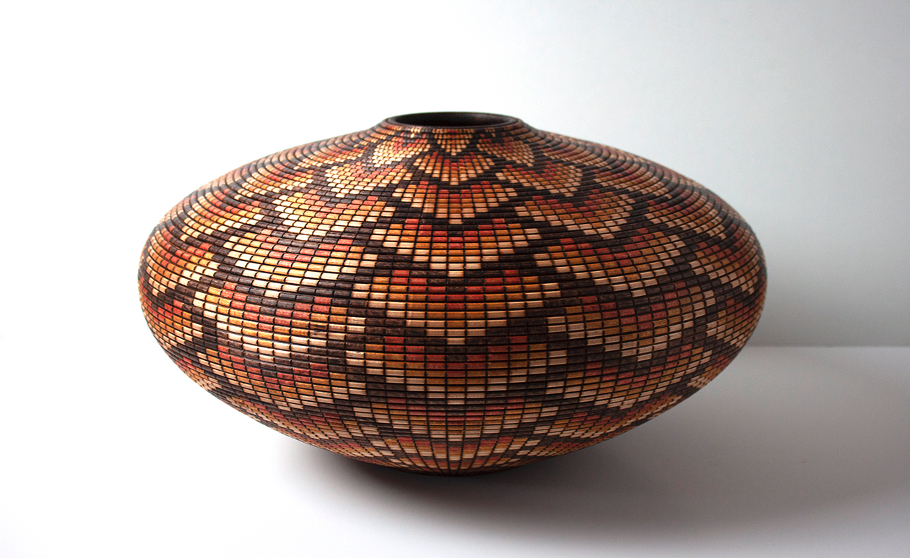
I recently had the opportunity to attend a finishing seminar that was led by renown artist/woodturner Michael Early. Michael produces some of the most beautifully detailed turned pieces that are displayed in galleries and shows, including the basket illusion piece pictured at the top of this article. How important is finishing to his overall process? ”The last 10% of a project determines the overall value and impression of the piece. A good finish will differentiate your work, catch a viewer’s eye and draw them in, and determines 90% of the value”. Earley has refined his finishing approach, and has a variety of different approaches in his arsenal that he can draw upon, depending on what he is trying to achieve on a given project. “Some projects require a lot of durability, while food safety or a satin feel might be more appropriate for other pieces. I enjoy experimenting and incorporating different products and techniques into my repertoire so that I can achieve the finishing objective of any project.”
Earley covered a lot of ground in the seminar, and in this article I’ve captured some of the key learnings for me.

1. It’s all about the prep. While it’s important to choose the right finishing products, and learn the right techniques for applying them, its even more important to focus your efforts on achieving a good surface using sanding techniques. A bowl sanding tool like the one pictured, coupled with mesh sanding discs, can deliver a high quality finish that is free from swirls and streaks. For best results, start with 150 or 180 grit, depending on how deep your tool marks are, and work progressively through 400 grit, alternating the rotational direction of your lathe with each grit (if you have a lathe with a reverse feature.) While these tools are commonly use for bowl turning, Earley says “I use mine to improve the surface on nearly every project that I turn; bowls, spindles, you name it."

2. Use sanding sealer. For any surface build-up finish, Michael recommends using a sanding sealer as part of your surface prep process. A sanding sealer provides a couple functions. First, it will seal any oils into the wood and prevent them from disrupting your finish. Also, it fills wood pores and lays down a base coat that will help improve the quality of any top-coat finish. Michael recommends first sanding to 180 grit, then applying a first coat of sanding sealer. After the sanding sealer dries, sand to 320, then apply a second coat of sanding sealer. For a final sanding use 400 grit.

3. Cyanoacrylate Glue (Super Glue) isn’t just for pens. While the pen-turning community has found CA to be a great high-gloss, durable finish that can stand up to the rigorous demands of daily use of a writing instrument, Michael uses CA finish more broadly; “Any time I want a high gloss durable finish on an object less than 4” diameter, I will use Starbond CA glue. CA has a quick setting characteristic that can make it challenging to go larger than 4”, but as long as the ambient humidity isn’t too high, going up to 4” isn’t a problem.” Because CA is moisture activated, it can set up more quickly in a high humidity situation, making it a bad choice for finishing larger items.

4. Don’t be afraid of lacquer. For a durable, waterproof finish that can be applied to projects of any size, Earley turns to lacquer. “You don’t need professional class spray equipment to achieve a high quality lacquer finish. Grab a can of Deft rattle can lacquer and give it a try. It’s pretty easy and quite forgiving. If you don’t like one coat, lightly scuff with #0000 steel wool and the next one will melt into it, which is kind of like getting a ‘do-over’ without having to scrape anything off”.

5. Buff it out! Michael said that the biggest breakthrough discovery for his finishes happened when he first started using a buffing system to finalize his signature finishes. “When I display my work at shows, attendees commonly tell me that my work ‘feels better’ than other work at the event. There’s no better validation of the buffing process than when someone buys a piece because of how it feels in their hands.”
Michael is an avid learner, and continues to experiment with new approaches and products. If you want to follow along on his journey, you can find him here: www.michaelearleyart.com.