
1. Stock prep is THE MOST important part of the process.
Use only stock that has acclimated to your shop environment and measures at moisture content equilibrium using a good quality moisture meter. Be vigilant in preparing stock to be perfectly flat, straight and square by running all pieces through a jointer and planer. If you begin your panel construction with anything short of perfect lumber, you will have nothing but problems in subsequent steps. You can’t overcome imperfect boards using clamping pressure, extra glue, wood filler or other measures that might sound tempting. The goal is near perfection, and with the right tools, it’s not hard to achieve. After milling all of your stock to an S4S (Surfaced on Four Sides) state, test the fit of each joint by placing the planks on your clamps and sliding them together with only the slightest hand pressure.
If there are any gaps that require force to close, figure out which edge is the culprit and return to the jointer and re-cut the joint.

2. Go for best possible grain and color match across panel.
There is often debate about how you should arrange your planks as you glue them into a panel. In my experience, if you follow all of the recommendations here, you can arrange the panel in such a way that it is most pleasing to the eye. There’s no need to be concerned with cupping or twisting, because you’ve ensured that the moisture was at equilibrium, and removed all shape imperfections in the previous steps. Spend some time trying the boards in various locations, flipping them over, and getting the best appearance for the “show side” of your panel.
3. Choose the right clamp.
Panel gluing requires a lot of clamping pressure, so my recommendation is to use either pipe clamps or parallel jaw clamps. Either of these style clamps will provide plenty of pressure, so choose the one that you have available to you. My preference is parallel jaw clamps because they deliver even clamping pressure that will not cause your panel to flex as the clamps are tightened. Pipe clamps cause minor flexing in the panel, so you need to offset this upward pressure by alternating the clamps on top and bottom.
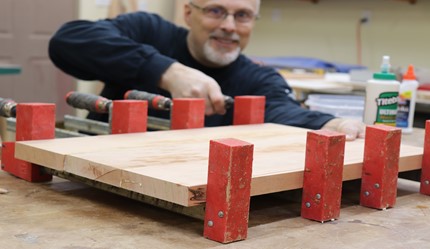
4. Determine the number of clamps and best placement for each.
Envision that pressure radiates from your clamps at a 45 degree angle, and you want to have clamping pressure across the entire span of each joint. To visualize this, I’ve drawn lines at a 45 degree angle to the board’s outer edge, extending each line across to the jointed edge. With lines places at overlapping points across the joint, you can determine the minimum number of clamps needed and the best location for each one. There’s no penalty for using extra clamps, but there could be problems if you try to get by without at least the minimum number. As you glue up the panel, apply a liberal amount of glue on one side of each joint and apply firm clamping pressure to ensure that there is glue squeeze-out across each joint.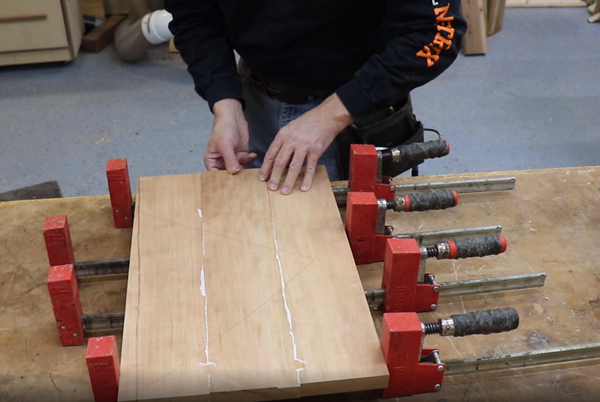
5. Force each joint flush.
Start at one end of the panel, and apply gentle clamping pressure. Feel each joint and ensure that each one is dead flat at the top. Do not accept anything short of perfectly flush. Then, move on to the next clamp and do the same. If you need to back up, loosen the necessary clamps and pry gently on the boards at the end of the panel for force alignment. Re-tighten clamps as you move forward. After 5 minutes, apply more clamping pressure, ensuring that each clamps is hand-tight.To complete the panel glue-up, wipe off excess glue with a damp cloth and wait at least one hour before removing the clamps.
To see additional detail and watch this process in action, check out the video on the ToolMetrix YouTube channel.