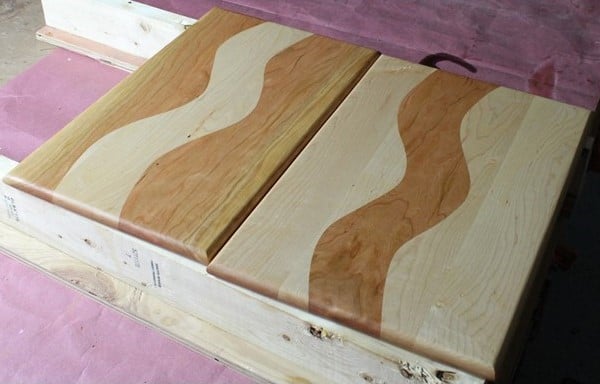
Here’s a fun project that looks challenging and draws lots of accolades from customers and admirers, but it’s actually a pretty simple cutting board to make.
The curves come together so seamlessly that appears to be done with an inlay process using meticulous care and precision.
In reality, you can make these with almost no concern about accuracy, letting the flow of your bandsaw cutting determine the shape of the “river” that is formed.
You can also repeat the process to have multiple curvy patterns across the same cutting board, forming an interesting design.

Tape blanks together. To get started, either find two boards of approximately the same size, or edge glue some boards to form your blanks.
In this project, I found a cherry plank that was 13” wide x 19” long x 7/8” thick, and I glued up some maple boards to approximately the same size.

Draw your pattern. I made a template out of ¼” MDF because I make a lot of this style cutting board so it’s handy to have a template on hand. If you are just making one or two, you can draw a simple curve directly onto the top board.
Make the curves gentle so that you can easily follow the line on your bandsaw. I space the lines a few inches apart, with some gentle variation in the spacing from end to end, which gives the board a more organic, dimensional look.

Cut to the line; well, sort of. It’s important to use a good quality bandsaw blade for this operation (I like a 3/8” blade with 4-6 TPI), and to have your guides setup properly and your bandsaw well-tuned. As you move through the cuts, use the lines as reference only.
Keep your cut motion gentle and fluid, and do not attempt to follow the lines exactly. If you start to wander away from the line, make your correction a gentle one rather than an abrupt turn. Under no circumstances should you back up to correct your cut path.
Both sides of your cut are important, and this process only works if you use a gentle approach. Also, sharp turns will cause the blade to flex, which forces the top and bottom of your cut out of alignment.
This will leave a noticeable gap, so it is important to keep the curves gentle and the cutting speed slow.

Test fit. Pull the pieces apart, and swap the middle parts. Test fit each board, checking for alignment and gaps. If you’ve made your cuts properly, you should be able to pull the pieces together with minimal hand pressure, with only the slightest gaps.
If there are large gaps, it is very difficult to fix at this point, and you are better off troubleshooting what might have gone wrong and re-cutting your pieces.

Glue and clamp. The assembly process is much like a regular cutting board, except that you will have only two joints to glue, and the pieces should be self-aligning due to the curves.
Be conservative with clamp pressure, and do not try to crush any gaps as this will cause other problems.

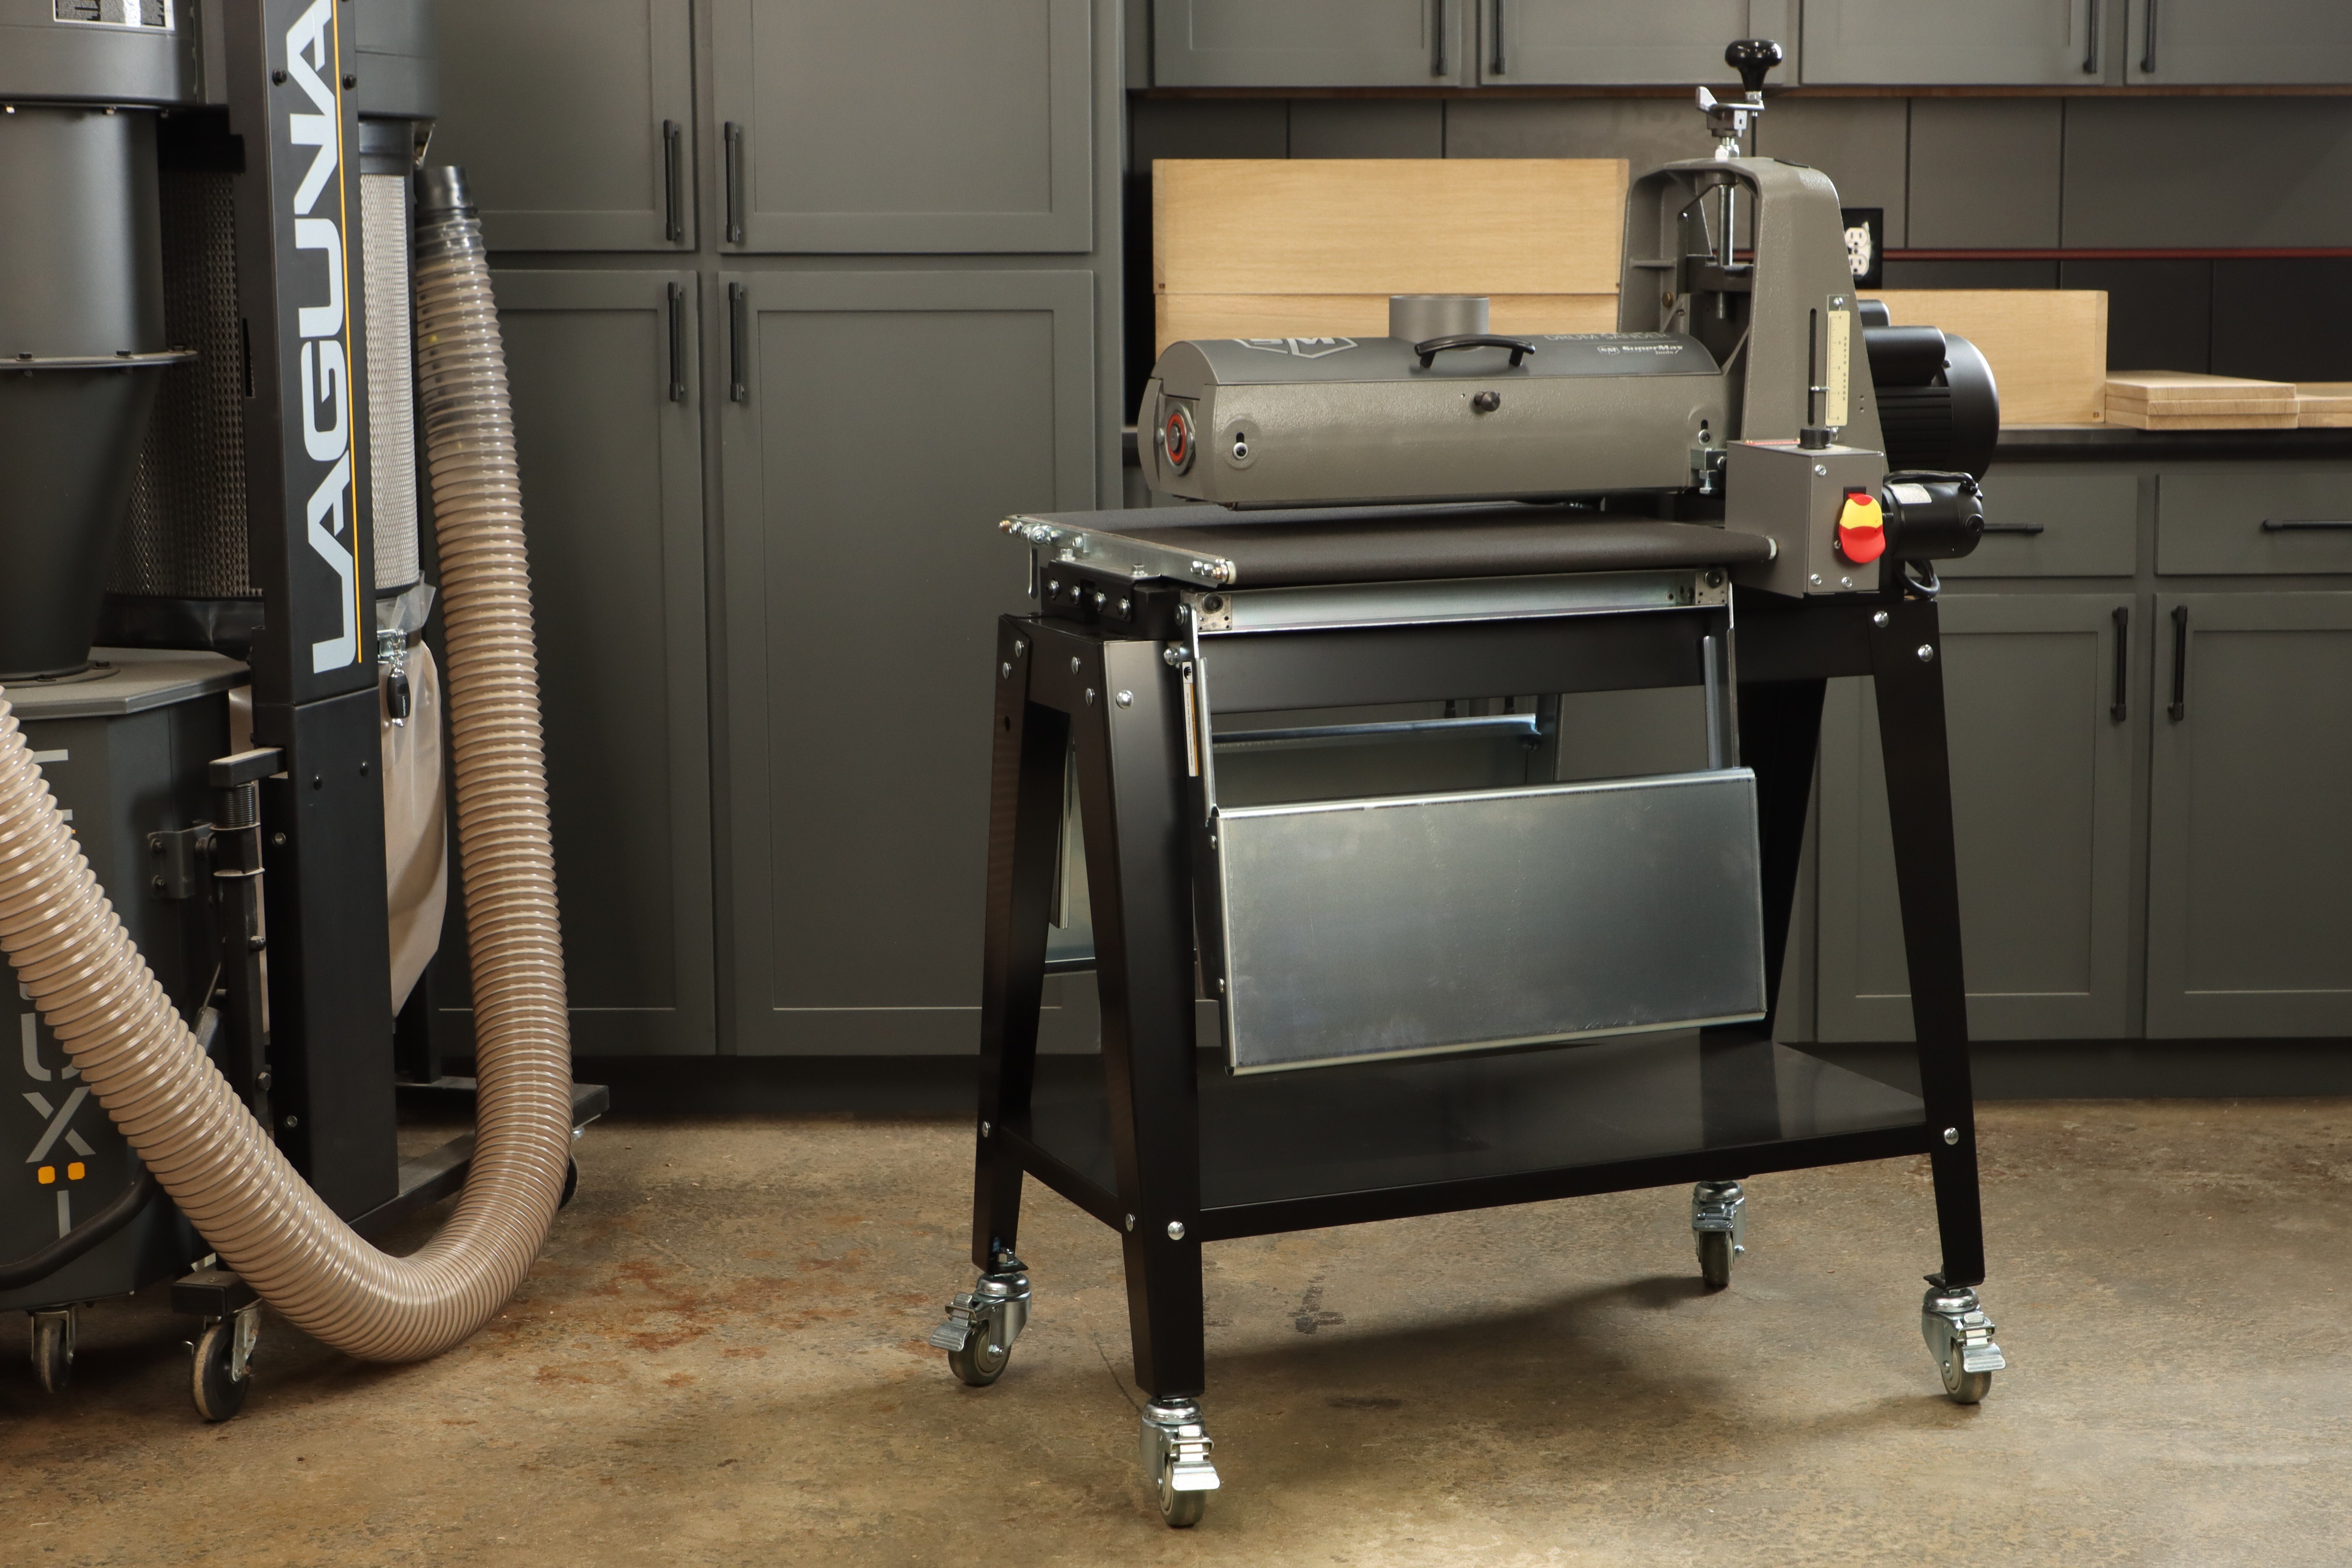
Plane or sand on both sides. After the glue dries, feed your cutting boards through a planer or drum sander to flush the joints.
At this point you can see if you have any gaps in the joints, and if so, mix some glue and sanding dust and fill them in. Sand the boards through 600 grit sandpaper to achieve a nice smooth surface.

Trim to length. Using a miter saw or table saw, trim the cutting boards to length to clean up the uneven ends.

Finish. Apply a couple coats of your favorite cutting board finish, such as the Howard's Butcher Block Conditioner shown here.
For more details on the process, watch the full video on the ToolMetrix channel.

Paul Mayer is a guest blogger. He operates under the name "ToolMetrix" (because of his passion for detailed tool analysis) and his work can be found on his:
YouTube Channel: (youtube.com/c/ToolMetrix)
Instagram Feed: (instagram.com/ToolMetrix)
Facebook Page: (facebook.com/ToolMetrix)