Tearout is the difference between a part that comes off the CNC ready to assemble and one that goes straight to the sanding bench, or the scrap pile. It shows up as splintered edges, lifted veneer, chipped corners, and fuzzy grain on otherwise clean cuts. Every shop deals with it, and almost every case of tearout can be traced back to a small number of root causes: the wrong bit, the wrong toolpath, feeds and speeds that do not match the material, or workpieces that move when they should not.
The good news is that tearout is preventable. Once you understand why fibers tear instead of cutting cleanly, fixing it becomes a question of dialing in five things: bit choice, toolpath strategy, feeds and speeds, pass depth, and material support. This guide walks through each of those, with specific recommendations for plywood, hardwood, MDF, and veneer-faced panels.
What Tearout Is and Why It Happens
Tearout happens when wood fibers fracture and pull away from the part instead of being cleanly severed by the cutter. Instead of slicing through the fiber, the bit lifts, drags, or breaks it. The damage usually shows up at the entry edge, exit edge, or the unsupported face of the cut.
At the fiber level, tearout is a function of two things: the angle at which the bit hits the fibers, and the support those fibers have at the moment of cutting. Cutters that move across grain in the wrong direction, that hit fibers with insufficient sharpness, or that approach unsupported edges produce tearout almost every time. Cutters that approach fibers with the right geometry, on supported material, at the right feed and speed, cut cleanly.
For shops, tearout matters because it costs money. Rework, sanding, sometimes scrap. On veneered or laminated panels, a single chip on the visible face can scrap a part that took 20 minutes to machine. Preventing tearout up front is always cheaper than fixing it after.
The Main Causes of Tearout on a Wood CNC Router
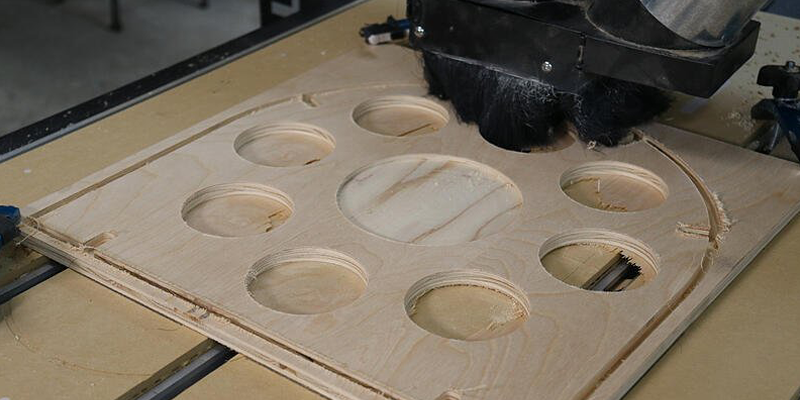
Cutting against unsupported wood fibers
When the bit exits a cut into open air (say, the bottom face of a through cut or the outside edge of a profile), the last fibers have no backing. They blow out instead of being severed. Anything that leaves fibers unsupported at the cut is a tearout risk.
Using the wrong bit for the material
An upcut spiral lifts fibers off the top face. A downcut spiral pushes fibers down on the bottom face. A bit designed for one material may shred a different one. Bit geometry has to match the material and the visible faces of the part.
Running dull or damaged tooling
Dull bits do not cut. They tear. A worn cutting edge crushes fibers ahead of the cut, generates heat, and leaves a fuzzy or broken surface. Damaged bits with chipped edges produce the same effect in a smaller area. Sharp tooling is the single most universal tearout prevention.
Cutting too aggressively in one pass
Trying to take a full-thickness cut in one pass forces the bit to remove more material than it cleanly can. Chip load climbs, the bit deflects, and fibers tear instead of slicing. Multiple lighter passes almost always produce cleaner edges than a single aggressive one.
Poor workholding or material support
If the workpiece can move, vibrate, or lift during the cut, the cutter loses its ideal geometry. Tearout follows. Marginal vacuum hold-down, missing clamps, or an unsupported overhang all create the same problem.

How to Prevent Tearout on a Wood CNC Router
The fix is a sequence, not a single change.
Choose the right router bit for the material
Match bit type to material and visible face. Use compression bits when both top and bottom faces matter. Downcut bits when only the top face matters. Upcut bits when chip evacuation matters and the top face will be sanded or hidden. Always start with sharp, high-quality carbide.
Use the right toolpath strategy
A separate roughing and finishing pass is the cleanest approach for parts that have to look perfect. Rough out most of the material with a faster, more aggressive pass, then leave a small finish allowance (0.020 to 0.040 inch is typical) for a slow, clean finishing pass that produces the visible edge.
Climb cutting on the finishing pass usually produces a cleaner edge in wood than conventional cutting, because the bit slices fibers from the supported side toward the unsupported side rather than the reverse. Climb cutting does require rigid workholding and a machine that can handle the cutting forces.
Adjust feeds, speeds, and depth of cut
Run the bit at the feed rate and RPM the manufacturer recommends for the material. If you do not have manufacturer numbers, use a chip load chart. Take multiple lighter passes (typically half the bit diameter or less per pass) rather than full depth.
Support the material properly
A backer board, sacrificial spoilboard, or zero-clearance support under the cut prevents fiber blowout on the bottom face. Strong vacuum hold-down or clamps keep the part stationary during the cut. Painter's tape on the visible face is a cheap, surprisingly effective tearout prevention on small parts and delicate veneers.
Run test cuts before full production
A test cut on scrap of the same material catches problems before they affect real parts. Run the program on a small offcut, inspect the edges, adjust if needed, then commit to the production run. Skipping this step is one of the most expensive shortcuts in CNC work.
Choose the Right Router Bit to Reduce Tearout
When to use downcut bits
Downcut bits push chips down into the cut, which produces a very clean top surface. Use them on single-sided plywood, melamine, or any part where only the top face needs to look perfect. The trade-off is that chips can pack at depth and the bottom face may splinter.
When to use compression bits
Compression bits combine upcut at the bottom and downcut at the top, pulling fibers from both faces toward the center. They are the right choice for double-sided plywood and laminated panels where both faces are visible. Set the cut depth so the upcut portion sits fully in the lower half of the material.
When straight flute bits can help
Straight flute bits do not pull fibers up or push them down. In delicate veneers or laminated materials where any vertical force causes problems, a straight flute bit can produce cleaner cuts than a spiral. They tend to clear chips less efficiently, so depth of cut should be conservative.
How bit sharpness, diameter, and length affect cut quality
A sharp bit slices cleanly. A dull bit tears. Replace bits on a schedule that matches your production volume rather than waiting for visible problems. Use the largest diameter the cut allows for stiffness, and the shortest length-of-cut needed to reach depth. Long, skinny bits deflect under load and produce tearout the larger, shorter equivalent would not.
Toolpath Strategies That Help Prevent Tearout
A few toolpath techniques pay back consistently:
A separate roughing and finishing pass, with the finishing pass set to climb cut, gives the cleanest visible edge.
A scoring cut at very shallow depth around the part outline severs the top fibers before the main cut reaches them, which dramatically reduces top-face splintering.
Ramp entries and helical plunges instead of vertical plunges reduce tearout at the entry point. Vertical plunges hammer the bit straight into the wood and chip the entry.
Routing end grain first, then long grain, prevents the cutter from tearing fibers as it exits an end-grain face into a long-grain face. Sequencing the cut intentionally is free and effective.
Lead-in and lead-out arcs on profile cuts eliminate dwell marks at the entry and exit points.
Adjust Feeds, Speeds, and Depth of Cut
Why incorrect feed rate can increase tearout
Feed rate that is too low forces the bit to rub instead of cut, which generates heat, dulls the cutter faster, and produces fuzzy, torn edges. Feed rate that is too high overloads the cutter, produces chatter, and leaves rough, splintered edges. There is a window for every bit-and-material combination where the chip load is right, and that window is where clean cuts live.
Why spindle speed needs to match the material and bit
RPM has to be matched to the bit diameter and the material. A small-diameter bit needs high RPM to maintain cutting speed at the edge. A large-diameter bit at the same RPM moves the edge too fast and burns the material. Use a chip load calculator and start from the bit manufacturer's recommended numbers.
Why lighter passes often produce cleaner edges
A heavy pass forces the bit to remove a lot of material at once, which loads the cutter, deflects it, and produces tearout. Two or three lighter passes at the same total depth produce a cleaner edge with less wear on the bit. The cycle time penalty is usually small and the quality improvement is usually large.
How plunge rate and ramp entry affect cut quality
A vertical plunge at full feed rate hammers the bit straight into the wood. The entry point chips, the bit heats up, and the early part of the cut suffers. Slowing the plunge rate or, better, using a ramp or helical entry gives the bit time to engage smoothly.
Material-Specific Tearout Prevention Tips
Preventing tearout in plywood
Compression bits for double-sided work; downcut bits for single-sided. Strong vacuum hold-down. A sacrificial spoilboard under through cuts. Climb cutting on the finishing pass. Painter's tape on visible veneers prone to chipping.
Preventing tearout in hardwood
Sharp tooling above everything else. Match feed rate and RPM to the species. Denser woods need slower feed rates and different RPM than softer hardwoods. Watch for burning, which often shows up alongside tearout when the bit is dull or feeds are wrong. Consider a roughing pass and a separate, slower finish pass on visible work.
Preventing tearout in MDF
MDF tears less than natural wood because it has no grain, but the face paper or laminate on coated MDF will chip just like veneer if mishandled. Use sharp upcut bits with strong dust extraction. Score visible edges if the laminate is delicate. Replace bits on a tighter schedule because MDF is hard on tooling.
Preventing tearout in veneer-faced panels
Treat the veneer as the most fragile part of the panel. A scoring pass through just the veneer layer at very low depth, followed by the main cut, prevents top-face chipping. Painter's tape on the veneer can also help. Compression bits sized for the panel thickness produce the cleanest two-sided results.
How to Handle High-Risk Tearout Areas
Edges and corners
The last few inches before an outside corner are the highest-risk area for tearout because the bit is approaching an edge with diminishing support. Slow the feed rate in those zones, use lead-in arcs, and consider a separate finishing pass that climb cuts those edges last.
Holes and internal cutouts
Hole entries chip if the plunge is too fast or vertical. Use a ramp or helical entry. For cutouts, leave small tabs to hold the part until the cut is complete, then trim the tabs by hand.
End grain areas
End grain tears more easily than long grain. Plan the cut so the bit enters and exits long grain when possible, and cut end-grain edges first so the long-grain pass cleans them up.
Fragile top surfaces
Veneers, melamine, and high-gloss laminates all chip easily. Score the cut line at shallow depth first to sever the surface fibers, then cut the rest. Painter's tape over the cut line adds another layer of support.
Common Mistakes That Lead to Tearout
Using a dull bit too long
Dulls bits do not announce themselves with a warning light. They show up in slightly fuzzier edges that get worse over hours. Set a replacement schedule and stick to it.
Taking full-depth cuts too aggressively
If you are trying to cut 3/4-inch plywood in a single pass, you are pushing the bit harder than it wants to be pushed. Two or three passes at lighter depth will produce a cleaner edge with less wear.
Using the wrong cutter for plywood or veneered material
A standard upcut bit on premium plywood will splinter the top face every time. Match the bit to the material, especially when veneer or laminate is involved.
Ignoring workholding and backing support
A part that lifts, vibrates, or shifts during the cut will tear out. So will an unsupported edge. Solid hold-down and a backer board cost almost nothing and prevent a lot of damage.
Skipping test cuts on scrap material
Programming time is cheap. Production parts are not. A five-minute test cut on scrap will catch problems before they ruin real material.
When Tearout Might Actually Be a Burning or Tooling Problem
How burning and tearout can overlap
Burning and tearout often appear together because they share a common cause: a dull bit or wrong feeds and speeds. A bit that is too dull to cut cleanly will both tear fibers and overheat the material.
Signs the issue is feed and speed related
If the same bit produces clean cuts in one material and burned or torn cuts in another, the problem is likely feeds and speeds. Re-check chip load and adjust.
Signs the issue is tooling or machine stability related
If the same bit produces inconsistent results in the same material across a single run, the problem is probably the bit (dull, damaged, or runout) or the machine (worn collet, loose spindle, soft workholding). Check the bit first, then the collet, then the holding setup.
Final Thoughts
Clean cuts on a CNC router are the result of dozens of small decisions made well together: the bit, the toolpath, the feeds and speeds, the depth of cut, and the way the material is supported. None of those decisions are mysterious. They reward attention and punish shortcuts. Pick the right bit for the job, take lighter passes than you think you need, support the material on both faces, and run a test cut before committing to a long production run. Do that consistently and tearout becomes something that used to happen to you, not something you fight every day.