Tools needed:
- Lathe
- 4-jaw chuck
- Spindle gouges
- Parting tool
- Ring tool (optional)

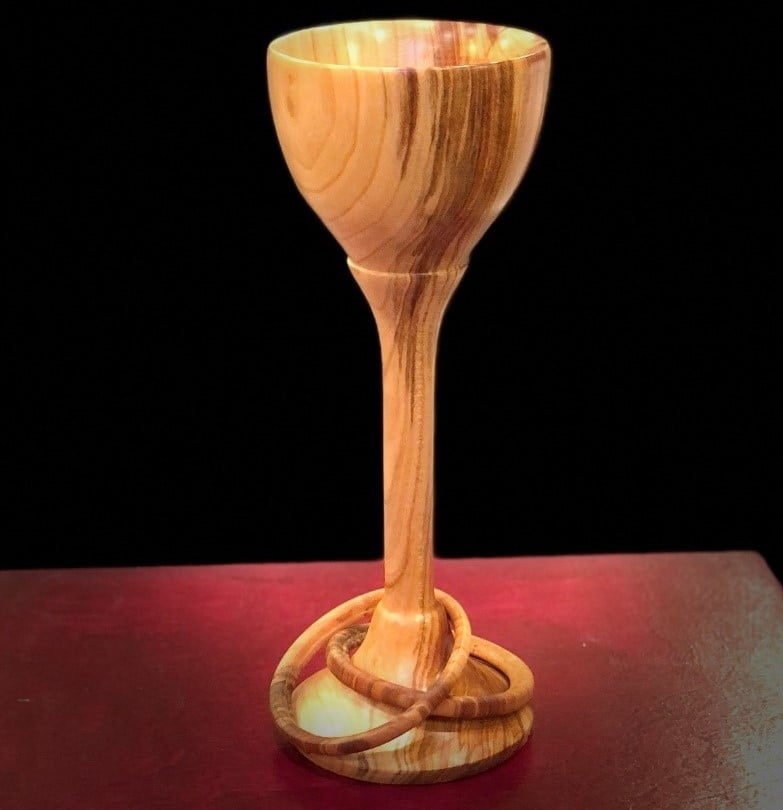
Prep a blank. You can make your ringed goblet any size that you like. The one shown here is approximately 2-3/4” x 12”, and started with a blank of 3” x 14”.
These are easier to turn if you start with wood that is slightly green. This wood was approximately 30% moisture content, which makes it easier to scoop out the wood from the bowl.

Make it round. Use a spindle roughing gouge to remove corners and make the blank round.
Turn a tenon. You’ll want to mount the rounded blank onto a four-jaw chuck, so turn a tenon that will fit your jaws. After you’ve turned the tenon to size, mount the blank into your chuck.
Scoop out the bowl. Using a 3/8” bowl gouge, or a small round carbide insert turning tool, slowly and carefully remove the material from the goblet’s bowl.
Make light cuts, being careful to avoid catches. Turning on the unsupported end of a long cylinder requires some finesse and patience, so take your time on this step.

Plug the end with a tennis ball, and re-engage the tailstock. The tennis ball allows you to apply pressure with the tailstock without marring the inside of your goblet’s bowl. 
Remove some stock to establish the ring size. Determine the outside diameter that you want for your rings, and remove some stock until you approach that diameter.

Define ring width, and clear material on each side. You can use a ring tool or a spindle gouge for this. Then, remove waste from an inch on each side of the ring, going down a bit deeper than the thickness you want for your ring.

Shape ring. Using a spindle rouge or ring tool, shape the ring to its final proportions. Remove as much of the material behind the ring as you can without actually removing the ring.

Sand the ring while it’s still attached. If you cut it loose before you sand, it won’t be as easy. Sand through your final grit before making the final cut to remove the ring.

Free the ring. Using a ring tool or thin parting tool apply light cutting pressure on the remaining material behind the ring. I’ve found that too much pressure will produce a jagged edge that requires more sanding. 
More rings. The traditional wedding goblet has two rings. Add as many as you’d like to symbolize the union, or to just show off your woodturning skills. 
Tape rings out of the way and finish shaping. Use painters’ tape to hold the rings out of the way as you remove the remaining material, shaping the stem and bowl to a pleasing shape. Sand the goblet through your final grit (600 is where I stopped).

Finish using your favorite product. I used a 50/50 blend of shellac and boiled linseed oil because it dries quickly, builds up nicely and provides a nice glow.
To see the entire process, watch the video on the ToolMetrix YouTube channel here:

Paul Mayer is a guest blogger. He operates under the name "ToolMetrix" (because of his passion for detailed tool analysis) and his work can be found on his:
YouTube Channel: (youtube.com/c/ToolMetrix)