For those of us who enjoy both woodworking and woodturning, a great way to bring the two crafts together is to incorporate bun feet into a piece of furniture. It adds an element of class and distinction to a classic design. Sure, you can buy bun feet at a reasonable cost, but why not apply your turning skills and incorporate the perfect material match into your project, and have some fun on your lathe while you’re at it.
Turning bun feet is a fairly straightforward spindle project, with three main things to be concerned with: consistency, consistency, and of course, consistency. I’ll show you a few tips to ensure that you produce a set of bun feet that not only looks great, but provide a production level of consistency.

The perfect bun foot starts with a perfect blank. Cut all of the blanks for your bun feet to the exact same size, which should be the actual height and diameter at the widest point. I use a miter with a stop block for this, clamping the blank to my fence for safety. The most important point of consistency will be to establish a consistent height, and not alter the height when you are turning. The slightest bit of variation in height Can cause your furniture to rock, which is the hallmark of shoddy woodworking.

Make a template. This is the second most important way to maintain consistency across your bun feet. If you are not a designer yourself, find a photo of a bun foot design that you like on-line, print it, and make yourself a template using a bandsaw or scroll saw. There’s no copyright protection for the shape of a bun foot, and there’s no shame in following in the tracks of a great designer.

Make it round. As with any turning project, your first step after mounting it on your lathe should be to make the blank round using a spindle roughing gouge. With bun feet, however, you will want to take extra care to remove the minimum amount of material to achieve a round state, because if you go to far, you will introduce the risk of producing inconsistency into the set of bun feet.

Mark your transition lines. Use your template to mark the important transition points on the bun foot. Here I’m marking the high point of the bun and the transition point from the shoulder going into the downward curve. Use these lines as a guide as you begin to make your first cuts that will establish these transitions. Reference the template frequently as you make progress on turning to ensure that you are not getting off track.

Establish your low spots. Using a parting tool or skew chisel, establish the small diameter areas of your bun foot. As you get close, check the work periodically with a caliper to make sure that you don’t take it too far.

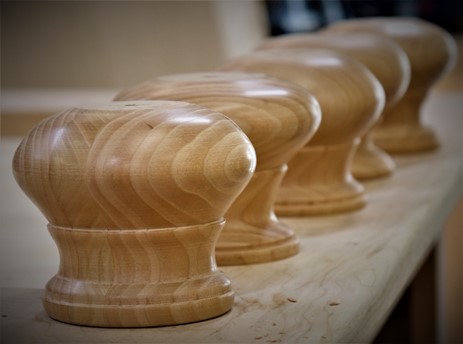
Shape the bun. After you’ve carefully established your low spots and transition points, use a freshly sharpened spindle gouge to bring the bun foot to it’s final shape. Go slowly as your turn, ensuring adherence to your template to remain consistent with the other feet. Sand after achieving the final shape.

Install using hangar bolts. You could use glue and dowels to permanently install the bun feet, but I like the flexibility that I get from using a hangar bolt. First, you can use the mechanism for slight adjustments in height to reduce wobbling on uneven floors. Also, you can remove them to reduce the chance of damaging them during a move.
If you’d like to see a video of the entire process described here, check out this video on the ToolMetrix YouTube channel.


