Many of us who create projects in the woodshop also like to apply those creative skills in the kitchen. What better way of bringing these two worlds together than by creating a knife in the shop that can be used as we produce our kitchen-based art form. If you have metallurgy tools and skills than you will no doubt want to start by making your own blade, but for those of us who don’t dabble with steel, there are plenty of blade kits available that can let us focus on the wood aspects that we know and love.

Choosing a knife kit
As I shopped around the market for blade kit, I stumbled upon a chef knife blade that had exactly the shape I was looking for; not too big, not too small, and high carbon steel to hold a wicked sharp edge.
Then I saw that it was made by Ron Hock, the infamous metallurgist and tool maker who has perfected the hand plane iron (if you’ve ever used one, you know what I’m talking about). That was my pick; a 5” Chef’s Knife Kit from Hock Tools.
The kit includes a high quality, insanely sharp high carbon blade along with three steel pins that are used for assembly.
Choosing a scale (handle) material
You can choose any wood species for a scale, but I prefer to use wood that is dense and hard for better durability. Stabilized wood is ideal for knife handles, but I use non-stabilized wood and haven’t had any problems.
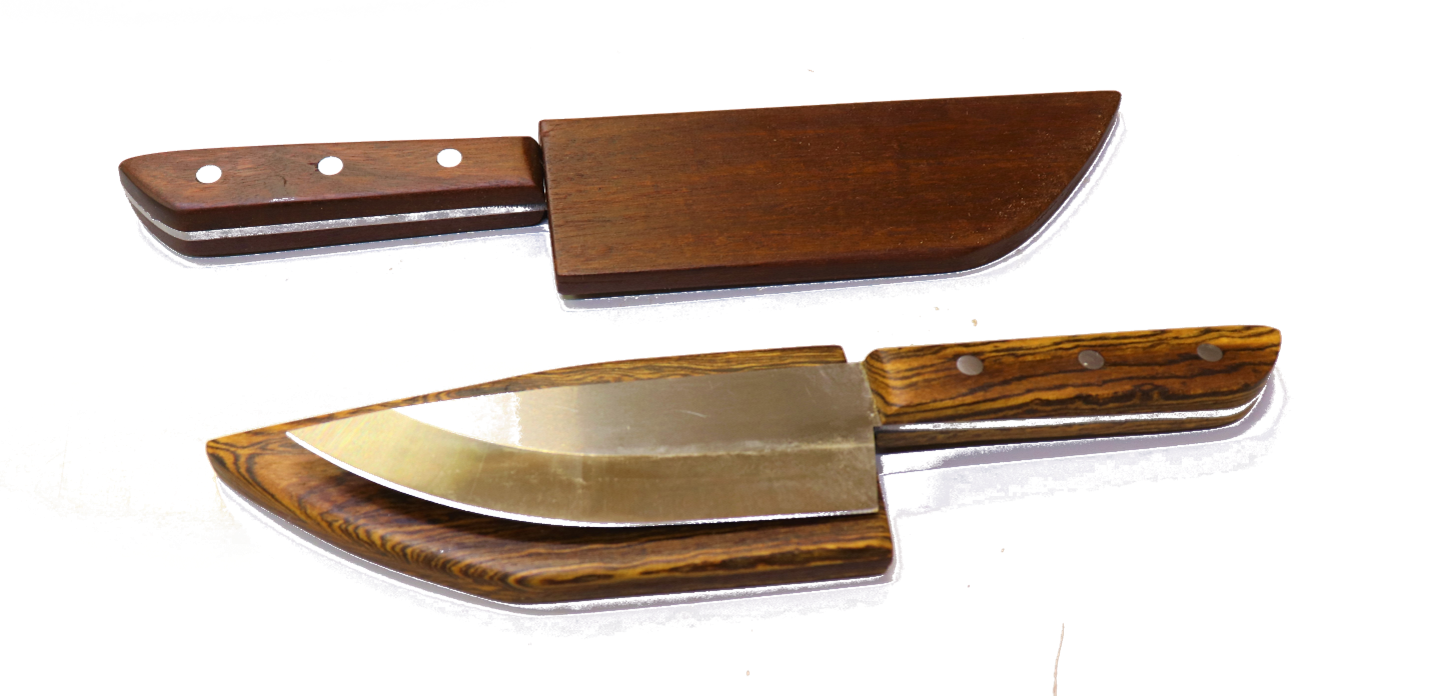
The wood that I used for this knife handle was Cocobolo, a beautiful tropical wood that is extremely dense and outstanding for making knife scales.

Cut the scales
Cut the scale pieces to ¼” thick using a table saw, with a length and width just slightly oversized for the knife blade.

Dill the scales
With the sharp blade wrapped in masking tape, use the blade itself as a drilling template for drilling three holes through knife scales.
Alignment is critical, so after you’ve drilled the first hole, insert a drill bit to keep the scale pieces secure while you drill the next holes.

Trace and cut
Set the pins through the blade and scales, and trace the blade outline. Then cut out the shape on a bandsaw, leaving the line.

Shape the front of the scales
Before attaching to the blade, you want to shape the front edges of the scales because they will be difficult to sand without scratching the blade once they are attached.

Prep your wood for attaching
Add a piece of masking tape onto the blade, positioning it right next to the scales on each side. This will prevent epoxy from getting onto the blade, saving you some cleanup time and hassle.
Since the wood that I used, Cocobolo, is oily, I also wiped down the scales with acetone just prior to assembly. This breaks down the oils at the surface and allows the epoxy to better attach to the scales.

Assembly time
Mix up a batch of epoxy. If it’s your first time making a knife, you might want to use a longer setting epoxy to allow you to assemble without the stress of having the epoxy set up too soon.
I typically use quick setting (5 minute) epoxy and haven’t had any problems. Insert the pins, spread a liberal coating of epoxy onto the scales, then assemble the pieces.

Squeeze with C-Clamps
Use a pair of C-Clamps to apply enough pressure so that no gap remains between the scales and the blade. You should have epoxy squeeze-out around the entire perimeter.

Shape and sand smooth
Sand the scales flush with the blade, and shape the handle gently using coarse sand paper (80 grit works well). After you have everything flush and shaped how you want it, sand through 600 grit for a nice smooth surface.
In the next blog article, I’ll walk you through the process of building an accompanying sheath, and share some finishing tips for the project. To watch a video that documents this process go here.


