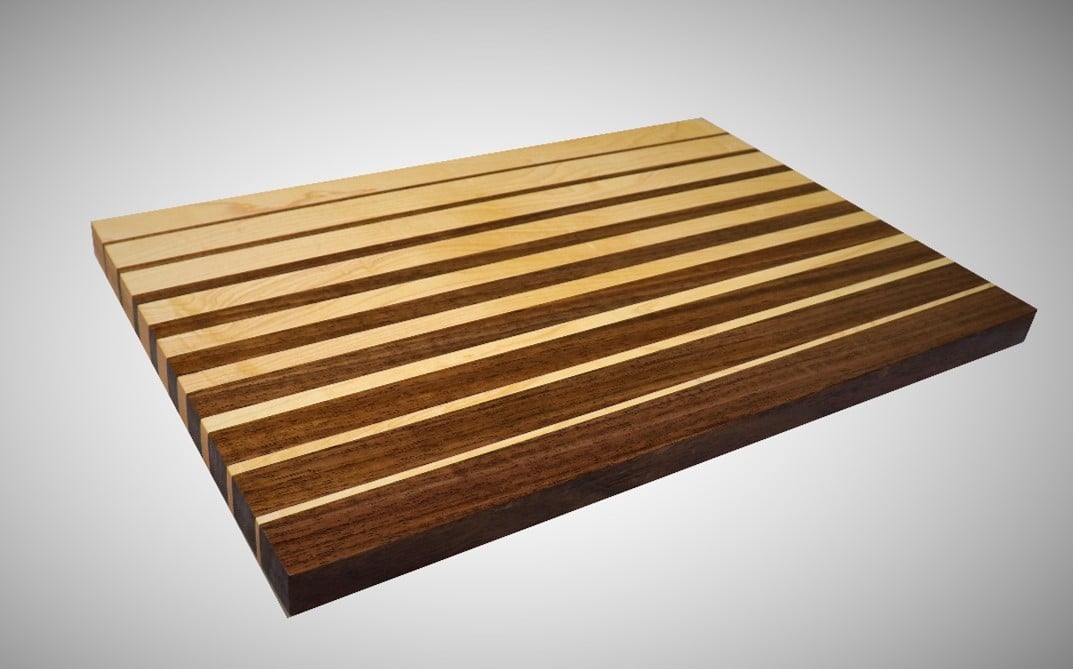
In the past I ran a business with my father where we sold a variety of wooden products, and one of our all-time best sellers was this contrasting wood strip cutting board featuring alternating strips of contrasting colored wood.
People would pick it up, stare at it the beautiful grains and contrasting woods, caress it, and generally buy it.
Stock selection
When making cutting boards you want to use closed grain stock that is dense so that it can resist knife slices. With this specific cutting board design, you will want to choose species with obvious contrast in color.
My default combination is black walnut and sugar maple, but I’ve experimented with other combinations such as cherry/maple, cherry/walnut and white oak/walnut. All of those combinations look nice, but it seemed that people were more drawn to the stark contrast between the pale light maple and the dark rich walnut.
Prepare the stock
Choose stock that is free of any defects or cracks. This is important for a couple reasons. First, the design of this board is highly detailed and eye catching, and any defects in the board will distract from the artistic design.
Second, when you’re ripping strips, I find that it is best for the design if the strips come from contiguous adjacent cuts on the stock, rather than having to cut around defects as you progress through the rips.
The grain continuity adds a nice element of harmony to the overall design aesthetic. It is also important to thoroughly prep your stock to be perfectly square and flat prior to ripping strips.
This is known as S4S stock, and it involves running the material through a jointer, planer and table saw to produce perfectly dimensioned material. If you’re sloppy in this stop, you will pay for it down the road.
I have found that a good material size for this cutting board is 18” long and 7/8” thick. Of course, you can make variations to this to suite your preferences.
Rip the strips

When ripping narrow strips, it is important to have your table saw tuned up and a sharp ripping or combination blade installed. My preference is to use a 7-1/4” blade on my table saw for this project because it provides better cut quality and higher yield with the thinner kerf.
Ideally you can rip the strips without having to visit the jointer after each cut, which will only be possible if your fence is properly aligned with the miter slots and you are using a sharp blade. After the thin rip is complete, you will not be able to safely run it through the jointer. If you need to clean up the edge you could use a planer or better yet a drum sander.
For each species you will rip strips of the following widths: 1/8”, ¼”, 3/8”, ½”, 5/8”, 3/4”, 7/8”, 1”, and 1-1/8”. Use a safe method of pushing the work piece through as you make the thin rips, such as the thin rip jig shown here.
Layout your strips

Be sure that all joints are tight and that the pieces are arranged in progression as shown, starting on one end with the widest strip of one species, followed by the thinnest strip of the other species, and so on.
Use two pencils to mark the boards after the sequence has been established; one light pencil (I use white charcoal pencils rather than wax) and one dark one. This will allow you to easily see the sequence on both species of wood.
Glue, clamp and wipe down

Use a high quality, waterproof, food-safe PVA glue such as Titebond 3. Apply clamp pressure and wipe off excess glue before it cures.
Plane Flush and Trim ends

After the glue has fully cured, remove the clamps and run the cutting board through your planer until the glue lines are completely flush. Using a panel cutting jig, trim the ends square on a table saw.
Sand and Finish

Sand thoroughly to 400 grit to get the board baby-bottom smooth. Then apply a couple coats of mineral oil and butcher block finish to protect it from drying and cracking.
Let the recipient of the cutting board know that it should be washed only by hand, and never placed in a dishwasher due to the potential for cracking.


