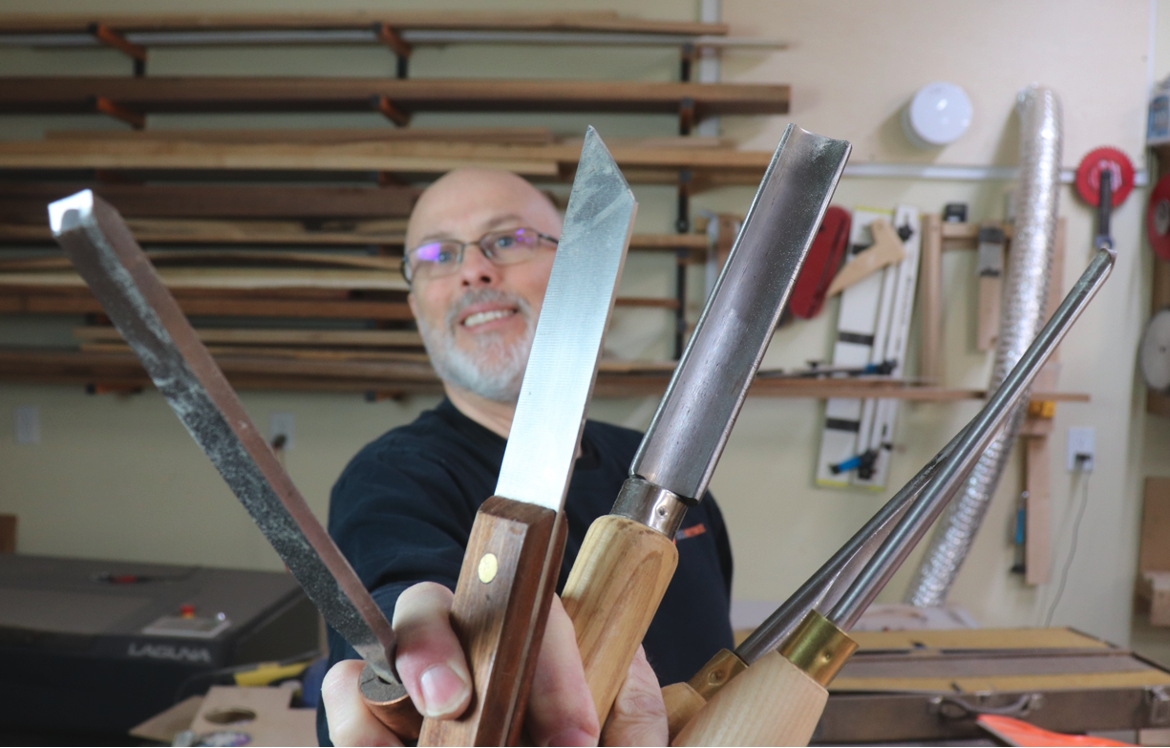
Contrary to the title of this blog, I think actual starter sets of spindle-turning tools are a terrible idea. If you go that route you will end up with some tools that are less than ideal, and others that are simply worthless. Rather than trying to completely outfit your gouge collection in a single click, I recommend making a careful selection for each of the tools that you will actually need. A good set should include the precious few tools that you will actually use, and if you choose carefully, you can produce just about any spindle project with a collection of tools that you can hold in one hand. Unfortunately, I have amassed a large collection of spindle turning tools, which creates a disturbing level of clutter in my shop. In reviewing my tool inventory, I have found that there are only five of my traditional tools (as opposed to carbide insert tools) that I use with any regularity. And if I challenged myself, I would admit that I could turn anything with just these five tools. I will write a separate blog about carbide tools at a later date, because I feel strongly that there are a lot of reasons for considering starting with those rather than traditional tools, but for those who want to start with traditional tools I’ll provide a list of the ones that I think you should buy first.

- Spindle Roughing Gouge. Most spindle turning projects begin with a blank that has square corners, so the first step that you need to take is to make the blank round. The early stages of this rounding process can be produce some jarring, so the spindle roughing gouge requires a couple important characteristics. First, it is typically the largest and heaviest duty tool in a spindle gouge collection. Second, it should have a nose grind that is more blunt than spindle gouges that are intended to produce a finished surface. The roughing gouge has a single goal; make the square object round. Once that heavy lifting is completed, other tools that are designed for more finesse and a sheered surface finish will take over.

- A 1/2” Spindle Gouge. This is my primary shaping tool, allowing me to create medium to large sized beads along with gentle swooping convex or concave shapes. The 1/2” spindle gouge is ground to a more aggressive point, typically ranging from 40 - 55 degrees, which allows it to sheer the wood and produce a near finish-ready surface.

- A 3/8” Spindle Gouge. When final details are required, I pull out my 3/8” spindle gouge. This allows me to turn much smaller beads and create details that are finer than the larger 1/2” gouge. While it might sound like a 3/8” and a 1/2” gouge are nearly the identical, you will find that the capabilities of the two tools are quite different and complementary to one another. If I could only have one, I would choose the 1/2”, but having both of these tools gives you much more flexibility.

- Parting tool. The humble parting tool is used in nearly ever spindle turning project. If you only have one parting tools, I would suggest getting the thinnest one that you can find. These make it easy to part the project from the waste as a last step prior to removing from the lathe. They are also useful in turning tenons onto projects, or adding fine detailed grooves as an accent.

- Skew Chisel. This tool is optional, and I would suggest getting the other four first, and once you feel confident in using all four, then add a skew chisel. When used properly, a skew chisel can produce a surface finish on a straight section or gentle curve that surpasses what can be achieved by the finest sandpaper grits. There is a learning curve associated with this tool, so give yourself time to practice your technique before using it on a real project. But once you have the hang of it, it is the most satisfying tool to use.
This core set of tools will allow you to turn nearly any spindle project that you want to, without having to clutter your shop with a set of random tools that might not be applicable to your work.
If you’d like to see a demonstration of each of these tools, check out the ToolMetrix YouTube channel.


