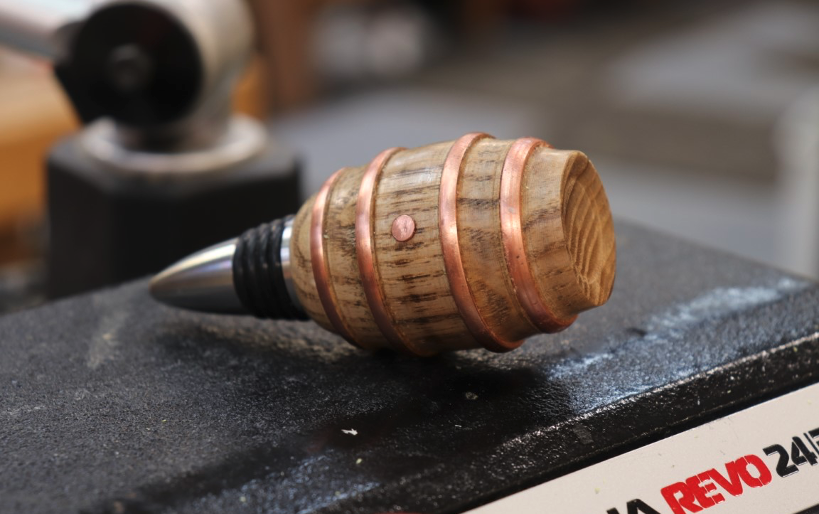
Turning bottle stoppers is highly addictive, and this copper and wood barrel wine bottle stopper is an example of where that rabbit hole can take you. Did you know that you can turn non-ferrous metals such as copper on a wood lathe? Yes, indeed, and that’s one of the keys to creating this unique project. Check out my previous blog post for some basic tips for turning bottle stoppers, and here I’ll focus on the specifics for turning this copper and wood barrel.

Cut some wood pieces. Start with a piece of wood that is 1.75” square by 8+” long, and make clear marks on two sides to help you keep track of the orientation when you assemble your blank. Make 5 cuts across the grain; the middle piece cut to 1/2” thick and all the rest cut to 1/4” thick. This is best done on a table saw using a stop block to ensure that your cuts do not get trapped between the blade and fence. Mark each piece on the top as you cut it, to ensure that you can assemble in the same sequence for grain consistency.

Cut four matching copper pieces. Using your bandsaw with a 3/8” or wider blade, cut pieces of 1/8” thick copper plate to the same dimensions as your wood pieces, 1.75” square.

Abrade the copper surface. Using 80 grit sandpaper, scuff the surface of the copper pieces on each side to produce a better bonding surface for the glue.

Glue and clamp. Dampen all surfaces and apply polyurethane glue, then clamp until the glue cures. Polyurethane glue works better than traditional PVA based wood glue for this project because polyurethane provides a better bond on a non-porous surface such as metal, whereas PVA glues requires penetration into the wood pores to form a bond.

Install a threaded insert. Follow the steps in my previous blog for additional details on this. Drill a 5/16” hole using a Jacobs Chuck, apply some polyurethane glue, then press a 3/8” threaded insert into the hole using the live center on your lathe.

Temporarily attach an extension. Using hot glue, temporarily attach the piece that the wood pieces were cut from originally. I initially tried turning by simply placing the blank onto a mandrel, but the copper introduced more resistance than a standard wood or resin blank, and the force proved too much for the glue bond and it tore the insert from the blank.

Turn to a barrel shape. Turning copper is a slow process, and worked best when I concentrated more of my efforts on the copper rung areas rather than spending even time on the wood and copper portions. I experimented with different turning tools and found that the standard insert from Easy Wood Tools worked best in removing copper at an acceptable rate, and leaving a smooth surface finish.

Relief cuts near barrel staves. To give the barrel staves the appearance of being wrapped around the wooden barrel, use a 1/4” parting tool to make relief cuts in the wood directly adjacent to the copper. Allow the copper to protrude 3/32” above the wood, then use the parting tool to gently round over the edges of the copper to soften the feel.

Sand and finish. Wet sand through 400 or 600 grit to polish the copper, then apply a few coats of your favorite spindle turning finish. I use Mylands Friction Polish for projects like this because it delivers a nice glow and builds up quickly.

Install a barrel bung. Drill a 1/8” hole and tap in a short section of 1/8” diameter copper rod to give the appearance of a bung plug. Secure the copper with a couple drops of CA glue.

Install stopper hardware. Install your choice of bottle stopper hardware into the threaded insert. Here, I’m using a solid stainless steel stopper from Niles Bottle Stoppers.
If you’d like to see a full video of this project check out the ToolMetrix YouTube channel.


