I find that many of my woodworking project ideas are related to food and cooking; cutting boards, bread slicing guides, bottle openers, etc. In the summer time my cooking time is spent outdoors, so naturally I’m thinking of grill-related projects. When I bought a grill scraper for my son it came with two extra replacement scapers that could be installed into the handle when the initial scraper was worn out. The handle that it came with was cheap and boring, so I was inspired to make a more attractive handle that could use one of the replacement. I love the combination of walnut and copper, and I felt that would make a nice look for this project.

Start by roughing out a blank. Like so many of my woodturning projects, this one started out at my 18bx bandsaw where I rough cut a 2” x 2” x 12” blank from a beautiful piece of black walnut.

Mount it up and make it round. I mounted the blank between centers on my Revo 2436 lathe; no chuck needed for this simple spindle project. After ensuring that I had a solid mount, I positioned the tool rest about 1/2” from the blank, spun it up to about 1000 RPM and used a roughing gouge to remove the corners. As I felt the piece getting more round, I would check periodically by setting the roughing gouge on the piece. Once it stopped thumping, I knew that the piece was round.

Mark the handle. Using a ruler and pencil, I marked off a 4” section for the handle, then marked dividers at every 1/2” interval. These would serve as the location markers for my beads which would provide better grip and make the handle look cool. Pro Tip: A white charcoal pencil works great for marking on walnut.

Turning beads. Turning beads is one of the most satisfying things that you can do on a lathe. I start by using a skew chisel to mark off the sections, which helps with consistency. Then, using either a skew chisel or a spindle gouge, start in the center and carefully roll over to the groove that serves as the section divider. Whichever tool that you use, be sure that it is extremely sharp before you begin, as you want to achieve as close to a finish-ready surface as possible directly from the tool. Be as smooth and fluid as possible as you form an archiving motion with your wrists to form the bead. Practice on scrap if you haven’t done it before, because it can take a few practice runs before you like your results. I find it easiest to form the left sides of all the beads, then turn around and come back the other direction and form the right. That approach of rolling in one direction at a time allows me to maintain better consistency across the beads.

Turn a tenon on the end. After completing the handle shape, remove stock to form a tapered shaft that is slightly larger than your ferrule. Then, using a skew chisel or square scraper, form a tenon on the end that is the right size to create a friction fit for your copper ferrule. For my ferrule I used a half of a 3/4” copper pipe coupler which seemed perfect for this project.

Burning detail into the handle. I got the handle spinning at 1300 RPM and used a steel wire to burn into the grooves between beads on the handle. This is an easy process that provides a nice visual detail.

Sanding. I use mesh sandpaper on turning projects whenever possible because it lasts much longer and doesn’t clog up like other types, which helps produce a great surface.

Finishing. You can’t beat the euphoria that you achieve when you first hit your turning project with a coat of finish. Here I’m using one of my favorite finishes for spindle turning projects; Mylands High Build Friction Polish. I love this stuff because it’s foolproof to apply, builds to a great luster, and dries almost instantly if you apply it with some friction/heat from the spinning lathe.

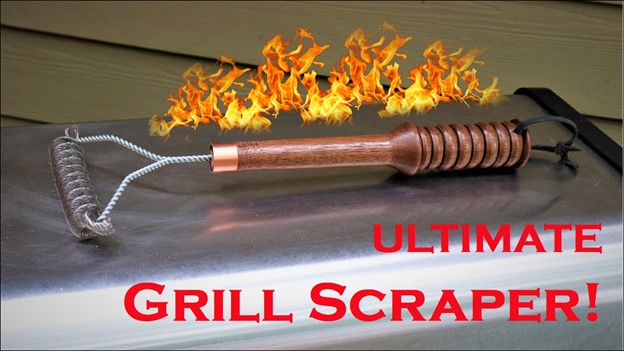
Set the copper ferrule in place. Ideally you can achieve a perfect friction fit that doesn’t require any glue. On this one my copper ring wasn’t quite as tight as I would have preferred so I dabbed a few drops of thick CA glue on it and it now holds it solidly.

Install the Scraper. Drill two holes and push the scraper into the handle. I was able to achieve a great fit, so I did not feel it was necessary to add any glue. If yours is loose, just apply a couple drops of CA glue to hold it solidly in place.

Install a strap for hanging the scraper. I like to hang my scraper on the front of my grill, so I drilled a hole through the handle and tied a 1/4” strip of leather into a short loop.
If you want to watch a video of this project being created, check out the ToolMetrix YouTube channel.


