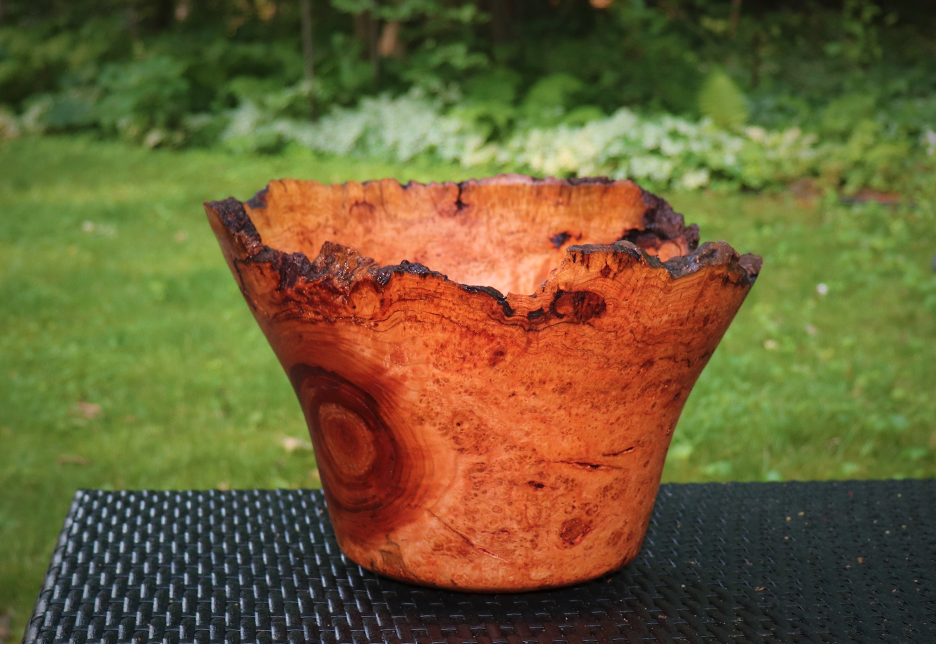
Woodturners have a powerful craving for beautiful burls. We can’t walk through the forest, or heck, even drive down the road without being distracted by protrusions that pop out of hardwood trees. When I received a large cherry burl from my friend Matt Collins, I knew that I had to make something special.

The burl was good sized, and it was cherry which is my favorite timber for turning. Burls are a different type of material for turning, and they present unique challenges. With standard timber, the grain pattern is predictable, and with burl, it’s completely random. Therefore, you can orient the bowl in any direction that you want without modifying your turning approach. So, the first challenge in turning a burl is deciding the orientation. My hope was to cut this burl in half in a cross-cut, and that way I could get two good sized bowls from it, with the straight grained center positioned as an end grain bowl. Unfortunately it had a large flat spot on one side, which would have meant that I would have lost a lot of material when making it round. So instead, I opted for one large bowl with the grain orientation of the burl’s center running through the bowl from side to side.

Creating a flat spot. When turning a live edge bowl, it’s important to establish an ample sized flat spot where a face plate can be mounted. Also, I always use a large 5” face plate when turning large or unpredictable stock like this because it provides a much better control point on the blank.

Use longer screws. Burls can be unpredictable in many ways, and you won’t know what lurks inside until you begin turning it. One of the risks is that there are gaps, or pockets inside, which suggest a weaker connection to your face plate, which can become risky when the blank is spinning. As an added precaution I always use 2” or larger deck screws when attaching a large burl to a face plate. With that approach, I’ve never had a blank come flying off the lathe.

Make it round and turn a tenon. After getting the blank spinning on my Revo 2436 lathe, my next step was to make it round to stabilize it. That can take a bit of time with a large burl because of the wild organic shapes that they can produce. Stop and check your work often and choose the right stopping point because you don’t want to remove any more of that beautiful material than you have to. I prefer to use a tenon for large bowls, rather than a recess, as it gives me better holding power. I also use a 5” chuck rather than a smaller one whenever possible on a large piece like this.

Push cuts to shape the outside. Using a series of push cuts, I was able to shape the outside. I decided on a flower shape with concave sides and a flared top.

Scooping out the inside. I went for a wall thickness of 5/8”, and with a live edge with a crazy profile like this one, you have to approach the rim with a lot of caution because you don’t want to make any contact with the rim while turning.

Smoothing the bottom. In a narrow, deep bowl I like to use a special gouge for turning the bottom. This is a signature Ashley Harwood gouge that has a long shaft to help reach the bottom of a deep bowl, and a flat grind to allow for sheer cutting with a straight-in approach. This makes it easy to produce a smooth surface that requires minimal sanding.

Applying a finish. I used a blend of polyurethane and boiled linseed oil which gives a nice warm glow on the cherry burl, and offers good protection.
If you’d like to watch a video of this burl being turned, check out the ToolMetrix YouTube channel.


