Living up in Minnesota, I have rarely seen mesquite wood, much less had any to work with in my shop. Ever since watching Norm Abram build his iconic Mesquite bookcase on New Yankee Workshop, I’ve dreamed of getting my hands on a chunk of this beautiful wood, which is one of the hardest, most gnarly wood species found in North America. It features heartwood with a rich chocolaty color, offering pleasing contrast with its creamy colored sapwood.
A friend from Arizona told me that he has scored some mesquite sections from a residential tree that was the victim of a storm, and asked if I would turn a bowl for him. YESSSSSSS! He didn’t have to ask me twice about that.

Rip cut. When the 16” x 24” section arrived, it was still soaking wet and weighed a bit over 150 pounds. Normally I prefer to rough out bowl blanks on my 18bx Bandsaw, but 150 pounds is a bit unwieldy for that so I used a chainsaw. First I split the log with the grain. Notice that I’m cutting through the long great and not the end grain, as it cuts easier and is easier on the chain.

Knock off the corners. Next I temporarily attached a plywood disk onto the log to use as a cutting guide, and cut off the corners to make it easier to get it started on the lathe. After trimming the blank to size, it weighed about 65 pounds which was well within the comfort zone of my Revo 2436 lathe.

Big face plate. I flattened out a spot on the bark side using a chisel and attached a 6” face plate. I prefer a large face plate with heavy bowls because it stabilizes the blank much better than a small face plate.

Flatten the bottom. Next I take a two step process to balance the bowl. First, I use some peeling cuts on the bottom of the bowl to flatten it and prepare for a tenon.

Make it round. Then I make a series of passes along the side of the bowl to remove enough material to make it round. At that point the bowl becomes more balanced and I can turn up the speed on the Revo.

Next comes shaping. I look at the bowl and imagine what material should be removed to create the most pleasing shape possible, then proceed to do so.

Push cut. Then after forming the tenon, I make one continuous push cut pass from the bottom all the way to the top of the bowl. This refines the shape and creates smooth transitions in contour throughout the profile.

Next comes the process of scooping out the material inside the bowl. This requires a sharp gouge, and with a dense wood like mesquite, some patience. Notice the concentric circles in the photo. The scooping process works best if your make cuts that push toward the bottom of the bowl, rather than sweeping from side to side. You will find that you spend less effort fighting end grain this way. Keeping the outside edge a consistent thickness is the most important part of scooping out the middle. I aim for a wall thickness of 1/2” to 5/8” thick on a bowl this size; going thinner introduces risk of failure, and leaving thicker looks amateurish.

Controlled drying. After the bowl is turned to final thickness, I control the drying to slow rate. This can be done by placing it in a humidity controlled room, or in this case, I wrapped it in paper and placed some of the shavings inside. Mesquite is prone to cracking, so I wanted to be sure that I minimized the potential.

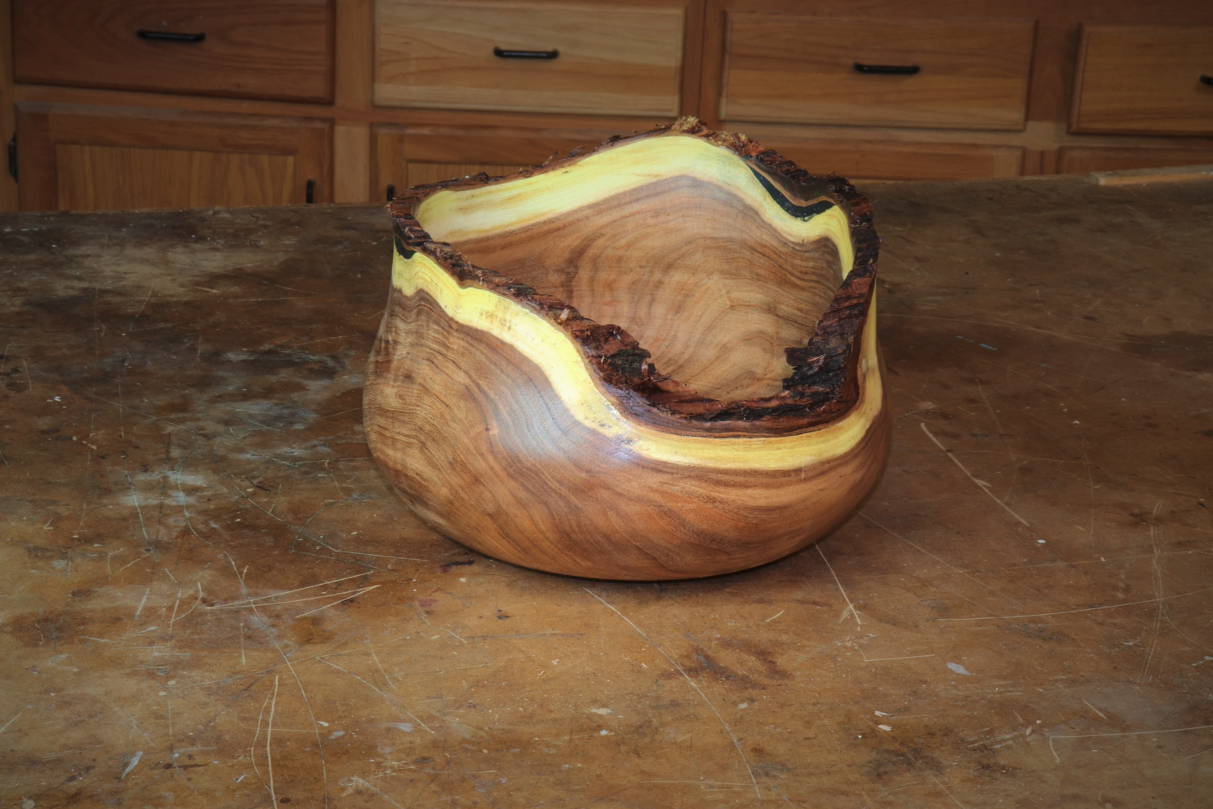
Patch with resin. After several weeks of dry time I removed the bowl and patched a few small cracks that had appeared. I added black dye to the resin to accentuate the repair.

Finish. After the resin cured I sanded to 320 grit paper and added a polyurethane finish.
If you are interested in watching a video that covers the turning process of this mesquite bowl, check out the ToolMetrix YouTube channel.


