Sometimes I like to find a project that is whimsical and well-suited for mass production. This snowman bottle opener hits both of those marks. It uses a project kit from Rockler that includes the bottle opener as well as a threaded insert to secure it into the handle, which in this case is the snowman.

Making a blank. As with many turning projects, this one starts out at the bandsaw. I used a chunk of birdseye maple that was taken from an old veneer log core, cutting it into a blank of approximately 1.75” x 1.75” x 7”.

Using a simple miter saw hold down jig to hold the small blank securely, I squared up each end of the blank on a miter saw.

Pilot hole. Drilling a 1/8” hole into one end of the blank serves as a pilot hole for the hardware that will be installed later, ensuring that the hardware is perfectly centered on the handle.

Make it round. After mounting the blank onto my Revo lathe, I used a spindle gouge to quickly knock off the corners and make the blank round.

Mark transitions. I drew lines on the blank where I wanted each layer of the snowman to intersect, and then used a parting tool to reduce the size of each of the smaller tiers of the snowman as well as the hat.

Shape the snowman. I shaped the snowman tiers and hat using a spindle detail gouge. As I did this, I checked the size periodically to ensure that it was a good fit for my hand since the snowman’s body will serve as a handle for the bottle opener.

Finish. I applied several coats of Mylands Friction Polish which is one of my favorite spindle turning finishes because it dries so quickly and uses the friction heat to produce an durable and lustrous finish. Note that I am applying using a paper towel rather than a rag. This is a safety measure in case the cloth would catch on something. With a paper towel the catch would simply tear the towel, whereas a cloth rag it might dangerously pull your hand into the work piece.

Drill to final size for threaded insert. After the finish has dried, drill to the final specified size for the threaded insert. Use a hand screw clamp to secure the snowman before drilling. There are two reasons that I wait until after the piece is turned to drill to final dimension. First, the hole could get distorted due to pressure applied during turning. Second. with a larger hole the piece is weaker, and could split from the cone on the live center.
Paint the hat. This is an optional step but I think it adds a nice detail to the project. I masked off the snowman’s body and sprayed a couple coats of flat black spray paint. I used a product that was billed as an all-in-one paint and primer to give it a nice surface quality.

Install the threaded insert. A hex wrench is a great way to seat the threaded insert so that it is flush to the top of the hat. Don’t force it if you meet a lot of resistance, as the threads are thin and will easily crush. Instead, find a slightly larger drill bit and open the hole up a bit.

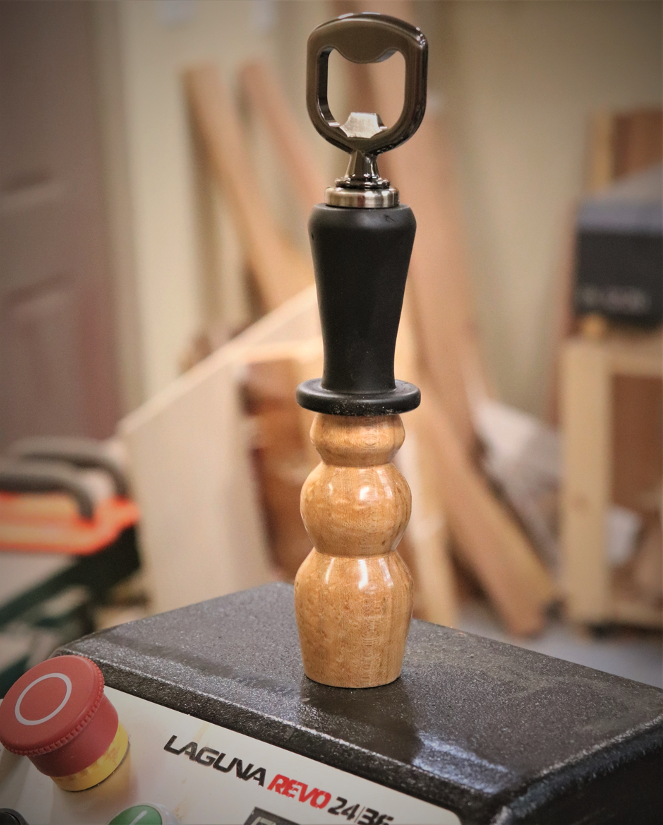
Install the opener. After the insert is fully seated, spin the bottle opener mechanism into position.

If you’d like to see a video of this project, be sure to check out the ToolMetrix YouT!ube channel.


